 What you'll learn
| How to plan, schedule, and hold productive video meetings with your team. |
What you'll need
| About 15 minutes. |
| Google Workspace account. Don't have one? Start your free 14-day trial today. |
In this tutorial
|
1. Plan the agenda |
Expand all | Collapse allCollapse all |
- In Calendar, choose an option:
- Click an empty time slot in the calendar grid.
- Click
Create.
- Add an event title, date, and time.
- (Optional) To create the event on another calendar you have edit access to, at the bottom click your calendar name and select another calendar.
You can create a new document right in Google Docs or in Google Drive.
Choose an option:
2 Schedule the meeting |
- In Calendar, choose an option:
- Click an empty time slot in the calendar grid.
- Click
- Add an event title, date, and time.
- (Optional) To create the event on another calendar you have edit access to, at the bottom click your calendar name and select another calendar.
- In the Add guests field, enter the first few letters of a person’s name or email address. Matching addresses in your organization’s directory appear as you enter text.
- Click a suggestion to add that person to the event. If no suggestions appear, enter your guest’s full email address. After you add a guest to your event:
- A video meeting in Google Meet is automatically added to the event.
- The guest's calendar appears next to yours.
- (Optional) You can add a Google Groups mailing list address to invite a large group of people at once.
For more information about inviting a large group, see managing large events in Calendar. - (Optional) To mark a guest’s attendance as optional, point to the guest's name and click People
.
- (Optional) To allow guests to modify the event, invite others, or see the guest list, click Guest permissions and check the appropriate boxes.
Note: If you create an event in Calendar and do not give guests permission to modify the event, they will not be able to change the event's date or time on their own calendar.
- Open Calendar and click
Event.
- Go to the Add guests section and enter the person's email address.
- Click Suggested times and select a suggested meeting time.
- Click a time slot.
- (Optional) If you can't find a suggested meeting time, click Find a timeand select a time slot.
- Click Save.

Note: If you don’t see resources, room details, or automatic room suggestions, your administrator might not have set them up for your organization.
- Click the Add rooms, location, or conferencing field.
Note: If you don't see this option, contact your administrator.
- Click Add rooms.
Based on your work location, number of attendees, and previous room bookings, suggestions automatically appear.
- (Optional) If you need to adjust the criteria for your meeting room, you can click:
- People
to specify the required room size.
- Video
to specify the need for video-conferencing equipment.
- Phone
to specify the need for audio conferencing
- People
- Point to the room that meets your criteria and check the box to select the room.
- If you don’t see a suitable room:
- In the search box, enter another resource or building name, floor, or conferencing equipment (such as Chromebox for meetings). As you enter text, you’ll see results below the search box.
- Point to a room to see details, such as room capacity, location, equipment and features.
- When you find the room you need, point to it and check the box to select it.
Add Google Meet video meetings to Calendar events
Schedule video calls and invite guests using Calendar
It’s easy to schedule a Meet video meeting in Calendar—just add one or more guests to the event to automatically add a video meeting.
- Click the Add description or attachments field.
- Add details, such as contact information, instructions, or links for your event.
- (Optional) Format your description by bolding, italicizing, underlining, or adding lists and links.
When you’re finished filling in the details, save your event and send invitations.
- Click Save.
- Choose an option:
- Send to notify guests by email
- Don’t send to skip notifications at this time
- Dismiss to continue editing the invitation
- If you’re inviting people from outside of your organization, click:
- Invite external guests to notify them.
- Continue editing to notify them later.
- (Optional) To open your event on the Edit event page, click More options.
Update an existing event:
You can invite more guests, change the meeting location, and more.
- In the calendar grid, click the event
.
- To invite more guests, change the meeting location, or add attachments, make your changes and click Save.
Note: If the event organizer hasn’t given you edit permissions, you can't make changes to the event time or its duration.
3 Confirm attendance |
If you need to track attendance for your event, you can instantly see who’s accepted or declined your invitation, and who’s proposed a new meeting time.
Check guest attendance:
- In the Calendar grid, click the event.
- Go to the Guests field to see a list of responses from your guests. You might have to click the Down arrow
to see the responses.
Respond to a proposed new meeting time request:
- In the Calendar grid, click the event.
- In the Guests section, go to the proposal and click Review proposed time.
- To accept the new proposed time, click Save.
- (Optional) To notify guests about the new meeting time, click Send.
4 Share materials |
- Select the file you want to share.
- Click Share or Share
.
- Under Share with people and groups, enter the email address you want to share with.
Note: If visitor sharing is on for your organization, you can invite someone who doesn't have a Google Account to collaborate on your Google Drive files and folders. See Share documents with visitors.
- To change what people can do to your file, on the right, click the Down arrow
- Choose to notify people:
- If you want to notify people that you shared a file with them, check the Notify people box. If you notify people, each email address you enter will be included in the email.
- If you don't want to notify people, uncheck the Notify people box.
- Click Share or Send.
Use this project plan template

- Click the Add description or attachments field.
- Add details, such as contact information, instructions, or links for your event.
- (Optional) Format your description by bolding, italicizing, underlining, or adding lists and links.
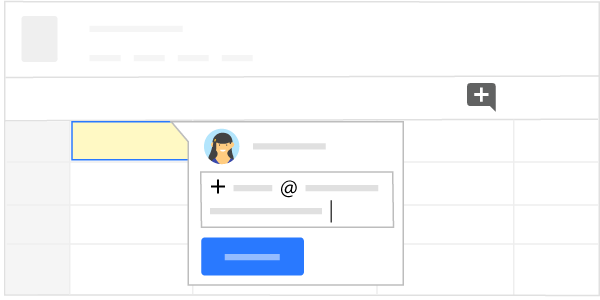
- In Docs, Sheets, or Slides, select the text you'd like to comment on.
- Click Add comment
.
- Enter your comment in the box.
- (Optional) To direct your task or comment to a specific person, enter a plus sign (+) followed by their email address. You can add as many people as you want. Each person will get an email with your comment and a link to the file.
- (Optional) To assign the comment to a specific person, check the Assign to box.
- Click Comment or Assign.
Note: If a file reaches the maximum number of comments, you can make a copy of the file without copying over any comments.
- In Calendar, click the name of the event in your calendar grid.
- Click Edit
and make your changes to the event.
- Click Save.
- Enter a message for guests.
- Click Send.
5 Hold the meeting |
Join a meeting from Calendar
- In Google Calendar, click the event you want to join.
- Click Join with Google Meet.
- In the window that opens, click Join Now.
Join a meeting from Gmail
- Open Gmail and in the sidebar, under Meet, click My meetings.
- Choose an option:
- Click Join a meeting and enter a meeting code.
- Point to a meeting on the left under My meetings .
- Click Join.
Join a meeting from Meet
In Meet, you can select a scheduled event or you can enter a meeting code or nickname.
Select a scheduled event:
- In a web browser, enter https://meet.google.com/.
- Select the meeting from your list of scheduled events. Only meetings scheduled through Google Calendar appear on Google Meet.
- Click Join now.
Tip: A chime sounds as the first 5 people join. After that, you’ll receive a silent notification for new participants.
Enter a meeting code or nickname:
- In a web browser, enter https://meet.google.com.
- Click Enter a code or link > click Join.
- Enter a meeting code or nickname.
- The meeting code is the string of letters at the end of the meeting link. You don't have to enter the hyphens.
- You can only use meeting nicknames with people in your organization. This feature is currently only available to Google Workspace users.
If your organization has purchased and installed a Meet hardware device, you can also type the meeting code or nickname into that device.
Leave the field blank to start a new meeting with a new code.
- Click Continue and then Join now.
- In Google Drive, open the Google Docs, Google Sheets, or Google Slides file you want to share or present.
- (Optional) To edit a document, spreadsheet, or presentation simultaneously with your guests:
- In the upper-right corner, click Share.
- Add a title to your document and click Save.
- Add your meeting guests and give everyone Editor access.
- Click Send.
- Open Google Meet and join the meeting.
- Click Present now and choose what to share:
- Your entire screen
- A window
- A tab
- Click Share.
Tip: If you're not using Chrome browser (which automatically hides any pop-up notifications), mute or turn off notifications so they don’t appear when you’re presenting.
- In Docs, Sheets, or Slides, select the text you'd like to comment on.
- Click Add comment
- Enter your comment in the box.
- (Optional) To direct your task or comment to a specific person, enter a plus sign (+) followed by their email address. You can add as many people as you want. Each person will get an email with your comment and a link to the file.
- (Optional) To assign the comment to a specific person, check the Assign to box.
- Click Comment or Assign.
Note: If a file reaches the maximum number of comments, you can make a copy of the file without copying over any comments.
6 Follow up
6.1 Send follow-up email
- In Calendar, click the name of the event in your calendar grid.
- Click Edit
- Click Save.
- Enter a message for guests.
- Click Send.
- In Docs, Sheets, or Slides, select the text you'd like to comment on.
- Click Add comment
- Enter your comment in the box.
- (Optional) To direct your task or comment to a specific person, enter a plus sign (+) followed by their email address. You can add as many people as you want. Each person will get an email with your comment and a link to the file.
- (Optional) To assign the comment to a specific person, check the Assign to box.
- Click Comment or Assign.
Note: If a file reaches the maximum number of comments, you can make a copy of the file without copying over any comments.
- In Calendar, choose an option:
- Click an empty time slot in the calendar grid.
- Click
- Add an event title, date, and time.
- (Optional) To create the event on another calendar you have edit access to, at the bottom click your calendar name and select another calendar.
Google, Google Workspace, and related marks and logos are trademarks of Google LLC. All other company and product names are trademarks of the companies with which they are associated.