June 20, 2022

GSoC 2022: First update - Planning

Introduction

This summer I'm contributing to Nautilus as part of GSoC, focusing on improving the discoverability of the new document feature. In this post I will describe how the project was split between me and Utkarsh, briefly go over the schedule established for my work, and briefly mention my current research in GNOME Boxes.

The split

The initial short project idea assumed that only one student was going to work on it, so when both me and Utkarsh Gandhi were accepted, we had quite an unexpected situation. Fortunately, the fact that the project had many stretch goals allowed us to split it so that both of us can work independently. The unexpected situation has taught us to share tasks in a meaningful way, which has made us all the more able to grow at our assignments, furthermore we have learned how to work without blocking each other's progress. Most of the initial tasks that aim to revamp the UI and the code of the New Document menu go to Utkarsh, while I'm going to focus on the discoverability side and the default experience of the user, meaning what happens when there are no templates in the Templates directory.

Make "New Documents" feature discoverable

Finally, the subject of my project turned out to be about resolving the accessibility issue of this feature - when there are no templates in the Templates directory, the new document menu is not shown, and many users don't know about its existence. They completely ignore the Templates directory, not knowing what it does and just assuming it's one of those "just there" directories and files. Another thing I'll take a look at is the ability to easily add templates, without the cumbersome process of creating and copying files. I'll also reconsider the pros and cons of default templates.

Timeline

While it's not final, because we've lost our crystal balls, here's the current anticipated schedule I'll be following:
  1. Research the underlying problem and use cases by looking at other implementations (operating systems, file managers, web apps) (2 weeks) - 12.06-26.06 (current)
  2. Design a mockup based on above research, adhering to GNOME HIG and designers review (1 week) - 26.06-03.07
  3. Code prototype iteration in a development branch that provides a meaningful empty state, makes sure the "new documents" menu item is always shown, and the user can add more templates (2 weeks) - 03.07-17.07
  4. Test and review the prototype iteration, refine the prototype based on feedback and repeat if necessary (2 weeks) - 17.07-31.07
  5. Open a Merge Request to merge the development branch to the master branch (4 days) - 31.07-04.08

Beginning of research

As I have started the first point of my timeline/schedule, I found myself in need of many virtual machines. Equipped with powerful yet simple and elegant GNOME Boxes, I managed to run 2 different operating systems on it:
  • ChromeOS Flex - knowledge gained on how to work with libvirt xml files allowed me to figure out how to get this web centric system running in Boxes. I have documented the necessary steps in this guide, but it definitely deserves a separate blog post.
  • Windows 11 thanks to this excellent guide.
Next to try are file managers from other linuxes, and web apps; already tested macOS Finder. My next GSoC update definitely won't lack colorful pictures.

Conclusion

The project is coming along quite smoothly, with reasonable objectives and deliverables. We’ve managed to figure out how to split the project, establish a schedule for our work, and I’ve learnt how to use GNOME Boxes to test different implementations of the “New Document” feature. I found the community very helpful and welcoming, just like my mentor Antonio Fernandes who’s very understanding and patient :)

June 19, 2022

Google Summer of Code with GNOME Foundation.

Google Summer of Code — every undergrad’s dream to get selected into it one day. I found out about Google Summer of Code in my freshman year. I was so excited that a program like this exists where open source contributors collaborate over projects with organizations! But I was overwhelmed by the amount of applications the program receives and the number of students that actually get selected. Therefore, I didn’t apply in first year, but started improving my skills and making open source contributions to different organizations.

Open source can be overwhelming at the beginning, but you just need to start contributing. Getting into Google Summer of Code is a dream come true to me. And in this blog I’ll share my experience on how I got into Google Summer of Code’22!

Finding an organization

I started looking for different organizations from February, found an organization named Metacall, which made polyglot programming easy. I made some contributions there. I looked into their past projects and tried to understand how the code base worked. I was intermediate in web dev, so side by side I also started looking for organizations which had web dev projects.

In March, the selected organizations were announced publicly, I browsed through different organizations and their web dev related projects and I landed on GNOME Foundation’s idea list page. As I was going through the different project ideas, the idea of Faces of GNOME — Continuing the Development of the Platform caught my attention.

Selecting and working on project

The Faces of GNOME is a Foundation-led initiative with the intent of championing the contributors and recognizing their continuous and previous efforts towards the GNOME project. Faces aim to be a historical platform where you’re able to see the faces behind the GNOME project. From current contributors to past contributors. Faces intend to be a place where Contributors have their own profile, serving as a directory of the current and past Contributors of the Project.

The project used Jekyll, HTML, CSS, JavaScript as it’s tech stack. I had no idea about Jekyll when I started this project. Had worked with Hugo, which is similar static site generator.

I started studying Jekyll as I had no idea about that static site generator. Took a week to study Jekyll and codebase and then jumped onto ongoing issues. My mentor, Claudio Wunder was supportive and helped me clearing all my doubts (even silly ones)!.

Contribution period

Next, in April, we had to submit our proposal. I had proposed a few new features which was really appreciated by my mentor. Creating project proposal was a difficult task as I had to cover every bit of project feature in detail. Previous year GSoC mentee, Arijit Kundu, helped me with drafting the proposal. I got my proposal reviewed from different foundation members who were onlooking the project. Received a nice feedback from everyone and thought for the first time that I can make into this program.

Even after making proposal, my contributions didn’t stop and I started engaging with the community more. I asked m doubts, joined different channels and talked about various features I want to implement in this project.

Result Day!

Finally, the result day came on May 20, 2022. I was so happy to get selected in Google Summer of Code’22. I never imagined that I would be a part of this program. Open Source does wonders!!

So, this was my experience on getting selected into Google Summer of Code. Hope you liked it. If you have any questions, please connect with me on different social media platforms.

Happy Summers!!🌞🌞

June 17, 2022

GSoC update #1 – Planning

GSoC coding period started on Monday, so this is a good time to blog about what I’ve started working on and what’s my milestone to finish the project. First off, I’ve created a simple mockup using Sonny Piers’ amazing Workbench app. This is the first step in knowing how we want the UI to look like, at least in the first iteration.

Media history viewer mockup

Thanks to the mockup, I’ve created a milestone with approximate time estimates for each task. This is what my milestone looks like:

First part – Implement a basic media history viewer (18 days)

  • Add MediaTimeline list model that can load media messages (6 days, in progress)
  • Add a subpage to the RoomDetails dialog for the media history with a GtkGridView that links to the MediaTimeline (2 days)
  • Add MediaHistoryImage widget that can show an image message type (3 days)
  • Add MediaHistoryVideo widget that can show a video message type (3 days)
  • Add MediaHistoryAudio widget that can show an audio message type (1 day)
  • Add MediaHistoryVoice widget that can show a voice message type (1 day)
  • Add MediaHistoryFile widget that can show a file message type (2 days)

Second part – Add click actions to the media history widgets (18 days)

  • Integrate the MediaViewer inside the media history page as a subpage (2 days)
  • Make image and video message types to be opened by the MediaViewer on click (2 days)
  • Make the file of the MediaHistoryFile widget to download on click and show the progress (6 days)
  • Make the file of the MediaHistoryFile widget open on click when it’s downloaded (2 days)
  • Add a dialog to listen to the audio of the MediaHistoryAudio and MediaHistoryVoice widgets on click (6 days)

Third part – Filters & Animations (12 days)

  • Wrap the MediaTimeline list model to a GtkFilterListModel to be able to filter the list (1 days)
  • Add options to filter the media history by media type (4 days)
  • Add animations to the MediaViewer to open and close photos and videos (3 days)
  • Add a swipe back gesture to the MediaViewer, similar to the one found in Telegram (4 days)

Sneak peek: Media viewer animations

Some days ago I started working on a media viewer for my app Telegrand. I wanted a similar feeling of the media viewer on Telegram iOS and Android, which I’ve always found really cool to use. You can see my progress in the tweets below. The animations and the swipe gestures were liked quite a bit, so I’ve decided to add them in Fractal too, so that they can also be used in the media history viewer.

Status update, 17/06/2022

I am currently in the UK – visiting folk, working, and enjoying the nice weather. So my successful travel plans continue for the moment… (corporate mismanagement has led to various transport crises in the UK so we’ll see if I can leave as successfully as I arrived).

I started the Calliope playlist toolkit back in 2016. The goal is to bring open data together and allow making DIY music recommenders, but its rather abstract to explain this via the medium of JSON documents. Coupled with a desire to play with GTK4, which I’ve had no opportunity to do yet, and inspired by a throwaway comment in the MusicBrainz IRC room, I prototyped up a graphical app that shows what kind of open data is available for playlist generation.

This “calliope popup” app can watch MPRIS nofications, or page through an existing playlist. In future it could also page through your Listenbrainz listen history. So far it just shows one type of data:

This screenshot shows MusicBrainz metadata for my test playlist’s first track, which happens to be the song “Under Pressure”. (This is a great test because it is credited to two artists :-). The idea is to flesh out the app with metadata from various different providers, making it easier to see what data is available and detect bad/missing info.

The majority of time spent on this so far has been (re-)learning GTK and figuring out how to represent the data on screen. There was some also work involved making Calliope itself return data more usefully.

Some nice discoveries since I last did anything in GTK are the Blueprint UI language, and the Workbench app. Its also very nice having the GTK Inspector available everywhere, and being able to specify styling via a CSS file. (I’ve probably done more web sites than GTK apps in the last 10 years, so being able to use the same mental model for both is a win for me.). The separation of Libadwaita from GTK also makes sense and helps GTK4 feels more focused, avoiding (mostly) having 2 or 3 widgets for one purpose.

Apart from that, I’ve been editing and mixing new Vladimir Chicken music – I can strongly recommend that you never try to make an eight minute song. This may be the first and last 8 minute song from VC 🙂

#48 Adaptive Calendar

Update on what happened across the GNOME project in the week from June 10 to June 17.

Neil McGovern reports

GNOME mourns the loss of Marina Zhurakhinskaya - https://www.outreachy.org/blog/2022-06-14/remembering-and-honoring-marina-zhurakhinskaya-founder-of-outreachy/

‎‎‎‏‏‎ ‎‏‏‎ ‎


Core Apps and Libraries

Calendar

A simple calendar application.

Adrien Plazas says

Calendar received a new sidebar containing a date chooser and an agenda view, which replaced the year view and the navigation arrows. It is the first step implementing its new adaptive design, but please note the application isn’t adaptive yet.

Circle Apps and Libraries

Fina announces

Warp 0.2.0 was released: It features many design improvements, lots of new translations, support for mobile devices, improved error handling and much more. Happy file transferring :)

Decoder

Scan and Generate QR Codes.

Maximiliano reports

Decoder 0.3.0 is out, some highlights:

  • QR codes are always black on white for maximum compatibility
  • See the text contents of a newly scanned code
  • Scanned codes are automatically stored in history

Amberol

Plays music, and nothing else.

Emmanuele Bassi announces

Amberol 0.8.0 is out: you can now search for songs in your playlist just by starting to type, even when in selection mode. Plus: Amberol can now run in the background through the sandbox portal; cover art is shared across songs in the same album, to reduce memory use; and the window size is correctly restored across sessions. Bonus news: if you use macOS, you can now build and run Amberol using dependencies from the Homebrew project.

Third Party Projects

noëlle announces

Bottles 2022.6.14 was released, bringing GTK4+Libadwaita, performance enhancements, and many smaller interface improvements.

xjuan says

Cambalache 0.10.0 is out! - Adwaita, Handy, inline objects, special child types, and more…

Fractal

Matrix messaging app for GNOME written in Rust.

Marco Melorio says

Hi there! I’m Marco Melorio and I’m participating in this year’s Google Summer of Code, under the GNOME Foundation. I’m working on Fractal, the GNOME matrix client, with the help of my mentor Julian Sparber. More specifically, I’m working on implementing a media history viewer to the app.

To follow my progress on the project you can check out my blog here. I’ve already published a small introduction post about me and a first update post which includes a mockup and milestones about the project.

GNOME Foundation

Neil McGovern reports

Microsoft has awarded GNOME $10,000 for winning its FOSS fund #20 https://twitter.com/sunnydeveloper/status/1536744475979939841

That’s all for this week!

See you next week, and be sure to stop by #thisweek:gnome.org with updates on your own projects!

June 15, 2022

Cambalache 0.10.0 is out!

3rd party libs release!

After almost 6 months of work I am pleased to announce a new Cambalache release!

Adwaita and Handy support

This cycle main focus was to add support for 3rd parties libraries and what better than Adwaita and Handy to start with.

Keep in mind that workspace support for new widgets is minimal which means you should be able to create all widgets and set its properties but some widgets might not show correctly in the workspace or lack placeholder support, please file an issue if you find something!

Inline object properties support

One of the new features in Gtk 4 is the ability to define a new object directly in a property instead of using a reference.

 <object class="GtkWindow">
   <property name="child">
     <object class="GtkLabel">
       <property name="label">Hola Mundo</property>
     </object>
   </property>
 </object>

You will be able to create such object by clicking in the + icon of the object property and the child will appear in the hierarchy with the property name as prefix.

Special child type support

An important missing feature was being able to define special child type which is needed for things like setting a titlebar widget in a window.

<object class="GtkWindow">
   <child type="titlebar">
     <object class="GtkHeaderBar"/>
   </child>
 </object>

Now all you have to do is add the widget as usual and set the special type in the layout tab!

New Property Editors

From now on you will not have to remember all the icon names just select the icon you want with the new chooser popover.

GdkColor and GdkRgba properties are also supported using a color button chooser.

Child reordering support

Some times the order of serialization matter a lot specially when there is no layout/packing property to define the order of children, this is why now you can reorder children serialization position directly in the hierarchy!

Full Release Notes

  • Add Adwaita and Handy library support
  • Add inline object properties support (only Gtk 4)
  • Add special child type support (GtkWindow title widget)
  • Improve clipboard functionality
  • Add support for reordering children position
  • Add/Improve workspace support for GtkMenu, GtkNotebook, GtkPopover, GtkStack, GtkAssistant, GtkListBox, GtkMenuItem and GtkCenterBox
  • New property editors for icon name and color properties
  • Add support for GdkPixbuf, Pango, Gio, Gdk and Gsk flags/enums types
  • Add Ukrainian translation (Volodymyr M. Lisivka)
  • Add Italian translation (capaz)
  • Add Dutch translation (Gert)


Cambalache is still in heavy development so if you find something that does not work please file a bug here

Matrix channel

Have any question? come chat with us at #cambalache:gnome.org

Where to get it?

Download source from gitlab

git clone https://gitlab.gnome.org/jpu/cambalache.git

or the bundle from flathub

flatpak remote-add --user --if-not-exists flathub https://flathub.org/repo/flathub.flatpakrepo
flatpak install --user flathub ar.xjuan.Cambalache

Happy coding!

defragmentation

Good morning, hackers! Been a while. It used to be that I had long blocks of uninterrupted time to think and work on projects. Now I have two kids; the longest such time-blocks are on trains (too infrequent, but it happens) and in a less effective but more frequent fashion, after the kids are sleeping. As I start writing this, I'm in an airport waiting for a delayed flight -- my first since the pandemic -- so we can consider this to be the former case.

It is perhaps out of mechanical sympathy that I have been using my reclaimed time to noodle on a garbage collector. Managing space and managing time have similar concerns: how to do much with little, efficiently packing different-sized allocations into a finite resource.

I have been itching to write a GC for years, but the proximate event that pushed me over the edge was reading about the Immix collection algorithm a few months ago.

on fundamentals

Immix is a "mark-region" collection algorithm. I say "algorithm" rather than "collector" because it's more like a strategy or something that you have to put into practice by making a concrete collector, the other fundamental algorithms being copying/evacuation, mark-sweep, and mark-compact.

To build a collector, you might combine a number of spaces that use different strategies. A common choice would be to have a semi-space copying young generation, a mark-sweep old space, and maybe a treadmill large object space (a kind of copying collector, logically; more on that later). Then you have heuristics that determine what object goes where, when.

On the engineering side, there's quite a number of choices to make there too: probably you make some parts of your collector to be parallel, maybe the collector and the mutator (the user program) can run concurrently, and so on. Things get complicated, but the fundamental algorithms are relatively simple, and present interesting fundamental tradeoffs.


figure 1 from the immix paper

For example, mark-compact is most parsimonious regarding space usage -- for a given program, a garbage collector using a mark-compact algorithm will require less memory than one that uses mark-sweep. However, mark-compact algorithms all require at least two passes over the heap: one to identify live objects (mark), and at least one to relocate them (compact). This makes them less efficient in terms of overall program throughput and can also increase latency (GC pause times).

Copying or evacuating spaces can be more CPU-efficient than mark-compact spaces, as reclaiming memory avoids traversing the heap twice; a copying space copies objects as it traverses the live object graph instead of after the traversal (mark phase) is complete. However, a copying space's minimum heap size is quite high, and it only reaches competitive efficiencies at large heap sizes. For example, if your program needs 100 MB of space for its live data, a semi-space copying collector will need at least 200 MB of space in the heap (a 2x multiplier, we say), and will only run efficiently at something more like 4-5x. It's a reasonable tradeoff to make for small spaces such as nurseries, but as a mature space, it's so memory-hungry that users will be unhappy if you make it responsible for a large portion of your memory.

Finally, mark-sweep is quite efficient in terms of program throughput, because like copying it traverses the heap in just one pass, and because it leaves objects in place instead of moving them. But! Unlike the other two fundamental algorithms, mark-sweep leaves the heap in a fragmented state: instead of having all live objects packed into a contiguous block, memory is interspersed with live objects and free space. So the collector can run quickly but the allocator stops and stutters as it accesses disparate regions of memory.

allocators

Collectors are paired with allocators. For mark-compact and copying/evacuation, the allocator consists of a pointer to free space and a limit. Objects are allocated by bumping the allocation pointer, a fast operation that also preserves locality between contemporaneous allocations, improving overall program throughput. But for mark-sweep, we run into a problem: say you go to allocate a 1 kilobyte byte array, do you actually have space for that?

Generally speaking, mark-sweep allocators solve this problem via freelist allocation: the allocator has an array of lists of free objects, one for each "size class" (say 2 words, 3 words, and so on up to 16 words, then more sparsely up to the largest allocatable size maybe), and services allocations from their appropriate size class's freelist. This prevents the 1 kB free space that we need from being "used up" by a 16-byte allocation that could just have well gone elsewhere. However, freelists prevent objects allocated around the same time from being deterministically placed in nearby memory locations. This increases variance and decreases overall throughput for both the allocation operations but also for pointer-chasing in the course of the program's execution.

Also, in a mark-sweep collector, we can still reach a situation where there is enough space on the heap for an allocation, but that free space broken up into too many pieces: the heap is fragmented. For this reason, many systems that perform mark-sweep collection can choose to compact, if heuristics show it might be profitable. Because the usual strategy is mark-sweep, though, they still use freelist allocation.

on immix and mark-region

Mark-region collectors are like mark-sweep collectors, except that they do bump-pointer allocation into the holes between survivor objects.

Sounds simple, right? To my mind, though the fundamental challenge in implementing a mark-region collector is how to handle fragmentation. Let's take a look at how Immix solves this problem.


part of figure 2 from the immix paper

Firstly, Immix partitions the heap into blocks, which might be 32 kB in size or so. No object can span a block. Block size should be chosen to be a nice power-of-two multiple of the system page size, not so small that common object allocations wouldn't fit. Allocating "large" objects -- greater than 8 kB, for Immix -- go to a separate space that is managed in a different way.

Within a block, Immix divides space into lines -- maybe 128 bytes long. Objects can span lines. Any line that does not contain (a part of) an object that survived the previous collection is part of a hole. A hole is a contiguous span of free lines in a block.

On the allocation side, Immix does bump-pointer allocation into holes. If a mutator doesn't have a hole currently, it scans the current block (obtaining one if needed) for the next hole, via a side-table of per-line mark bits: one bit per line. Lines without the mark are in holes. Scanning for holes is fairly cheap, because the line size is not too small. Note, there are also per-object mark bits as well; just because you've marked a line doesn't mean that you've traced all objects on that line.

Allocating into a hole has good expected performance as well, as it's bump-pointer, and the minimum size isn't tiny. In the worst case of a hole consisting of a single line, you have 128 bytes to work with. This size is large enough for the majority of objects, given that most objects are small.

mitigating fragmentation

Immix still has some challenges regarding fragmentation. There is some loss in which a single (piece of an) object can keep a line marked, wasting any free space on that line. Also, when an object can't fit into a hole, any space left in that hole is lost, at least until the next collection. This loss could also occur for the next hole, and the next and the next and so on until Immix finds a hole that's big enough. In a mark-sweep collector with lazy sweeping, these free extents could instead be placed on freelists and used when needed, but in Immix there is no such facility (by design).

One mitigation for fragmentation risks is "overflow allocation": when allocating an object larger than a line (a medium object), and Immix can't find a hole before the end of the block, Immix allocates into a completely free block. So actually mutator threads allocate into two blocks at a time: one for small objects and medium objects if possible, and the other for medium objects when necessary.

Another mitigation is that large objects are allocated into their own space, so an Immix space will never be used for blocks larger than, say, 8kB.

The other mitigation is that Immix can choose to evacuate instead of mark. How does this work? Is it worth it?

stw

This question about the practical tradeoffs involving evacuation is the one I wanted to pose when I started this article; I have gotten to the point of implementing this part of Immix and I have some doubts. But, this article is long enough, and my plane is about to land, so let's revisit this on my return flight. Until then, see you later, allocators!

The tree view is undead, long live the column view‽

As the title, this is a spin-off of my last post in which I’ll talk about on Files list view instead of grid view.

But before that, a brief summary of what happened in-between.

Legitimate succession

In my last post we were at the interregnum: Files grid view was temporarily managed by GtkFlowBox. Since then the switch to GTK4 has happened and with it came GtkColumnView to claim its due place.

Despite that, GNOME 42 couldn’t ship the GTK4-based Files app (but it still benefited from it, with the new pathbar and more). Can you guess whose blame it was?

A view of trees

That’s how the spin-off starts.

Files list view has for a long time been managed by GtkTreeView, a venerable GTK widget which is still in GTK4 and didn’t have major API changes.

What looked like good news, for ease of porting, was hiding bad news: its drag-and-drop API is still a nightmare.

Drag and drag

GTK4 bring a new drag-and-drop paradigm to the table that makes it dramatically easier to implement drag-and-drop within and between apps. But GtkTreeView doesn’t employ widgets for its rows, so it can’t use the new paradigm.

So, it does its own thing, but with a different API from GTK3 too. I tried to use it to restore drag-and-drop on list view, but:

1. it was laborious and time-consuming;
2. grid view, which still lacked drag-and-drop support, couldn’t benefit from this work;
3. it might require debugging and improving GtkTreeView itself.

So I realized GtkTreeView was just dragging me down and we’d better move on.


 Because treeview

Users, designers, and developers have long requested things for Files list view that are basically impossible to do correctly and maintainably with GtkTreeView:

  • rubberband selection;
  • background space around items (for folder context menu);
  • sort menu shared with the grid view;
  • CSS styling;
  • animations;
  • rich search results list (without a clunky “Location” column);
  • and more…

Much like EelCanvas, GtkTreeView doesn’t employ child widgets for the content items, which makes it lack many useful GTK features.

A view of columns

In my previous blog post I’ve mentioned how GTK4 brings new scalable view widgets. But I didn’t mention they are super amazing, did I?

The hero of this blog post is  GtkColumnView. It is a relative of GtkGridView, but displays items in a list with column instead.

Both take a model and use a factory to produce item widgets on-demand.

This has made it simpler to implement the new list view. All I had to do was copy the grid view code and make a few changes. That was going to be easy!

Famous last words

While the initial implementation was indeed a quick job, it was possible only by taking many shortcuts. Also known as very ugly hacks. It was good enough to share this screenshot in early February, but not good enough to release in GNOME 42.

As the 42 release was no longer the target, there was enough time to do things right. I’ve learnt more about GtkColumnView, fixed some GTK bugs, reported a few others and engaged with GTK developers on API discussion. Thanks their invaluable help, I was able to get rid of the hacks one by one and the quality and design of the code have improved significantly.

Old VS New

Who needs words when I have screenshots?

Old Recents list ─ misaligned thumbnails and name, wide Location column
New Recents list ─ Centered thumbnails, location as a caption, size column present
Old search results list ─ wide Location column, truncated full-text snippet, cannot change sort order.


New search results list ─ Sort menu, full snippets, location caption only for subfolder results
New List view ─ compact mode, rubberband selection, background space between and around rows

Columns & trees?

For a long time, Files has got an optional feature for list view which allows expanding folders in the same view. I don’t use it, but still did my best to implement it in GtkColumnView.

However, this implementation is still very unstable, so there is a chance GNOME 43 won’t have this feature. If you can code and want this feature to be included in GNOME 43, you can pick up on where I’ve left, your help is welcome!

A view of cells

Unlike the previous blog post, I’m going to share a little about the code design.

As mentioned, both GtkGridView and GtkColumnView use a model. The new Files list and grid views use a NautilusViewModel (containing NautilusViewItem objects) and share a lot of model-related code under a NautilusListBase abstract class.

src/nautilus-list-base.c: 1291 lines of code
src/nautilus-list-view.c: 1139 lines of code
src/nautilus-grid-base.c: 502 lines of code

In order to maximize the shared code, the child widgets of both views inherit from a NautilusViewCell widget class:

  • in grid view, each item creates one cell widget: NautilusGridCell;
  • in list view, each item creates one cell widget per column:
    • NautilusNameCell for the first column.
    • NautilusStarCell for the last column.
    • NautilusLabelCell for every other column.

Thanks to this cell abstraction, NautilusListBase can also hold common code for child widgets of both views, including event controllers! And this means they are also going to share drag-and-drop code!

Reviews welcome in https://gitlab.gnome.org/GNOME/nautilus/-/merge_requests/847


June 14, 2022

Attempting to create an aesthetic global line breaking algorithm

The Knuth-Plass line breaking algorithm is one of the cornerstones of TeX and why its output looks so pleasing to read (even to people who do not like the look of Computer Modern). While most text editors do line breaking with a quick & dirty algorithm that looks at each line in isolation, TeX does something fancier called minimum raggedness. The basic algorithm defines a global metric over the entire chapter and then chooses line breaks that minimize it. The basic function is the following:

For each line measure the difference between the desired width and the actual width and square the value. Then add these values together.

As you can easily tell, line breaks made at the beginning of the chapter affect the potential line breaks you can do later. Sometimes it is worth it to make a locally non-optimal choice at the beginning to get a better line break possibility much later. Evaluating a global metric like this can be potentially slow, which is why interactive programs like LibreOffice do not use this method.

The classical way of solving this problem is to use dynamic programming. It has the requirement that the problem must conform to a requirement called the Bellman optimality condition (or, if you are into rocketry, the Pontryagin maximum principle). This is perhaps best illustrated with an example: suppose you are in Paris and want to drive to Venice. This requires picking some path to drive that is "optimal" for your requirements. Now suppose we know that Zürich is along the path of this optimal route. The requirement basically says, then, that the optimal route you take from Paris to Zürich does not in any way affect the optimal route from Zürich to Venice. That is, the two paths can be routed independently of each other. This is true for the basic form of Knuth-Plass line breaking.

It is not true for line breaking in practice.

As an example there is an aesthetic requirement that there should not be three or more consecutive lines that end with a hyphen. Suppose you have split the problem in two and that in the top part the last two lines end with a dash and that the first line of the bottom part also ends with a dash. Each of the two parts is optimal in isolation but when combined they'd get the additional penalty of three consecutive hyphens and thus said solution might not be globally optimal.

So then what?

Computers today are a fair bit faster than in the late 70s/early 80s when TeX was developed. The problem size is also fairly small, the average text chapter only contains a few dozen lines (unless you are James Joyce). This leads to the obvious question of "couldn't you just work harder rather than smarter and try all the options?" Sadly the deities of combinatorics say you can't. There are just too many possibilities.

If you are a bit smarter about it, though, you can get most of the way there. For any given point in the raw text there are reasonably only a few places where you could place the optimal line break since every line must be "fairly smooth". The main split point is the one "closest" to the chapter width and then you can try one or two potential split points around it. These choices can be examined recursively fairly easily. So this is what I implemented as a test.

It even worked fairly well for a small sample text and created a good looking set of line breaks in a fraction of a second. Then I tried it with a different sample text that was about twice as long. The program then froze taking 100% CPU and producing no results. Foiled by algorithmic complexity once again!

After a bunch of optimizations what eventually ended up working was to store, for each split point, the N paths with the smallest penalties up to that point. Every time we enter that point the penalty of the current path is evaluated and compared to the list. If the penalty is larger than the worst option then search is abandoned. The resulting algorithm is surprisingly fast and could possibly even be used in real time.

The GUI app

Ideally you'd want to have tests for this functionality. This is tricky, since there is no golden correct answer, only what "looks good". Thus I wrote an application that can be used to examine the behaviour of the program with different texts, fonts and other parameters.

On the left you have the raw editable text, the middle shows how it would get rendered and on the right are the various statistics and parameters to twiddle. If we run the optimization on this piece of text the result looks like this:

For comparison here's what it looks like in LibreOffice:

And in Scribus:

No sample picture of TeX provided because I have neither the patience nor the skills to find out how to make it use Gentium.

While the parameters are not exactly the same in all three cases, we can clearly see that the new implementation produces more uniform results than the existing ones. One thing to note is that in some cases the new method creates lines that are a bit wider than the target box, where the other two never do. This causes the lines to be squished when justified and it looks really bad if done even a bit too much. The optimization function would probably need to be changed to penalize wide lines more than narrow ones.

The code

Get it here. It uses Gtk 4 and a bunch of related tech so getting it to work on anything else than Linux is probably a challenge.

There are a bunch of optimizations one could do, for example optical margin alignment or stretching individual letters on lines that fall far from the target width.

Thanks to our sponsor

This blog post was brought to you in part by two weeks of sick leave due to a dislocated shoulder. Special thanks to the paramedics on call and the fentanyl they administered to me.

How many Flathub apps reuse other package formats?

Today I read Comparison of Fedora Flatpaks and Flathub remotes by Hari Rana, who is an active and valued member of the Flatpak community. The article is a well-researched and well-written overview of how these two Flatpak ecosystems differ, and contains the following remark about one major difference (emphasis mine):

Flathub is open with what source a Flatpak application (re)uses, whereas Fedora Flatpaks strictly reuses the RPM format.

As such, Flathub has tons of applications that reuse other package formats.

When this article was discussed in the Flatpak Matrix channel, several people wondered whether “tons” is a fair assessment. Let’s find out!

The specific examples given in the article are of apps which reuse a .deb (to which I will add .rpm), AppImage, Snap package, or binary .tar.gz archive. It’s not so easy to distinguish a binary tarball from a source tarball, so as a substitute I will look for apps which use the extra-data to download external sources at install time rather than at build time.

I have cloned every repo from the Flathub GitHub organisation with this script I had lying around. There are 2,220 such repositories. This is a bigger number than the 1,518 apps cited in the blog post, because it includes many thing which are not apps, such as 258 GTK themes and 60 digital audio workstation plugins. I also believe that the 1,518 number does not include end-of-lifed apps, whereas my methodology does. This post will also ignore the existence of OBS Studio and Firefox, where those projects build the Flatpak from source on their own infrastructure and push the result into Flathub.

Now I’m just going to grep them all for the offending strings:

$ (for i in */
do
    if git -C $i grep --quiet -E '(\.(deb|rpm|AppImage|snap)\&gt;)|(extra-data)'
    then
        echo $i
    fi
done) | wc -l
237

(Splitting apart the search terms, we have 141 repos matching .deb, 10 for .rpm, 23 for .AppImage, 6 for .snap, and 110 for extra-data. These numbers don’t sum to 237 because the same repo can use multiple formats, and these binary files are often used by extra-data apps.)

So by my back-of-an-envelope calculation, 237 out of 2220 repos on Flathub repackage other binary formats. This is a little under 11%. Of those 237, 51 are GTK themes, specifically variations of the Mint, Pop and Yaru themes. If we assume that all the other 186 are apps, and that none of them are EOLed, then 186 divided by 1,518 gives us a little more than 12% of apps on Flathub that are repackaged from other binary formats. (I believe this is a slight overestimate but I have run out of time this morning.)

Is that a big number? It’s roughly what I expected. Is it “ton[ne]s”? Compared to Fedora’s Flatpak repo, where everything is built from source, it certainly is: indeed, it’s more than the total number of apps in the Fedora Flatpak repo!

If it is valuable for Flathub to provide proprietary apps like Slack whose publishers do not currently wish to support Flatpak (which I believe it is) then it’s unavoidable that some apps repackage other binary formats. OK, time for one last bit of data: what if we exclude extra-data apps?

$ (for i in */
do
    if ! git -C $i grep --quiet extra-data && \
       git -C $i grep --quiet -E '\.(deb|rpm|AppImage|snap)\>'
    then
        echo $i
    fi
done )| wc -l
127

So (ignoring non-extra-data apps which use binary tarballs, if any such apps exist) that’s something like 76 apps and 51 GTK themes which probably could be built from source by Flathub, but aren’t. It may be hard to build some of these apps from source (perhaps the upstream build system requires network access) but the rewards would include support for aarch64 and any other architectures Flathub may add, and arguably greater transparency in how the app is built.

If you want to do your own research in this vein, you may be interested in gasinvein‘s Flatpak remote metadata fetcher, which would let you generate and analyse a 200 MiB JSON file rather than by cloning and grep-ing 4.6 GiB of Git repositories. His analysis using this data yields 174 apps, quite close to my 186 estimate above.

./flatpak-remote-metadata.py -u https://dl.flathub.org/repo flathub | \
    jq -r '.[] | select(
        .manifest | objects | .modules[] | recurse(.modules | arrays | .[]) |
        .sources | arrays | .[] | .url | strings | test(".*.(deb|rpm|snap|AppImage)$")
    ) | .metadata.Application.name // .metadata.Runtime.name' | \
    sort -u | wc -l

June 12, 2022

Flatpak Brand Refresh

Flatpak

Flatpak has been at the center of the recent app renaissance, but its visual identity has remained fairly stale.

Without diverging too much from the main elements of its visual identity we’ve made it more contemporary. The logo in particular has been simplified to work in all of the size scenarios and visual complexity contexts.

Flatpak Logo

There’s definitely a few spots where the rebrand has yet to propagate to, so please refer to the guidelines if you spot and old coat of paint.

If you’re giving a talk on Flatpak, feel free to make use of the LibreOffice Impress Template.

June 11, 2022

Using VS Code and Podman to Develop SYCL Applications With DPC++'s CUDA Backend

I recently wanted to create a development container for VS Code to develop applications using SYCL based on the CUDA backend of the oneAPI DPC++ (Data Parallel C++) compiler. As I’m running Fedora, it seemed natural to use Podman’s rootless containers instead of Docker for this. This turned out to be more challenging than expected, so I’m going to summarize my setup in this post. I’m using Fedora Linux 36 with Podman version 4.1.0.

Prerequisites

Since the DPC++ is going to use CUDA behind the scene, you will need an NVIDIA GPU and the corresponding Kernel driver for it. I’ve been using the NVIDIA GPU driver from RPM Fusion. Note that you do not have to install CUDA, it is part of the development container alongside the DPC++ compiler.

Next, you require Podman, which on Fedora can be installed by executing

sudo dnf install -y podman

Finally, you require VS Code and the Remote - Containers extension. Just follow the instructions behind those links.

Installing and Configuring the NVIDIA Container Toolkit

The default configuration of the NVIDIA Container Toolkit does not work with Podman, so it needs to be adjusted. Most steps are based on this guide by Red Hat, which I will repeat below.

  1. Add the repository:

    curl -sL https://nvidia.github.io/nvidia-docker/rhel9.0/nvidia-docker.repo | sudo tee /etc/yum.repos.d/nvidia-docker.repo
    

    If you aren’t using Fedora 36, you might have to replace rhel9.0 with your distribution, see the instructions.

  2. Next, install the nvidia-container-toolkit package.

    sudo dnf install -y nvidia-container-toolkit
    
  3. Red Hat’s guide mentioned to configure two settings in /etc/nvidia-container-runtime/config.toml. But when using Podman with --userns=keep-id to map the UID of the user running the container to the user running inside the container, you have to change a third setting. So open /etc/nvidia-container-runtime/config.toml with

    sudo -e /etc/nvidia-container-runtime/config.toml
    

    and change the following three lines:

    #no-cgroups = false
    no-cgroups = true
    
    #ldconfig = "@/sbin/ldconfig"
    ldconfig = "/sbin/ldconfig"
    
    #debug = "/var/log/nvidia-container-runtime.log"
    debug = "~/.local/nvidia-container-runtime.log"
    
  4. Next, you have to create a new SELinux policy to enable GPU access within the container:

    curl -sLO https://raw.githubusercontent.com/NVIDIA/dgx-selinux/master/bin/RHEL7/nvidia-container.pp
    sudo semodule -i nvidia-container.pp
    sudo nvidia-container-cli -k list | sudo restorecon -v -f -
    sudo restorecon -Rv /dev
    
  5. Finally, tell VS Code to use Podman instead of Docker by going to User SettingsExtensionsRemote - Containers, and change Remote › Containers: Docker Path to podman, as in the image below.

Docker Path setting

Replace docker with podman.

Using the Development Container

I created an example project that is based on a container that provides

You can install additional tools by editing the project’s Dockerfile.

To use the example project, clone it:

git clone https://github.com/sebp/vscode-sycl-dpcpp-cuda.git

Next, open the vscode-sycl-dpcpp-cuda directory with VS Code. At this point VS Code should recognize that the project contains a development container and suggest reopening the project in the container

Reopen project in container

Click Reopen in Container.

Initially, this step will take some time because the container’s image is downloaded and VS Code will install additional tools inside the container. Subsequently, VS Code will reuse this container, and opening the project in the container will be quick.

Once the project has been opened within the container, you can open the example SYCL application in the file src/sycl-example.cpp. The project is configured to use the DPC++ compiler with the CUDA backend by default. Therefore, you just have to press Ctrl+Shift+B to compile the example file. Using the terminal, you can now execute the compiled program, which should print the GPU it is using and the numbers 0 to 31.

Alternatively, you can compile and directly run the program by executing the Test task by opening the Command Palette (F1, Ctrl+Shift+P) and searching for Run Test Task.

Conclusion

While the journey to use a rootless Podman container with access to the GPU with VS Code was rather cumbersome, I hope this guide will make it less painful for others. The example project should provide a good reference for a devcontainer.json to use rootless Podman containers with GPU access. If you aren’t interested in SYCL or DPC++, you can replace the exising Dockerfile. There are two steps that are essential for this to work:

  1. Create a vscode user inside the container.
  2. Make sure you create certain directories that VS Code (inside the container) will require access to.

Otherwise, you will encounter various permission denied errors.

June 10, 2022

How to get your application to show up in GNOME Software

Adding Applications to the GNOME Software Center

Written by Richard Hughes and Christian F.K. Schaller

This blog post is based on a white paper style writeup Richard and I did a few years ago, since I noticed this week there wasn’t any other comprehensive writeup online on the topic of how to add the required metadata to get an application to appear in GNOME Software (or any other major open source appstore) online I decided to turn the writeup into a blog post, hopefully useful to the wider community. I tried to clean it up a bit as I converted it from the old white paper, so hopefully all information in here is valid as of this posting.

Abstract

Traditionally we have had little information about Linux applications before they have been installed. With the creation of a software center we require access to rich set of metadata about an application before it is deployed so it it can be displayed to the user and easily installed. This document is meant to be a guide for developers who wish to get their software appearing in the Software stores in Fedora Workstation and other distributions. Without the metadata described in this document your application is likely to go undiscovered by many or most linux users, but by reading this document you should be able to relatively quickly prepare you application.

Introduction

GNOME Software

Installing applications on Linux has traditionally involved copying binary and data files into a directory and just writing a single desktop file into a per-user or per-system directory so that it shows up in the desktop environment. In this document we refer to applications as graphical programs, rather than other system add-on components like drivers and codecs. This document will explain why the extra metadata is required and what is required for an application to be visible in the software center. We will try to document how to do this regardless of if you choose to package your application as a rpm package or as a flatpak bundle. The current rules is a combination of various standards that have evolved over the years and will will try to summarize and explain them here, going from bottom to top.

System Architecture

Linux File Hierarchy

Applications on Linux are expected to install binary files to /usr/bin, the install architecture independent data files to /usr/share/ and configuration files to code>/etc. Small temporary files can be stored in /tmp and much larger files in /var/tmp. Per-user configuration is either stored in the users home directory (in ~/.config) or stored in a binary settings store such as dconf. See the File Hierarchy Standard for more information.

Desktop files

Desktop files have been around for a long while now and are used by almost all Linux desktops to provide the basic description of a desktop application that your desktop environment will display. Like a human readable name and an icon.

So the creation of a desktop file on Linux allows a program to be visible to the graphical environment, e.g. KDE or GNOME Shell. If applications do not have a desktop file they must be manually launched using a terminal emulator. Desktop files must adhere to the Desktop File Specification and provide metadata in an ini-style format such as:

  • Binary type, typically ‘Application’
  • Program name (optionally localized)
  • Icon to use in the desktop shell
  • Program binary name to use for launching
  • Any mime types that can be opened by the applications (optional)
  • The standard categories the application should be included in (optional)
  • Keywords (optional, and optionally localized)
  • Short one-line summary (optional, and optionally localized)

The desktop file should be installed into /usr/share/applications for applications that are installed system wide. An example desktop file provided below:


[Desktop Entry]
Type=Application
Name=OpenSCAD
Icon=openscad
Exec=openscad %f
MimeType=application/x-openscad;
Categories=Graphics;3DGraphics;Engineering;
Keywords=3d;solid;geometry;csg;model;stl;

The desktop files are used when creating the software center metadata, and so you should verify that you ship a .desktop file for each built application, and that these keys exist: Name, Comment, Icon, Categories, Keywords and Exec and that desktop-file-validate correctly validates the file. There should also be only one desktop file for each application.

The application icon should be in the PNG format with a transparent background and installed in
/usr/share/icons,/usr/share/icons/hicolor//apps/, or /usr/share/${app_name}/icons/*. The icon should be at least 64×64 in size.

The file name of the desktop file is also very important, as this is the assigned ‘application ID’. New applications typically use a reverse-DNS style, e.g. org.gnome.Nautilus.desktop but older programs may just use a short name, e.g. gimp.desktop. It is important to note that the file extension is also included as part of the desktop ID.

You can verify your desktop file using the command ‘desktop-file-validate’. You just run it like this:


desktop-file-validate myapp.desktop

This tools is available through the desktop-file-utils package, which you can install on Fedora Workstation using this command


dnf install desktop-file-utils

You also need what is called a metainfo file (previously known as AppData file= file with the suffix .metainfo.xml (some applications still use the older .appdata.xml name) file should be installed into /usr/share/metainfo with a name that matches the name of the .desktop file, e.g. gimp.desktop & gimp.metainfo.xml or org.gnome.Nautilus.desktop & org.gnome.Nautilus.metainfo.xml.

In the metainfo file you should include several 16:9 aspect screenshots along with a compelling translated description made up of multiple paragraphs.

In order to make it easier for you to do screenshots in 16:9 format we created a small GNOME Shell extension called ‘Screenshot Window Sizer’. You can install it from the GNOME Extensions site.

Once it is installed you can resize the window of your application to 16:9 format by focusing it and pressing ‘ctrl+alt+s’ (you can press the key combo multiple times to get the correct size). It should resize your application window to a perfect 16:9 aspect ratio and let you screenshot it.

Make sure you follow the style guide, which can be tested using the appstreamcli command line tool. appstreamcli is part of the ‘appstream’ package in Fedora Workstation.:


appstreamcli validate foo.metainfo.xml

If you don’t already have the appstreamcli installed it can be installed using this command on Fedora Workstation:

dnf install appstream

What is allowed in an metainfo file is defined in the AppStream specification but common items typical applications add is:

  • License of the upstream project in SPDX identifier format [6], or ‘Proprietary’
  • A translated name and short description to show in the software center search results
  • A translated long description, consisting of multiple paragraphs, itemized and ordered lists.
  • A number of screenshots, with localized captions, typically in 16:9 aspect ratio
  • An optional list of releases with the update details and release information.
  • An optional list of kudos which tells the software center about the integration level of the
    application
  • A set of URLs that allow the software center to provide links to help or bug information
  • Content ratings and hardware compatibility
  • An optional gettext or QT translation domain which allows the AppStream generator to collect statistics on shipped application translations.

A typical (albeit somewhat truncated) metainfo file is shown below:

<?xml version="1.0" encoding="UTF-8"?>
<component type="desktop-application">
<id>org.gnome.Terminal.desktop</id>
<metadata_license>GPL-3.0+ or GFDL-1.3-only</metadata_license>
<project_license>GPL-3.0+</project_license>
<name>Terminal</name>
<name xml:lang="ar">الطرفية</name>
<name xml:lang="an">Terminal</name>
<summary>Use the command line</summary>
<summary xml:lang="ar">استعمل سطر الأوامر</summary>
<summary xml:lang="an">Emplega la linia de comandos</summary>
<description>
<p>GNOME Terminal is a terminal emulator application for accessing a UNIX shell environment which can be used to run programs available on your system.</p>
<p xml:lang="ar">يدعم تشكيلات مختلفة، و الألسنة و العديد من اختصارات لوحة المفاتيح.</p>
<p xml:lang="an">Suporta quantos perfils, quantas pestanyas y implementa quantos alcorces de teclau.</p>
</description>
<recommends>
<control>console</control>
<control>keyboard</control>
<control>pointing</control>
</recommends>
<screenshots>
<screenshot type="default">https://help.gnome.org/users/gnome-terminal/stable/figures/gnome-terminal.png</screenshot>
</screenshots>
<kudos>
<kudo>HiDpiIcon</kudo>
<kudo>HighContrast</kudo>
<kudo>ModernToolkit</kudo>
<kudo>SearchProvider</kudo>
<kudo>UserDocs</kudo>
</kudos>
<content_rating type="oars-1.1"/>
<url type="homepage">https://wiki.gnome.org/Apps/Terminal</url>
<project_group>GNOME</project_group>
<update_contact>https://wiki.gnome.org/Apps/Terminal/ReportingBugs</update_contact>
</component>

Some Appstrean background

The Appstream specification is an mature and evolving standard that allows upstream applications to provide metadata such as localized descriptions, screenshots, extra keywords and content ratings for parental control. This intoduction just touches on the surface what it provides so I recommend reading the specification through once you understood the basics. The core concept is that the upstream project ships one extra metainfo XML file which is used to build a global application catalog called a metainfo file. Thousands of open source projects now include metainfo files, and the software center shipped in Fedora, Ubuntu and OpenSuse is now an easy to use application filled with useful application metadata. Applications without metainfo files are no longer shown which provides quite some incentive to upstream projects wanting visibility in popular desktop environments. AppStream was first introduced in 2008 and since then many people have contributed to the specification. It is being used primarily for application metadata but also now is used for drivers, firmware, input methods and fonts. There are multiple projects producing AppStream metadata and also a number of projects consuming the final XML metadata.

When applications are being built as packages by a distribution then the AppStream generation is done automatically, and you do not need to do anything other than installing a .desktop file and an metainfo.xml file in the upstream tarball or zip file. If the application is being built on your own machines or cloud instance then the distributor will need to generate the AppStream metadata manually. This would for example be the case when internal-only or closed source software is being either used or produced. This document assumes you are currently building RPM packages and exporting yum-style repository metadata for Fedora or RHEL although the concepts are the same for rpm-on-OpenSuse or deb-on-Ubuntu.

NOTE: If you are building packages, make sure that there are not two applications installed with one single package. If this is currently the case split up the package so that there are multiple subpackages or mark one of the .desktop files as NoDisplay=true. Make sure the application-subpackages depend on any -common subpackage and deal with upgrades (perhaps using a metapackage) if you’ve shipped the application before.

Summary of Package building

So the steps outlined above explains the extra metadata you need to have your application show up in GNOME Software. This tutorial does not cover how to set up your build system to build these, but both for Meson and autotools you should be able to find a long range of examples online. And there are also major resources available to explain how to create a Fedora RPM or how to build a Flatpak. You probably also want to tie both the Desktop file and the metainfo file into your i18n system so the metadata in them can be translated. It is worth nothing here that while this document explains how you can do everything yourself we do generally recommend relying on existing community infrastructure for hosting source code and packages if you can (for instance if your application is open source), as they will save you work and effort over time. For instance putting your source code into the GNOME git will give you free access to the translator community in GNOME and thus increase the chance your application is internationalized significantly. And by building your package in Fedora you can get peer review of your package and free hosting of the resulting package. Or by putting your package up on Flathub you get wide cross distribution availability.

Setting up hosting infrastructure for your package

We will here explain how you set up a Yum repository for RPM packages that provides the needed metadata. If you are making a Flatpak we recommend skipping ahead to the Flatpak section a bit further down.

Yum hosting and Metadata:

When GNOME Software checks for updates it downloads various metadata files from the server describing the packages available in the repository. GNOME Software can also download AppStream metadata at the same time, allowing add-on repositories to include applications that are visible in the the software center. In most cases distributors are already building binary RPMS and then building metadata as an additional step by running something like this to generate the repomd files on a directory of packages. The tool for creating the repository metadata is called createrepo_c and is part of the package createrepo_c in Fedora. You can install it by running the command:


dnf install createrepo_c.

Once the tool is installed you can run these commands to generate your metadata:


$ createrepo_c --no-database --simple-md-filenames SRPMS/
$ createrepo_c --no-database --simple-md-filenames x86_64/

This creates the primary and filelist metadata required for updating on the command line. Next to build the metadata required for the software center we we need to actually generate the AppStream XML. The tool you need for this is called appstream-builder. This works by decompressing .rpm files and merging together the .desktop file, the .metainfo.xml file and preprocessing the icons. Remember, only applications installing AppData files will be included in the metadata.

You can install appstream builder in Fedora Workstation by using this command:

dnf install libappstream-glib-builder

Once it is installed you can run it by using the following syntax:

$ appstream-builder \
   --origin=yourcompanyname \
   --basename=appstream \
   --cache-dir=/tmp/asb-cache \
   --enable-hidpi \
   --max-threads=1 \
   --min-icon-size=32 \
   --output-dir=/tmp/asb-md \
   --packages-dir=x86_64/ \
   --temp-dir=/tmp/asb-icons

This takes a few minutes and generates some files to the output directory. Your output should look something like this:


Scanning packages...
Processing packages...
Merging applications...
Writing /tmp/asb-md/appstream.xml.gz...
Writing /tmp/asb-md/appstream-icons.tar.gz...
Writing /tmp/asb-md/appstream-screenshots.tar...Done!

The actual build output will depend on your compose server configuration. At this point you can also verify the application is visible in the yourcompanyname.xml.gz file.
We then have to take the generated XML and the tarball of icons and add it to the repomd.xml master document so that GNOME Software automatically downloads the content for searching.
This is as simple as doing:

modifyrepo_c \
    --no-compress \
    --simple-md-filenames \
    /tmp/asb-md/appstream.xml.gz \
    x86_64/repodata/
modifyrepo_c \
    --no-compress \
    --simple-md-filenames \
    /tmp/asb-md/appstream-icons.tar.gz \
    x86_64/repodata/


Deploying this metadata will allow GNOME Software to add the application metadata the next time the repository is refreshed, typically, once per day. Hosting your Yum repository on Github Github isn’t really set up for hosting Yum repositories, but here is a method that currently works. So once you created a local copy of your repository create a new project on github. Then use the follow commands to import your repository into github.


cd ~/src/myrepository
git init
git add -A
git commit -a -m "first commit"
git remote add origin git@github.com:yourgitaccount/myrepo.git
git push -u origin master

Once everything is important go into the github web interface and drill down in the file tree until you find the file called ‘repomd.xml’ and click on it. You should now see a button the github interface called ‘Raw’. Once you click that you get the raw version of the XML file and in the URL bar of your browser you should see a URL looking something like this:
https://raw.githubusercontent.com/cschalle/hubyum/master/noarch/repodata/repomd.xml
Copy that URL as you will need the information from it to create your .repo file which is what distributions and users want in order to reach you new repository. To create your .repo file copy this example and edit it to match your data:


[remarkable]
name=Remarkable Markdown editor software and updates
baseurl=https://raw.githubusercontent.com/cschalle/hubyum/master/noarch
gpgcheck=0
enabled=1
enabled_metadata=1

So on top is your Repo shortname inside the brackets, then a name field with a more extensive name. For the baseurl paste the URL you copied earlier and remove the last bits until you are left with either the ‘norach’ directory or your platform directory for instance x86_64. Once you have that file completed put it into /etc/yum.repos.d on your computer and load up GNOME Software. Click on the ‘Updates’ button in GNOME Software and then on the refresh button in the top left corner to ensure your database is up to date. If everything works as expected you should then be able to do a search in GNOME software and find your new application showing up.
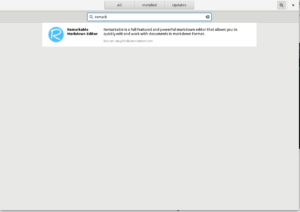
Example of self hosted RPM

Flapak hosting and Metadata

The flatpak-builder binary generates AppStream metadata automatically when building applications if the appstream-compose tool is installed on the flatpak build machine. Flatpak remotes are exported with a separate ‘appstream’ branch which is automatically downloaded by GNOME Software and no addition work if required when building your application or updating the remote. Adding the remote is enough to add the application to the software center, on the assumption the AppData file is valid.

Conclusions

AppStream files allow us to build a modern software center experience either using distro packages with yum-style metadata or with the new flatpak application deployment framework. By including a desktop file and AppData file for your Linux binary build your application can be easily found and installed by end users greatly expanding its userbase.

2022-06-10 Friday

  • Packed for the mens walking weekend.
  • As TDF changes its approach to app-store packaging I thought it would be worth taking some time to look back and try to thank everyone that has done such excellent work over the years. I hope I didn't miss anyone - though of course I have several Linux packaging heros that are (arguably) not per-se app-store packagers I had to miss out: Rene, Petr, Fridrich and no doubt more.

#47 Counting Items

Update on what happened across the GNOME project in the week from June 03 to June 10.

Core Apps and Libraries

GLib

The low-level core library that forms the basis for projects such as GTK and GNOME.

Philip Withnall announces

Benjamin Otte has just added a GListStore:n-items property to GLib, to make it easier to bind UI elements to whether a list store is empty

Software

Lets you install and update applications and system extensions.

Philip Withnall reports

István Derda has added an --uninstall command line option to gnome-software, to allow starting the uninstall process for an app from the command line. This should allow easier integration of gnome-software into other things.

Circle Apps and Libraries

Sophie announces

This week, Amberol joined GNOME Circle. Amberol just plays your music folders and files. Congratulations!

Authenticator

Simple application for generating Two-Factor Authentication Codes.

Bilal Elmoussaoui announces

Authenticator 4.1.6 is out. The new version includes:

  • Google Authenticator restore support by Julia
  • Disabled GTK Inspector in release builds
  • Redesigned account details QR code

Third Party Projects

James Westman announces

I’ve released blueprint-compiler v0.2.0, the first tagged release! If you’re using blueprint in a project, I highly recommend using this tag instead of the main branch, to avoid any breakage as the language develops toward 1.0. You can do this with "tag": "v0.2.0" in your flatpak manifest and revision = v0.2.0 in blueprint-compiler.wrap.

Workbench

A sandbox to learn and prototype with GNOME technologies.

sonnyp says

A new version of Workbench, the sandbox to learn and prototype with GNOME technologies, is out. Here are the highlights:

  • Add Blueprint markup syntax for UI
  • Add Vala programming language for Code
  • Add support for previewing templates
  • Add support for previewing signal handlers
  • Include all icons from icon-development-kit
  • Improve application design
  • Distribute Library examples under CC0-1.0
  • Respect system preference for color scheme
  • Add proper light/dark color schemes for Console
  • Fix error when importing files

https://beta.flathub.org/apps/details/re.sonny.Workbench

Phosh

A pure wayland shell for mobile devices.

Guido says

phoc 0.20.0 and phosh 0.20.0.beta1 are out adding swipe gesture support for top and bottom bar, reworked quick settings (which are now also accessible on the lock screen), a switch to latest wlroots (0.15.1) and much more.

Furtherance

Track your time without being tracked

Ricky Kresslein says

Furtherance v1.5.0 was released and it now has a button to repeat tasks (instead of right-click), CSV Export (thanks to Felix Zwettler), a centered timer when there are no saved tasks, and local date formats.

That’s all for this week!

See you next week, and be sure to stop by #thisweek:gnome.org with updates on your own projects!

Writing a simple time tracker in Rust

Today was another Red Hat Day of Learning. Half a year ago I started learning Rust, but have not really done much with it since then. I did try to port simple-term, but that was quickly thwarted by the unmaintained and broken vte Rust binding for GTK3 – that issue is still way over my head, I didn’t make much progress after two hours of monkey patching. I have used gtimelog to track my work for my entire professional life (since 2004).

June 09, 2022

2022-06-09 Thursday

  • Catch up with Miklos, COOL community call. Lunch, ESC call. Took M. to the doctor's.
  • Chased a nasty delta crasher - obviously each tile could only be compressed / delta'd once - it would be madness to have the same tile listed twice. Except - we do sometimes: added lots of assertions; fixed that. Lovely Ubisan stack trace dumping fixage from Andras pointed at exactly the problem immediately - lovely. Faster, and better too.

Water on the brain; joining OpenET board

I’m becoming a Westerner (in an age of aridification) because I have water permanently on the brain.

Quite related, I’ve joined the board of OpenET to help bring open data on evapotranspiration (a key part of the water cycle) to Colorado River water management, and eventually to the whole world. I’ll be advising on both basics like licensing and of course the more complex bits like economic sustainability, where (via Tidelift) my head mostly is these days.

Many thanks to John Fleck (GNOME documentation project, ret.) for dragging my head into this space years ago by writing about it so well for so long.

A quick textmode-themed update

Summer is coming and I've got a couple of posts cooking that may turn out mildly interesting, but — time constraints being what they are — in the meantime there's this.

Chafa

I (judiciously, as one might opine) pulled back from posting about every single feature release, but things have kept plodding along in quiet. ImageMagick is finally going away as per a buried remark from 2020, which means no more filling up /tmp, no more spawning Inkscape to read in SVGs, and so on. There's also lots of convenience and robustness and whatnot. Go read the release notes.

Text terminals, ANSI art groups, my dumb pet projects: they just won't.

As for eye candy, I guess the new 16/8-color mode qualifies. It's the good old "eight colors, but bold attribute makes foreground bright" trick, which requires a bit of special handling since the quantization step must apply two different palettes.

With this working, the road to ANSI art scene Naraka nirvana is short: Select code points present in your favorite IBM code page, strip newlines (only if your output is 80 columns wide), and convert Chafa's Unicode output to the target code page. You'll get a file worthy of the .ANS extension and perhaps a utility like Ansilove (to those who care: There's some mildly NSFW art in their Examples section. Definitely don't look at it. You've been warned).

Taken together, it goes something like this:

$ chafa -f symbol -c 16/8 -s 80 -w 9 --font-ratio 1 --color-space din99d \
    --symbols space+solid+half+stipple+ascii they_wont.jpg | tr -d \\n | \
    iconv -c -f utf8 -t cp437 > they_wont.ans
$ ansilove -f 80x50 -r they_wont.ans -o top_notch_blog_fodder.png

It's a bit of a screenful, but should get better once I get around to implementing presets.

Finally, I added a new internal symbol range for Latin scripts. It's got about 350 new symbols to work with on top of the ASCII that was already there. Example anim below; might be a good idea to open this one in a separate tab, as browser scaling kind of ruins it.

--fg-only --symbols latin. Input from 30000fps.

Thanks

Apart from the packagers, who are excellent but too numerous to list for fear of leaving anyone out, this time I'd like to thank Lionel Dricot aka Ploum for lots of good feedback. He develops a text mode offline-first browser for Gemini, Gopher, Spartan and the web called Offpunk, and you should check it out.

One more. When huntr.dev came onto my radar for the first time this spring, I admit to being a little bit skeptical. However, they've been a great help, and every interaction I've had with both staff and researchers has been professional, pleasant and highly effective. Big thumbs up. I've more thoughts on this, probably enough for a post of its own. Eventually.

A propos

I came across Aaron A. Reed's project 50 Years of Text Games a while back (via Emily Short's blog, I suspect), and have been following it with interest. He launched his kickstarter this week and is knocking it out of the park. The selection is a tad heavy on story/IF games (quoth the neckbeard, "grumble grumble, Empire, ZZT, grumble"), but it's really no complaint considering the effort that obviously went into this.

Seems low-risk too (the draft articles are already written and available to read), but I have a 75% miss rate on projects I've backed, so what do I know. Maybe next year it'll be 60%.

June 08, 2022

Apps: Attempt of a status report

This is not an official post from GNOME Foundation nor am I part of the GNOME Foundation’s Board that is responsible for the policies mentioned in this post. However, I wanted to sum up the current situation as I understand it to let you know what is currently happening around app policies.

Core and Circle

Ideas for (re)organizing GNOME apps have been around for a long time, like with this initiative from 2018. In May 2020, the Board of Directors brought forward the concept of differentiating “official GNOME software” and “GNOME Circle.” One month later the board settled on the GNOME Foundation’s software policy. GNOME Circle was officially launched in November 2020.

With this, there are two categories of software:

    1. Official GNOME software, curated by the release team. This software can use the GNOME brand, the org.gnome app id prefix, and can identify the developers as GNOME. Internally the release team refers to official software as core.

    2. GNOME Circle, curated by the Circle committee. This software is not official GNOME software and cannot use the GNOME trademarks. Projects receive hosting benefits and promotion.

Substantial contribution to the software of either of those categories makes contributors eligible for GNOME Foundation membership.

Those two categories are currently the only ones that exist for apps in GNOME.

Current Status and Outlook

Since the launch of GNOME Circle, no less than 42 apps have joined the project. With Apps for GNOME, we have an up-to-date representation of all apps in GNOME. And more projects benefitting from this structure are under development. Combined with other efforts like libadwaita, new developer docs, and a new HIG, I think we have seen an incredible boost in app quality and development productivity.

Naturally, there remain open issues after such a huge change. App criteria and workflows have to be adapted after collecting our first experiences. We need more clarification on what a “Core” app means to the project. And last but not least, I think we can do better with communicating about these changes.

Hopefully, at the upcoming GUADEC 2022 we will be able to add some cornerstones to get started with addressing the outstanding issues and continue this successful path. If you want to get engaged or have questions, please let me know. Maybe, some questions can already be answered below 🙂

Frequent Questions

Why is this my favorite app missing?

I often get questions about why an app is absent from apps.gnome.org. The answer is usually, that the app just never applied to Circle. So if your favorite app is missing, you may want to ask them to apply to GNOME Circle.

What do the “/World” and “/GNOME” GitLab namespaces mean?

I often get asked why an app is not on apps.gnome.org or part of “Core” while its repository resides in /GNOME. However, there is no specific meaning to /GNOME. It’s mostly a historical category and many of the projects in /GNOME have no specific status inside the project. By the way, many GNOME Circle projects are not even hosted on GNOME’s GitLab instance.

New “Core” apps however will be moved to /GNOME.

But I can still use org.gnome in my app id or GNOME as part of  my app name?

To be very clear: No. If you are not part of “Core” (Official GNOME software) you can’t. As far as I can see, we won’t require apps to change their app id if they have used it before July 2020.

What about those GNOME games?

We have a bunch of nice little games that were developed within the GNOME project (and that largely also still carry legacy GNOME branding.) None of them currently have an official status. At the moment, no rules exclude games from becoming part of GNOME Circle. However, most of those games would probably need an overhaul before being eligible. I hope we can take care of them soon. Let me know if you want to help.

June 07, 2022

Introduction

Hello everyone!

I’m Marco Melorio, a 22-year-old Italian computer science student. I’m a GNOME user for about 2 years and I’ve quite literally felt in love with it since then. Last year I started developing Telegrand, a Telegram client built to be well integrated with GNOME, which is a project I’m really proud of and it’s gaining quite a bit of interest. That was the moment where I started being more active in the community and also when I started contributing to various GNOME projects.

Fast-forward to today

I’m excited to announce that I’ve been selected for GSoC’22 to implement a media history viewer in Fractal, the matrix client for GNOME, with the help of my mentor Julian Sparber. More specifically, this is about adding a page to the room info dialog that can display all the media (e.g. images, videos, gifs) sent in the room. This is similar to what it’s found in other messaging apps, like Telegram, WhatsApp, etc.

I will be posting more in the next days with details on the implementation and milestones about the project.

Thanks for reading.

Creating your own math-themed jigsaw puzzle from scratch

 Don't you just hate it when you get nerd sniped?

I don't either. It is usually quite fun. Case in point, some time ago I came upon this YouTube video:

It is about how a "500 piece puzzle" usually does not have 500 pieces, but instead slightly more to make manufacturing easier (see the video for the actual details, they are actually quite interesting). As I was watching the video I came up with an idea for my own math-themed jigsaw puzzle.

You can probably guess where this is going.

The idea would not leave me alone so I had to yield to temptation and get the damn thing implemented. This is where problems started. The puzzle required special handling and tighter tolerances than the average jigsaw puzzle made from a custom photo. As a taste of things to come, the final puzzle will only have two kind of pieces, namely these:


For those who already deciphered what the final result will look like: good job.

As you can probably tell, the printed pattern must be aligned very tightly to the cut lines. If it shifts by even a couple of millimeters, which is common in printing, then the whole thing breaks apart. Another requirement is that I must know the exact piece count beforehand so that I can generate an output image that matches the puzzle cut.

I approached several custom jigsaw puzzle manufacturers and they all told me that what I wanted was impossible and that their manufacturing processes are not capable of such precision. One went so far as to tell me that their print tolerances are corporate trade secrets and so is the cut used. Yes, the cut. Meaning the shapes of the resulting pieces. The one feature that is the same on every custom jigsaw puzzle and thus is known by anyone who has ever bought one of them. That is a trade secret. No, it makes no sense to me either.

Regardless it seemed like the puzzle could not be created. But, as the old saying goes, all problems are solvable with a sufficient application of public libraries and lasers.

This is a 50 Watt laser cutter and engraver that is freely usable in my local library. This nicely steps around the registration issues because printing and cutting are done at the same time and the machine is actually incredibly accurate (sub-millimeter). The downside is that you can't use color in the image. Color is created by burning so you can only create grayscale images and the shade is not particularly precise, though the shapes are very accurate.

After figuring this out the procedure got simple. All that was needed was some Python, Cairo and 3mm plywood. Here is the machine doing the engraving.

After the image had been burned, it was time to turn the laser to FULL POWER and cut the pieces. First sideways

then lengthwise.

And here is the final result all assembled up.

This is a 256 piece puzzle showing a Hilbert Curve. It is a space filling curve, that is, it travels through each "pixel" in the image exactly once in a continuous fashion and never intersects itself. As you can (hopefully) tell, there is also a gradient so that the further along the curve you get the lighter the printing gets. So in theory you could assemble this jigsaw puzzle by first ordering the pieces from darkest to lightest and then just joining the pieces one after the other.

The piece cut in this puzzle is custom. The "knob" shape is parameterized by a bunch of variables and each cut between two pieces has been generated by picking random values for said parameters. So in theory you could generate an arbitrarily large jigsaw puzzle with this method (it does need to be a square with the side length being a power of two, though).

Release (semi-)automation

The time I have available to maintain GNOME Initial Setup is very limited, as anyone who has looked at the commit history will have noticed. I’d love more eyes & hands on this important but easy-to-overlook component, particularly to guide it kindly but firmly into the modern age of GTK 4 and the refreshed HIG.

I found that making a batch of 1–3 releases across different GNOME branches every few months was surprisingly time-consuming and error-prone, even with the pretty comprehensive release process checklist on the GNOME Wiki, so I’ve been periodically trying to automate bits of it away.

Philip Withnall’s gitlab-changelog script makes writing the NEWS file a lot quicker. I taught it to output the human-readable names of each updated translation (a nice additional contribution would be to also include the name of the human who updated the translation) and made it a little smarter about guessing the Git commit range to scan.

Beyond that, I added a Meson run target, maintainer-upload-release pointing at a script which performs some rudimentary coherence checks on the version number, tags the release (using git-evtag if available), atomically pushes the branch and that tag to GNOME GitLab, then copies the source tarball to master.gnome.org. (Apparently it has been almost 12 years since I did something similar in telepathy-gabble, building on the make maintainer-upload-release target that Simon McVittie added in 2008, which is where I borrowed the name.) Maybe other module maintainers may find this script useful too – it’s quite generic.

Putting these together, the release flow looks like this:

git switch gnome-42
git pull
../pwithnall/gitlab-changelog/gitlab-changelog.py GNOME/gnome-initial-setup
# Manually edit NEWS to incorporate the changelog, adjusted as needed
# Manually check the version in meson.build
git commit -am 'NEWS for 42.Y'
ninja -C _build dist maintainer-upload-release

Another release-related quality-of-life improvement is to make GitLab CI not only build and test the project (in the vain hope that there might actually be tests!) but also check that the install and gnome-initial-setup-pot targets both work. (At one point or another both have failed at or around release time; now they never will again, famous last words.)

I know none of this is rocket science, but I find it all makes the process quicker and less cumbersome, and it’s stopped me from repeating errors like uploading the wrong version on a few tired evenings. Obviously this could all be taken further: perhaps a manually-invoked CI pipeline that does all this stuff, more checks, etc. But while I’m on this train of thought:

Why do we release GNOME modules one-by-one at all?

The workflow we use to release Endless OS is a bit different to GNOME. Once we merge a change to some module’s Git repository, such as eos-updater or our shrinking branch of GNOME Software, that change embarks on a scenic automated journey that takes it to the next nightly build of the entire OS, both as an OSTree update and as fresh installation media. I use these nightly builds for my daily work, safe in the knowledge that I can roll back to the previous build if necessary.

We don’t make releases of individual modules: instead, when it comes time to release the OS, we trigger a pipeline that (among many other things) pushes the already-built OS update to the production repo, and creates Release_x.y.z tags on each Git repo.

This was quite an adjustment for me at first, compared to lovingly hand-crafting NEWS files and coming up with funny/esoteric release names, but now that I’m used to it it’s hard to go back. Why can’t GNOME do the same?

At this point in the post, we are straying into territory that I have limited first-hand knowledge of. Caveat lector! But here goes:

Thanks to GNOME OS, GNOME already has nightly builds of the entire desktop and apps: so rather than having to build everything yourself, or wait for a development release of GNOME, you can just update & reboot your GNOME OS VM and test the change right there. gnome-build-meta knows how to build every GNOME module; and if you can build the code, it seems a conceptually small step to run ninja dist and the stuff above to publish tags and tarballs for each module.

So you could well imagine on 43.beta release day, someone in the release team could boot the latest GNOME OS nightly, declare it to be Good, and push a button that tags every relevant GNOME module & builds and uploads all the tarballs, and then go back to their day, rather than having to chase down module owners who haven’t quite got around to making the release, fix random build breakages, and so on.

To make this work reliably, I think you’d need every module’s CI to be run through gnome-build-meta, building that MR against the rest of the project, so that g-b-m build failures would be caught before (not after) the offending change lands in the module in question. Seems doable – in Endless we have the equivalent thing managed by a jenkins-job-builder template, the GitHub Pull Request Builder plugin, and a gnarly script.

Continuous integration and deployment are becoming the norm throughout the software industry, for good reasons laid out quite well in articles like Shipping Fast Changes Your Life: the smaller the gap between making a change and it reaching a user, the faster the feedback, and the less costly it is to fix a bug or change course.

The free software movement has historically been ahead of the curve on this, with the “release early, release often” philosophy. And GNOME in particular has used a time-based release process for two decades, allowing major distros to align their schedules to GNOME and get updates into the hands of users quickly, which went some way towards overcoming the fact that GNOME does not own the full pipeline from source code to end users.

Havoc Pennington’s June 2002 email proposing this model has aged rather well, in my opinion, and places a heavy emphasis on the development branch being usable:

The unstable branch must always be dogfood-quality. If testers can’t test it by using it daily, they can’t make the jump. If the unstable branch becomes too unstable, we can’t release it on a reliable schedule, so we have to start breaking the stable branch as a stopgap.

Interestingly the time-based release schedule wiki page states that the schedule should contain:

Regular test release dates, approximately every 2 weeks.

These days, GNOME releases are closer to monthly. In the context of the broader industry where updates reach users multiple times a day, this is starting to look a little less forward-thinking! Of course, continuously deploying an entire OS to production is rather harder than continuously deploying web apps or apps in app stores, if only because the stakes are higher: you need a really robust automatic rollback mechanism to save your users’ plant-based bacon substitute if a new OS build fails to boot, or worse, contains an updater bug that prevents future updates being applied! Still, I believe that a bit of automation would go a long way in allowing module maintainers and the release team alike to spend their scarce mental energy on other things, and allow the project to increase the frequency of releases. What am I missing?

June 06, 2022

Playing with the rpi4 CPU/GPU frequencies

In recent days I have been testing how modifying the default CPU and GPU frequencies on the rpi4 increases the performance of our reference Vulkan applications. By default Raspbian uses 1500MHz and 500MHz respectively. But with a good heat dissipation (a good fan, rpi400 heat spreader, etc) you can play a little with those values.

One of the tools we usually use to check performance changes are gfxreconstruct. This tools allows you to record all the Vulkan calls during a execution of an aplication, and then you can replay the captured file. So we have traces of several applications, and we use them to test any hypothetical performance improvement, or to verify that some change doesn’t cause a performance drop.

So, let’s see what we got if we increase the CPU/GPU frequency, focused on the Unreal Engine 4 demos, that are the more shader intensive:

Unreal Engine 4 demos FPS chart

So as expected, with higher clock speed we see a good boost in performance of ~10FPS for several of these demos.

Some could wonder why the increase on the CPU frequency got so little impact. As I mentioned, we didn’t get those values from the real application, but from gfxreconstruct traces. Those are only capturing the Vulkan calls. So on those replays there are not tasks like collision detection, user input, etc that are usually handled on the CPU. Also as mentioned, all the Unreal Engine 4 demos uses really complex shaders, so the “bottleneck” there is the GPU.

Let’s move now from the cold numbers, and test the real applications. Let’s start with the Unreal Engine 4 SunTemple demo, using the default CPU/GPU frequencies (1500/500):

Even if it runs fairly smooth most of the time at ~24 FPS, there are some places where it dips below 18 FPS. Let’s see now increasing the CPU/GPU frequencies to 1800/750:

Now the demo runs at ~34 FPS most of the time. The worse dip is ~24 FPS. It is a lot smoother than before.

Here is another example with the Unreal Engine 4 Shooter demo, already increasing the CPU/GPU frequencies:

Here the FPS never dips below 34FPS, staying at ~40FPS most of time.

It has been around 1 year and a half since we announced a Vulkan 1.0 driver for Raspberry Pi 4, and since then we have made significant performance improvements, mostly around our compiler stack, that have notably improved some of these demos. In some cases (like the Unreal Engine 4 Shooter demo) we got a 50%-60% improvement (if you want more details about the compiler work, you can read the details here).

In this post we can see how after this and taking advantage of increasing the CPU and GPU frequencies, we can really start to get reasonable framerates in more demanding demos. Even if this is still at low resolutions (for this post all the demos were running at 640×480), it is still great to see this on a Raspberry Pi.

Builder GTK 4 Porting, Part VI

Short update this week given last Monday was Memorial Day in the US. I had a lovely time relaxing in the yard and running errands with my wife Tenzing. We’ve been building such a beautiful home together that it’s nice to just sit back and enjoy it from time to time.

A picture of my yardA picture of me

GTK

  • Merged some work on debug features for testing RTL vs LTR from Builder. There is a new GTK_DEBUG=invert-text-dir to allow rudimentary testing with alternate text directions.

Builder

  • Landed a new clone design using libadwaita.
  • Fixed rendering of symbolic icons in the gutter for diagnostics, etc
  • Fixed error underlines for spellcheck when dealing with languages where the glyph baseline may change
  • Added a new IdeVcsCloneRequest which can do most of the clone work so the UI bits can be very minimal.
  • Added interfaces to allow for retrieving a list of branches on a remote before you’ve cloned it. Useful to help selecting an initial branch, but do to how libgit2 works, we have to create a temporary directory to make it work (and then unlink it). Handy nonetheless.
  • Make gnome-builder --clone work again.
  • Make cloning newcomer applications automatically work again.
  • Made a lot of our popover’s use menu styling, despite being backed by GListModel and GtkListView.
  • Even more menuing cleanups. Amazing how each pass of this really tends to clarify things from a user perspective.
  • Made all of the editor menu buttons in the statusbar functional now.
  • New gsetting and preference toggle to set default license for new projects.
  • A new IdeWebkitPage page implementation which is a very rudimentary web-browser. This will end up being re-used by the html-preview, markdown-preview, and sphinx plugins.
  • Removed the glade plugin
  • Fixed presentation of clang completion items.

I’m pretty satisfied with the port of the cloning workflow, but it really needs to have a PTY plumbed through to the peer process so we can get better/more complete information. We’ll see if there is time before 43 though given how much else there is to get done.

All of this effort is helping me get a more complete vision of what I’d like to see out of a GTK 5. Particularly as we start attacking things from a designer tooling standpoint.

A screenshot of Builder with an integrated web-browser
A screenshot of Builder with the clone dialog choosing a branch to clone
A screenshot of Builder with the clone dialog

June 03, 2022

Introductory Post

Hello everyone! 😄

I'm Utkarsh Gandhi, a 20-year-old, second-year B.Tech student. I have been coding for a few years now but had never contributed to an open-source project before. My seniors advised me to participate in GSoC as it is the best way to start contributing to open source projects.

I looked at a lot of organisations, but none of them seemed right. Then finally, GNOME caught my eye. I had been using the GNOME desktop environment and its applications for a year, so this seemed like the perfect opportunity for me to give back to this organisation. I knew this would be the right fit for me.

I started contributing to GNOME (more specifically Nautilus) around mid-February this year. I chose Nautilus as it is one of those applications which I use on a daily basis, and it just seemed logical to try and contribute to the app which is really important to me. 

As this was the first time I was contributing to an open-source project, I was extremely nervous about how to get started. But the community members were really polite and helpful and gave me a lot of guidance during the first few weeks which made it really easy and fun for me to contribute :D

Fast-forward to June, and I am glad to announce that I have been selected as a contributor by the GNOME Foundation for the "Revamp New Documents Sub-menu" project in Nautilus for GSoC '22. My mentor is @anotniof, who has been extremely helpful ever since I started contributing.

My project aims to design and implement a UI for the New Document creation feature in GNOME Files (Nautilus), which is a UI front-end project.

I'm excited to work on this project and have a chance to give back to this wonderful community. Looking forward to an amazing summer! 🎉

This is my first post for this blog, and I plan to post updates on my progress every week or two on this blog, so stay tuned! 💫

Thank you for reading 😁

June 02, 2022

Using Composefs in OSTree

Recently I’ve been looking at what options there are for OSTree based systems to be fully cryptographically sealed, similar to dm-verity. I really like the efficiency and flexibility of the ostree storage model, but it currently has this one weakness compared to image-based systems. See for example the FAQ in Lennarts recent blog about image-based OSes for a discussions of this.

This blog post is about fixing this weakness, but lets start by explaining the problem.

An OSTree boot works by encoding in the kernel command-line the rootfs to use, like this:

ostree=/ostree/boot.1/centos/993c66dedfed0682bc9471ade483e2f57cc143cba1b7db0f6606aef1a45df669/0

Early on in the boot some code runs that reads this and mount this directory (called the deployment) as the root filesystem. If you look at this you can see a long hex string. This is actually a sha256 digest from the signed ostree commit, which covers all the data in the directory. At any time you can use this to verify that the deployment is correct, and ostree does so when downloading and deploying. However, once the deployment has been written to disk, it is not verified again, as doing so is expensive.

In contrast, image-based systems using dm-verity compute the entire filesystem image on the server, checksum it with a hash-tree (that allows incremental verification) and sign the result. This allows the kernel to validate every single read operation and detect changes. However, we would like to use the filesystem to store our content, as it is more efficient and flexible.

Luckily, there is something called fs-verity that we can use. It is a checksum mechanism similar to dm-verity, but it works on file contents instead of partition content. Enabling fs-verity on a file makes it immutable and computes a hash-tree for it. From that point on any read from the file will return an error if a change was detected.

fs-verity is a good match for OSTree since all files in an the repo are immutable by design. Since some time ostree supportes fs-verity. When it is enabled the files in the repo get fs-verity enabled as they are added. This then propagates to the files in the deployment.

Isn’t this enough then? The files in the root fs are immutable and verified by the kernel.

Unfortunately no. fs-verity only verifies the file content, not the file or directory metadata. This means that a change there will not be detected. For example, its possible to change permissions on a file, add a file, remove a file or even replace a file in the deploy directories. Hardly immutable…

What we would like is to use fs-verity to also seal the filesystem metadata.

Enter composefs

Composefs is a Linux filesystem that Giuseppe Scrivano and I have been working on, initially with a goal of allowing deduplication for container image storage. But, with some of the recent changes it is also useful for the OSTree usecase.

The basic idea of composefs is that we have a set of content files and then we want to create directories with files based on it. The way ostree does this is to create an actual directory tree with hardlinks to the repo files. Unfortunately this has certain limitations. For example, the hardlinks share metadata like mtime and permission, and if these differ we can’t share the content file. It also suffer from not being an immutable representation.

So, instead of creating such a directory, we create a “composefs image”, which is a binary blob that contains all the metadata for the directory (names, structure, permissions, etc) as well as pathnames to the files that have the actual file contents. This can then be mounted wherever you want.

This is very simple to use:

# tree rootfs
rootfs
├── file-a
└── file-b
# cat rootfs/file-a
file-a
# mkcomposefs rootfs rootfs.img
# ls -l rootfs.img
-rw-r--r--. 1 root root 272 Jun 2 14:17 rootfs.img
# mount composefs -t composefs -o descriptor=rootfs.img,basedir=rootfs mnt

At this point the mnt directory is now a frozen version of the rootfs directory. It will not pick up changes to the original directory metadata:

# ls mnt/
file-a file-b
# rm mnt/file-a
rm: cannot remove 'mnt/file-a': Read-only file system
# echo changed > mnt/file-a
bash: mnt/file-a: Read-only file system#
# touch rootfs/new-file
# ls rootfs mnt/
mnt/:
file-a file-b

rootfs:
file-a file-b new-file

However, it is still using the original files for content (via the basedir= option), and these can be changed:

# cat mnt/file-a
file-a
# echo changed > rootfs/file-a
# cat mnt/file-a
changed

To fix this we enable the use of fs-verity, by passing the --compute-digest option to mkcomposefs:

# mkcomposefs rootfs --compute-digest rootfs.img
# mount composefs -t composefs -o descriptor=rootfs.img,basedir=rootfs mnt

Now the image will have the fs-verity digests recorded and the kernel will verify these:

# cat mnt/file-a
cat: mnt/file-a: Input/output error
WARNING: composefs backing file 'file-a' unexpectedly had no fs-verity digest

Oops, turns out we didn’t actually use fs-verity on that file. Lets remedy that:

# fsverity enable rootfs/file-a
# cat mnt/file-a
changed

We can now try to change the backing file (although fs-verity only lets us completely replace it). This will fail even if we enable fs verity on the new file:

# echo try-change > rootfs/file-a
bash: rootfs/file-a: Operation not permitted
# rm rootfs/file-a
# echo try-change > rootfs/file-a
# cat mnt/file-a
cat: mnt/file-a: Input/output error
WARNING: composefs backing file 'file-a' unexpectedly had no fs-verity digest
# fsverity enable rootfs/file-a
# cat mnt/file-a
cat: mnt/file-a: Input/output error
WARNING: composefs backing file 'file-a' has the wrong fs-verity digest

In practice, you’re likely to use composefs with a content-addressed store rather than the original directory hierarchy, and mkcomposefs has some support for this:

# mkcomposefs rootfs --digest-store=content rootfs.img
# tree content/
content/
├── 0f
│   └── e37b4a7a9e7aea14f0254f7bf4ba3c9570a739254c317eb260878d73cdcbbc
└── 76
└── 6fad6dd44cbb3201bd7ebf8f152fecbd5b0102f253d823e70c78e780e6185d
# mount composefs -t composefs -o descriptor=rootfs.img,basedir=content mnt
# cat mnt/file-b
file-b

As you can see it automatically copied the content files into the store named by the fs-verity digest and enabled fs-verity on all the content files.

Is this enough now? Unfortunately no. We can still modify the rootfs.img file, which will affect the metadata of the filesystem. But this is easy to solve by using fs-verity on the actual image file:

# fsverity enable rootfs.img
# fsverity measure rootfs.img
sha256:b92d94aa44d1e0a174a0c4492778b59171703903e493d1016d90a2b38edb1a21 rootfs.img
# mount composefs -t composefs -o descriptor=rootfs.img,basedir=content,digest=b92d94aa44d1e0a174a0c4492778b59171703903e493d1016d90a2b38edb1a21 mnt

Here we passed the digest of the rootfs.img file to the mount command, which makes composefs verify that the image matches what was expected.

Back to OSTree

That was a long detour into composefs. But how does OSTree use this?

The idea is that instead of checking out a hardlinked directory and passing that on the kernel commandline we build a composefs image, enable fs-verity on it and put its filename and digest on the kernel command line instead.

For additional trust, we also generate the composefs image on the server when building the ostree commit. Then we add the digest of that image to the commit metadata before signing it. Since building the composefs image is fully reproducible, we will get the exact same composefs image on the client and can validate it against the signed digest before using it.

This has been a long post, but now we are at the very end, and we have a system where every bit read from the “root filesystem” is continuously verified against a signed digest which is passed as a kernel command line. Much like dm-verity, but much more flexible.

The Containers usecase

As I mentioned before, composefs was originally made for a different usecase, namely container image storage. The goal there is that as we unpack container image layers we can drop the content files into a shared directory, and then generate composefs files for the image themselves.

This way identical files between any two installed images will be shared on the local machine. And the sharing would be both on disk and in memory (i.e. in the page cache), This will allow higher density on your cluster, and smaller memory requirements on your edge nodes.

June 01, 2022

Accessibility repositories are now merged

Over the past week I worked on merging the atk and at-spi2-atk repositories into at-spi2-core. A quick reminder of what they do:

  • at-spi2-core: Has the XML definitions of the DBus interfaces for accessibility — what lets a random widget identify itself as having a Button role, or what lets a random text field to expose its current text contents to a screen reader. Also has the "registry daemon", which is the daemon that multiplexes applications to screen readers or other accessibility technologies. Also has the libatspi library, which is a hand-written binding to the DBus interfaces, and which is used by...

  • at-spi2-atk: Translates the ATK API into calls to libatspi, to effectively make ATK talk DBus to the registry daemon. This is because...

  • atk: is mostly just a bunch of GObject-based interfaces that programs can implement to make themselves accessible. GTK3, LibreOffice, and Mozilla use it. They haven't yet done like GTK4 or Qt5, which use the DBus interfaces directly and thus avoid a lot of wrappers and conversions.

Why merge the repositories?

at-spi2-core's DBus interfaces, the way the registry daemon works, atk's interfaces and their glue in at-spi2-atk via libatspi... all of these are tightly coupled. You can't make a change in the libatspi API without changing at-spi2-atk, and a change in the DBus interfaces really has to ripple down to everything, but keeping things as separate repositories makes it hard to keep them in sync.

I am still in the process of learning how the accessibility code works, and my strategy to learn a code base, besides reading code while taking notes, is to do a little exploratory refactoring.

However, when I did a little refactoring of bit of at-spi2-core's code, the tests that would let me see if that refactoring is correct were in another repository! This is old code, written before unit tests in C were doable in a convenient fashion, so it would take a lot more refactoring to get it to a unit-testable state. I need end-to-end tests instead...

... and it is at-spi2-atk that has the end-to-end tests for all the accessibility middleware, not at-spi2-core, which is the module I was working on. At-spi2-atk is the repository that has tests like this:

  • Create a mock accessible application ("my_app").
  • Create a mock accessibility technology ("my_screen_reader").
  • See if the things transferred from the first one to the second one make sense, thus testing the middleware.

By merging the three repositories, and adding a code coverage report for the test suite, we can add a test, change some code, look at the coverage report, and see if the test really exercised the code that we changed.

Changes for distributions

Please see the announcement on discourse.gnome.org.

That coverage report is not accessible!

Indeed, it is pretty terrible. Lcov's genhtml tool creates a giant <pre>, with things like the execution count for each line just delimited with a <span>. Example of lcov's HTML.

(Librsvg's coverage report is pretty terrible as well; grcov's HTML output is a bunch of color-coded <div>. Example of grcov's HTML.)

Does anyone know code coverage tools that generate accessible output?

May 31, 2022

Flatseal 1.8.0

I am happy to announce a new release of Flatseal 🎉. This new release comes with the ability to review and modify global overrides, highlight changes made by users, follow system-level color schemes, support for more languages and a few bugs fixes.

Let’s start with bug fixes. Since Flatpak 1.12.4, removing filesystem permissions with modes in Flatseal caused Flatpak to warn people about the mode being included as part of the override. Justifiably, this confused many. With this release, it will no longer include these modes, e.g. :ro,  when removing filesystem permissions.

Although Flatseal main distribution is Flatpak, there are people who prefer to install it from their regular package manager. So, I included a fix which handles the creation of the overrides directory. Under Flatpak, this scenario is handled by permissions themselves.

Moving on to new features, @A6GibKm added support for the new system-level color schemes recently added to GNOME. Plus, he streamlined both shortcuts and documentation windows behavior by making both modal.

The main feature I focused on for this release is the ability to review and modify global overrides, which is actually three features in one. Let me elaborate.

Currently, when people look at a particular application permissions they are actually seeing the mix of two things: a) the original permissions that came with that application and b) the permissions changed by them. But there’s a third source of changes that wasn’t taken into account, and that is global overrides.

So, the first part was to make Flatseal aware of these global overrides. That means, when people look at an application permissions, these global overrides need to be accounted for and displayed. With this release, all sources of permissions changes are taken into account. Now, what you see is effectively and exactly what the application can or can’t do.

But this introduces a new problem or, better said, it exacerbates an existing one. It goes like this; people go to Flatseal, select an application, switch a few options and close it. Next day, they go back, select the same application and have absolutely no idea what changed the day before. This only gets worse when introducing global overrides to the mix.

Therefore, the second part was to extend Flatseal models to differentiate between original permissions and the two types of overrides, and to expose that information to the UI. Now, with this release, every permission changed by the user or globally is highlighted as shown above. This includes tooltips to let people know exactly where the change came from.

Lastly, the third part was to expose global overrides themselves to the UI, so people can review and modify these. I tried different approaches as for how to expose this but, finally, I let occam’s razor decide. I exposed global overrides as-if it was just another application, under an “All Applications” sticky item on the applications lists.
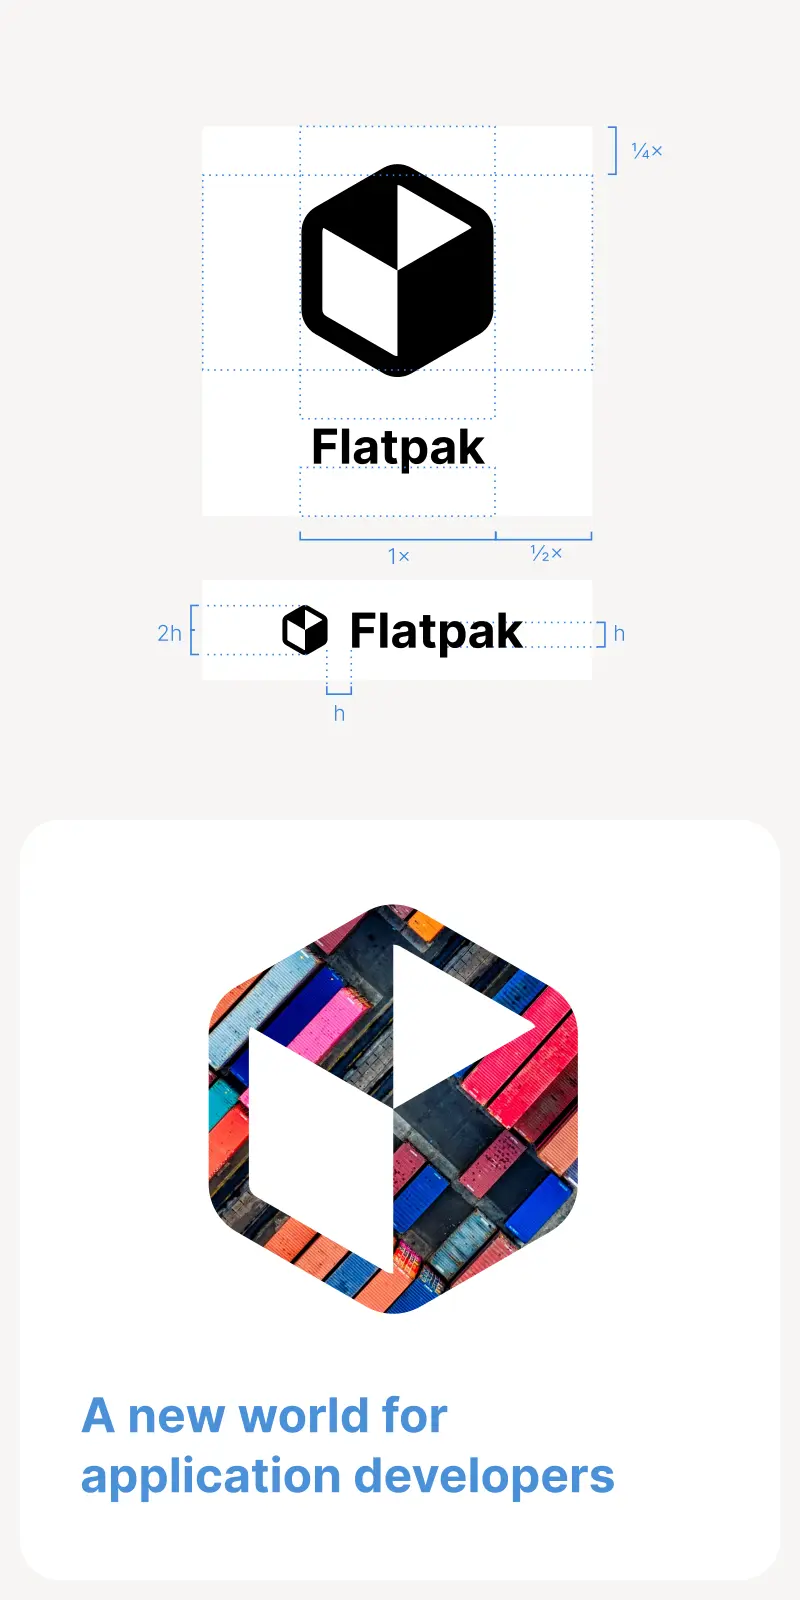
The benefit of this approach is that it’s quite easy to find, and even search, and it’s literally the same interface as for applications. But simplicity comes with a price.

If you’re a heavy user of Flatseal you probably noticed that it only allows to a) grant permissions that the applications don’t have or b) remove permissions that the applications have but, with the exception of filesystem permissions, c) it doesn’t allow to remove permissions that the applications don’t have.

Of course, most of the time, this wouldn’t even make sense for a particular application, but it is a limitation when thinking in terms of global overrides. So unfortunately, you can’t go and remove network access for all your applications in one click. At least not just yet.

Moving on to translations, support for Bulgarian, Danish and Chinese (China) languages were added by @RacerBG@exponentactivity, @EricZhang456 respectively. Big kudos to @libreajans, @AsciiWolf, @Vistaus, @cho2, @eson57, @daPhipz, @ovari, @TheEvilSkeleton,  and @Garbulix for keeping translations up to date.

Moving forward, I would like to revise the backend models to remove some of the limitations I mentioned earlier, polish the global overrides UI, and finally port it to GTK4 and Libadwaita.

Last but not least, special kudos to @rusty-snake for always keeping an eye on newly opened issues and patiently responding to people’s doubts.

ep0: The Journey Begins

image

Hey! I’m Thejas Kiran P S, a sophomore pursuing my Bachelor’s in Computer Science. I have been selected to GNOME organization as a GSoC'22 contributor and will be working on Pitivi. Pitivi is a non-linear video editor based on the GStreamer Editing Services library.

My work here will be to improve the Timeline component of the application by solving currently open issues and other bugs (Also introduce some new features maybe? ;)

That’s all for now. See you later!

May 30, 2022

Towards GNOME Shell on mobile

As part of the design process for what ended up becoming GNOME 40 the design team worked on a number of experimental concepts, a few of which were aimed at better support for tablets and other smaller devices. Ever since then, some of us have been thinking about what it would take to fully port GNOME Shell to a phone form factor.

GNOME Shell mockup from 2020, showing a tiling-first tablet shell overview and two phone-sized screens
Concepts from early 2020, based on the discussions at the hackfest in The Hague

It’s an intriguing question because post-GNOME 40, there’s not that much missing for GNOME Shell to work on phones, even if not perfectly. A few of the most difficult pieces you need for a mobile shell are already in place today:

  • Fully customizable app grid with pagination, folders, and drag-and-drop re-ordering
  • “Stick-to-finger” horizontal workspace gestures, which are pretty close to what we’d want on mobile for switching apps
  • Swipe up gesture for navigating to overview and app grid, which is also pretty close to what we’d want on mobile

On top of that, many of the things we’re currently working towards for desktop are also relevant for mobile, including quick settings, the notifications redesign, and an improved on-screen keyboard.

Possible thanks to the Prototype Fund

Given all of this synergy, we felt this is a great moment to actually give mobile GNOME Shell a try. Thanks to the Prototype Fund, a grant program supporting public interest software by the German Ministry of Education (BMBF), we’ve been working on mobile support for GNOME Shell for the past few months.

Scope

We’re not expecting to complete every aspect of making GNOME Shell a daily driveable phone shell as part of this grant project. That would be a much larger effort because it would mean tackling things like calls on the lock screen, PIN code unlock, emergency calls, a flashlight quick toggle, and other small quality-of-life features.

However, we think the basics of navigating the shell, launching apps, searching, using the on-screen keyboard, etc. are doable in the context of this project, at least at a prototype stage.

Three phone-sized UI mockups, one showing the shell overview with multitasking cards, the second showing the app grid with tiny multitasking cards on top, and the third showing quick toggles with notifications below.
Mockups for some of the main GNOME Shell views on mobile (overview, app grid, system status area)

Of course, making a detailed roadmap for this kind of effort is hard and we will keep adjusting it as things progress and become more concrete, but these are the areas we plan to work on in roughly the order we want to do them:

  • New gesture API: Technical groundwork for the two-dimensional navigation gestures (done)
  • Screen size detection: A way to detect the shell is running on a phone and adjust certain parts of the UI (done)
  • Panel layout: Using the former, add a separate mobile panel layout, with a different top panel and a new bottom panel for gestures (in progress)
  • Workspaces and multitasking: Make every app a fullscreen “workspace” on mobile (in progress)
  • App Grid layout: Adapt the app grid to the phone portrait screen size, ideally as part of a larger effort to make the app grid work better at various resolutions (in progress)
  • On-screen keyboard: Add a narrow on-screen keyboard mode for mobile portrait
  • Quick settings: Implement the new quick settings designs

Current Progress

One of the main things we want to unlock with this project is the fully semantic two-dimensional navigation gestures we’ve been working towards since GNOME 40. This required reworking gesture recognition at a fairly basic level, which is why most of the work so far has been focused around unlocking this. We introduced a new gesture tracker and had to rewrite a fair amount of the input handling fundamentals in Clutter.

Designing a good API around this took a lot of iterations and there’s a lot of interesting details to get into, but we’ll cover that in a separate deep-dive blogpost about touch gesture recognition in the near future.

Based on the gesture tracking rework, we were able to implement two-dimensional gestures and to improve the experience on touchscreens quite a bit in general. For example, the on-screen keyboard now behaves a lot more like you’re used to from your smartphone.

Here’s a look at what this currently looks like on laptops (highly experimental, the second bar would only be visible on phones):

Some other things that already work or are in progress:

  • Detecting that we’re running on a phone, and disabling/adjusting UI elements based on that
  • A more compact app grid layout that can fit on a mobile portrait screen
  • A bottom bar that can act as handle for gesture navigation; we’ll definitely need this for mobile but it’s is also a potentially interesting future direction for larger screens

Taken together, here’s what all of this looks like on actual phone hardware right now:

Most of this work is not merged into Mutter and GNOME Shell yet, but there are already a few open MRs in case you’d like to dive into the details:

Next Steps

There’s a lot of work ahead, but going forward progress will be faster and more visible because it will be work on the actual UI, rather than on internal APIs. Now that some of the basics are in place we’re also excited to do more testing and development on actual phone hardware, which is especially important for tweaking things like the on-screen keyboard.

Photo of the app grid on a Pinephone Pro leaning against a wood panel.
The current prototype running on a Pinephone Pro sponsored by the GNOME Foundation

May 29, 2022

GNOME Outreachy 2022

GNOME Translation Editor, Road to Gtk4

It's time to move to Gtk4. That could be an easy task for new project or for small projects without a lot of custom widgets, but gtranslator is old and the migration will require some time.

Some time ago I did the Gtk2 to Gtk3 migration. It was fun and during the journey we redesigned a bit the interface, but the internals didn't change a lot. Now we can do the same, migrate to Gtk4 and also update the User Interface.

Thankfully, I'm not alone this time, the GNOME community is there to help. A couple of months ago, Maximiliano started a series of commits to prepare the project to the Gtk4 migration, and today starts the Outreachy program and we've a great intern to work in this. Afshan Ahmed Khan will be working during this summer in the GNOME Translation Editor migration to Gtk4.

Outreachy

The Outreachy program provides internship to work in Free and Open Source Software. This year I've proposed the "Migrate GNOME Translation Editor to Gtk4" project and we had a lot of applicants. We had some great contributions during the application phase, and at the end Afshan was selected.

We've now an initial intern blog post and he is working now in the first step, trying to build the project with Gtk4. It's not a simple task, because gtranslator uses a lot of inheritance and there's a lot of widgets in the project.

User Interface redesign?

Once we've the project working with Gtk4 and libadwaita we can start to think about user interface improvements, and all the collaboration here is welcome, so if some designer or translator want to help, don't hesitate to take a look to the current interface and propose some ideas in the corresponding task

Beginning my GSoC'22 journey with GNOME

It was the late night of the 20th of May. My eyes were glued to the email, waiting for the results of the GSoC'22 when I finally received an email that started with a Congratulations message rather than a Thank You for applying message. I was overjoyed when I read the message "Congratulations, your proposal with GNOME Foundation has been accepted!". This post describes my GSoC project and my journey so far with the GSoC, GNOME Foundation, and Open Source.
GSoC @ GNOME

Journey so far

It was the first year of my university when I heard one of my seniors got accepted for the Google Summer of Code. But since I was new to the Computer Science field, I hardly understood any of the terms such as open-source, git, etc. One and a half years later, when I had some coding experience, I dived into the open-source world with Hactoberfest. I made my first trivial pull requests during that period. After that, I started looking for some organizations to start with the open-source contribution when I came across the GNOME Foundation.

I knew the GNOME organization because I used many of their products on my Fedora Desktop. When I joined their IRC, I was initially afraid to ask any questions, as it might have sounded stupid, but the community was generous to answer my stupid questions as well :)

It took me a long time to get the development environment set up. Then I just started looking for a good-first-issue, to begin with. In the same period, GNOME Foundation announced that they will be participating in GSoC that year. I remembered GSoC when I heard it in my first year of college, so I started looking for the projects. Out of all those projects, the Redesigning Health application UI caught my mind because I had just won a hackathon where our team built a Health application. So a Health based project had a special place in my heart.

I started working on some beginner issues and also started learning Rust alongside. My mentor, Rasmus Thomsen (@Cogitri) was supportive during the entire period. But, I was too under-confident in my skills, and eventually, I wasn't selected for the GSoC.

I took this rejection positively and I took some time off to work on my skills and build projects during that period. I started working on those issues again in January and this time the codebase made much more sense than the last time I tried. I went on to solve a few more issues during this period. I came to know that GNOME is participating once again and Health will also participate to revamp their synchronization feature. I participated once again but this time I was confident with myself.

And finally, I got the mail that I have been selected for the GSoC. It was a journey with a mixed feelings over the years, but I'm excited for what next I have in store.

Introduction to Health

Health is a Health and Fitness Tracking application. It helps the user to track and visualize their health indicators better. That means a user can track down their activities and weight progressions. The project is created and maintained by Rasmus Thomsen, who is also the mentor of my GSoC project.

Attached below is the screenshot of the Health MainView:

Health

About the Project

My project is titled - Reworking Sync Options for Health. This project aims to improve the synchronization features of the Health application. Currently, most users have to enter their data manually. Google Fit is the only sync provider present at the moment. We can sync steps and weights from Google Fit to our application.

The current sync feature works as follows:

  1. We pull out the steps from the sync provider.
  2. We convert the steps into a walking activity.

This approach works as long as we would only like to track our walking activity. But, it would be great to pull out actual activities from the sync provider to get a better insight into our Health data.

So my project aims to improve the following Health synchronization features:

  1. Support for syncing actual activities from the sync provider.
  2. Two-way sync support
  3. Support for multiple sync providers such as Apple HealthKit, NextCloud Health, etc.
  4. A proper User Interface and a way to handle multiple sync providers for individual Health data such as activities, weight, etc.
  5. Setting up a proper model so that different Health data can be added in the future.

If the time permits, I would also like to work on the support of PineTime Companion apps. This way Health data can be accessed directly to the cloud services on Health and PineTime companion apps can focus on firmware updates.

Upon completion, this project will solve the major issues Health has with their synchronization at the moment.

Ending notes

I will be updating my blog every two weeks. I have set my goals and milestones accordingly. If you would like to track my journey, keep an eye on the blog for updates, and check the issue board. If you would like to have a look at my proposal, make sure to use it just for reference.

Finally, I would like to express my gratitude to GNOME for believing in me and giving me this opportunity to contribute. I would also like to thank my mentor Rasmus Thomsen for guiding me throughout the journey.

At last, I would like to say that I still have a long way to go. Since I've been given this opportunity to contribute, I would stick along the way to contribute to different GNOME projects as well. But for now, I'm looking forward to a great summer ahead with GSoC.

May 28, 2022

Builder GTK 4 Porting, Part V

Previously Part IV, Part III, Part II, and Part I.

Still working through medicine changes which have wreaked havoc on my sleep, but starting to settle in a bit more.

Template-GLib

Small changes here and there for template-glib to cover more cases for us in our keybindings effort. Improved type comparisons, fixed some embarrassing bugs, improved both GObject Introspection and GType method resolution.

Had some interesting talks with Benjamin about expression language needs within GTK and what things I’ve learned from Template-GLib that could be extracted/rewritten with a particular focus on continuously-evaluating-expressions.

Text Editor

I include gnome-text-editor in these updates because I tend to share code between Builder and g-t-e frequently.

  • Improved session resiliency
  • The Save-As dialog will now suggest filenames based on your current language syntax
  • Tracked down some property orderings which ended up being a GTK bug, so fixed that too
  • Persisted maximized window state to the session object on disk
  • Support to inhibit logout while documents are modified
  • Allow starting a single instance of the app with -s|--standalone like we do with Builder

GTK 4

  • More API strawmen for things we need in Builder
  • Fix some checkbutton annoyances
  • Removed assertions from debug builds during failure cases, converted to g_criticals()

GtkSourceView

  • Updated CI to use a newer Fedora release for more recent wayland protocols and what not
  • More work on source assistants and how measure/present are applied to popovers
  • Improved when and how we show informative tooltips with snippets
  • Add a bunch of “suggested-name” and “suggested-suffix” metadata properties to language specifications so that applications may suggest filenames for Save-As
  • Made Vim emulation of registers global to the application rather than per-view which makes things actually useful and expected behavior to share content between documents
  • Squash some testsuite issues

Builder

Merged a bunch of cleanup commits from the community which is very helpful and appreciated!

I also decided that we’re going to remove all PyGObject plugins from Builder itself. We’ll still have it enabled for third-party plugins, at least for now. Maybe someday we’ll get a GJS back-end for libpeas and we could go that route instead. I’ve spent too much time tracking down bindings issues which made me feel very much like I was still working on MonoDevelop circa 2004. That experience was the whole reason I wrote Builder in C to begin with.

None of our PyGObject plugins are all that complicated so I’ve rewritten most of them in C and had help for a few others. So far that covers: blueprint, clangd, go-langserv (now gpls), intelephense, jedi-language-server, ts-language-server, vala-language-server, buildstream, cargo, copyright, eslint, find-other-file, jhbuild, make, mono, phpize, rstcheck, rubocop, stylelint, and waf.

A few got removed instead for various reasons. That includes gvls (replaced by vala-language-server), rls (replaced by rust-analyzer), and gjs-symbols (to be replaced by ts-language-server eventually).

I added support for two new language servers: bash-language-server and jdtls (Java) although we don’t have any bundling capabilities for them yet with regards to Flatpak.

I’ve landed a new “Create New Project” design which required a bunch of plumbing cleanup and simplification of how templates work. That will help me in porting the meson-templates and make-templates plugins to C too.

A screenshot of the "Create New Project" design

I’ve added quick access to Errors and Warnings in the statusbar so that we can remove it from the (largely hidden) pane within the left sidebar. Particularly I’d like to see someone contribute an addition to limit the list to the current file.

A screenshot of the errors/warnings popover

I updated the support for Sysprof so that it can integrate with Builder’s application runners and new workspace designs. You can how have Sysprof data in pages which provides a lot more flexibility. Long term I’d like to see us add API hooks in Sysprof so that we can jump from symbol names in the callgraphs to source code.

A screenshot of Sysprof embedded within Builder

We cleaned up how symbolic icons are rendered in the greeter as well as how we show scroll state with a GtkScrolledWindow when you have a AdwHeaderBar.flat.

A screenshot of the greeter window

Our Valgrind plugin got more tweakables from the Run menu to help you do leak detection.

A screenshot of the valgrind menu

Keybindings for “Build and Run” along with various tooling got simplified to be more predictable. Also a lot of work on the menuing structure to be a bit simpler to follow.

A screenshot of the updated Run menu

You can force various a11y settings now to help get developers testing things they might otherwise never test.

A screenshot of the a11y menu containing high-contrast and ltr/rtl controls

Same goes for testing various libadwaita and libhandy settings. Both this and the RTL/LTR settings have a few things that still need to propagate through the stack, but it will happen soon enough.

A screenshot showing the forced-appearance modes for libadwaita/libhandy

Using Sysprof will be a lot easier to tweak going forward now that there are menu entries for a lot of the instruments.

A screenshot of the sysprof menu

A lot of new infrastructure is starting to land, but not really visible at the moment. Of note is the ability to separate build artifacts and runnables. This will give users a lot more control over what gets built by default and what gets run by default.

For example, a lot of people have asked for run support with better environment variable control. This should be trivial going forward. It also allows for us to do the same when it comes to tooling like “run this particular testsuite under valgrind”.

As always, freshest content tends to be found here 🐦 before I manage to find a spare moment to blog.

Gingerblue 6.0.1 with Immediate Ogg Vorbis Audio Encoding

Gingerblue 6.0.1 is Free Music Recording Software for GNOME available under GNU General Public License version 3 (or later) that now supports immediate Ogg Vorbis audio recordings in compressed Ogg Vorbis encoded audio files stored in the $HOME/Music/ folder. https://download.gnome.org/sources/gingerblue/6.0/gingerblue-6.0.1.tar.xz

Visit https://www.gingerblue.org/ and https://wiki.gnome.org/Apps/Gingerblue for more information about the GTK+/GNOME Wizard program Gingerblue for Free Music Recording Software under GNOME 42.

Radio 16.0.43 for GNOME 42 (gnome-radio)

The successor to GNOME Internet Radio Locator for GNOME 42 is available from http://download.gnome.org/sources/gnome-radio-16.0.43.tar.xz and https://wiki.gnome.org/Apps/Radio

New stations in GNOME Radio version 16.0.43 is NRK Folkemusikk (Oslo, Norway), NRK P1+ (Oslo, Norway), NRK P3X (Oslo, Norway), NRK Super (Oslo, Norway), Radio Nordfjord (Nordfjord, Norway), and Radio Ålesund (Ålesund, Norway).

Installation on Debian 11 (GNOME 42) from GNOME Terminal


sudo apt-get install gnome-common gcc git make wget
sudo apt-get install debhelper intltool dpkg-dev-el libgeoclue-2-dev
sudo apt-get install libgstreamer-plugins-bad1.0-dev libgeocode-glib-dev
sudo apt-get install gtk-doc-tools itstool libxml2-utils yelp-tools
sudo apt-get install libchamplain-0.12-dev libchamplain-gtk-0.12
sudo apt-get install libgstreamer-plugins-bad1.0-dev libgeocode-glib-dev
wget http://www.gnomeradio.org/~ole/debian/gnome-radio_16.0.43-1_amd64.deb
sudo dpkg -i gnome-radio_16.0.43-1_amd64.deb

Installation on Fedora Core 36 (GNOME 42) from GNOME Terminal


sudo dnf install http://www.gnomeradio.org/~ole/fedora/RPMS/x86_64/gnome-radio-16.0.43-1.fc36.x86_64.rpm

Installation on Ubuntu 22.04 (GNOME 42) from GNOME Terminal


sudo apt-get install gnome-common gcc git make wget
sudo apt-get install debhelper intltool dpkg-dev-el libgeoclue-2-dev
sudo apt-get install libgstreamer-plugins-bad1.0-dev libgeocode-glib-dev
sudo apt-get install gtk-doc-tools itstool libxml2-utils yelp-tools
sudo apt-get install libchamplain-0.12-dev libchamplain-gtk-0.12
sudo apt-get install libgstreamer-plugins-bad1.0-dev libgeocode-glib-dev
wget http://www.gnomeradio.org/~ole/ubuntu/gnome-radio_16.0.43-1_amd64.deb
sudo dpkg -i gnome-radio_16.0.43-1_amd64.deb

More information about GNOME Radio 16.0.43 is available on http://www.gnomeradio.org/ and http://www.gnomeradio.org/news/

May 27, 2022

GSoC 2022: Introduction

Hello there!

My name is Ignacy Kuchciński and I'm studying computer science at UMCS in Lublin, Poland. I've been making minor contributions to GNOME over the past few years, and among the projects I was looking into was GNOME Files, a.k.a Nautilus. I learned about GSoC in #nautilus irc chat room as I observed the effort to port nautilus properties dialog to use GtkBuilder, and I really liked the idea of it - have a chance to make a more significant contribution and be a part of an awesome community on a deeper level. Fast-forward two years, I've applied to Nautilus for GSoC'22 and got accepted to help revamp the “New Document” submenu - an adventure I'm very excited to undertake.

The project

GNOME Files, also known as Nautilus, as many of you already know, is a file manager for GNOME. Its goal is to provide the user with a simple way to navigate and manage files.

One of its abilities, the New Document creation feature, is considered to be a part of core user experience, but its design implementation has room for improvement, especially in discoverability and usability. There are also further regressions to be addressed caused by the GTK 4 port.

For this project the idea is to design and implement a new UI for this feature, the main goals are following:

1. Exposing an entire tree of possible templates in a single view, instead of nested submenus.

2. Making use of visual representations of each template, such as icons, to help users find what they’re looking for.

3. Always showing the New Documents menu, even if the Templates directory is empty - in that case, offer the user the ability to add new templates, both pre-defined as well as custom.

4. Add the ability to search the list of templates.

5. Add the ability to quickly rename the newly created files.

I'll be working in close cooperation with the Nautilus maintainer Antonio Fernandes who will be my mentor, GNOME design team, and with various user studies in mind. Initially, the project was supposed to have only one student working on it. However, in quite an unexpected turn of events, two interns were selected. As a result I'll be working on this project together with Utkarsh Gandhi whom I congratulate for getting selected as well!

Nevertheless, the fact remains that the initial project was meant for a single person. Fortunately, there is a room for expansion: resolving the "no default templates" situation, which has a very big impact on the discoverability and ease of use of this feature. We're still figuring our strategy, but one of the possible scenarios is one of us focusing on revamping the "New Document" submenu, and the other figuring out how to deal with the lack of initial templates.

Conclusion

I will keep track of my progress on this blog, and you can contact me on the GNOME IRC/Matrix on the #nautilus channel. I'm very excited to take part in this journey among the welcoming community and I look forward to contributing towards it. :)

May 25, 2022

Beginning Outreachy journey with Gnome

This blog post introduces myself , how I got started as a contributor to gnome as contributor and what my project is about .

About me and my first encounter with gnome

I am currently in the third year of my integrated Master's Program at a tier-3 college in Indore, India. I am a technophile since childhood and in those days , I once installed kali-linux in vm (as google searches always show it was easy to hack neighbour's wifi with kali-linux 🤣 and cellular internet was expensive back then) but to my surprise the kali-linux looked very complex, then I again google searched and one advice got fix in my mind and that was "Kali linux is complex , start with a simple linux distro (ubuntu) and use it instead of windows" (A simple way to learn a tech thing is to use it). So When I entered college, one thing I was determined at ... and that was using Linux. I installed ubuntu Linux and loved the way it was beautiful and responsive, just one click and the application gets open immediately. Later I come to know that GUI which I am looking at and experiencing is actually gnome desktop.
linux vs windows

From gnome user to gnome contributor

I then tried other DEs (desktop environments) . But sometimes they offered less functionality to get the work done and other times provided more features than needed, making them complex and crashing occasionally. Gnome is a proper match of the two. The applications in gnome were simple to use, stable and provided all needed functionality.
In one subject of our college, we need to submit a study report on an open-source application. So at that time, I decided to get to the development side of gnome. Although, studying big thing as gnome application, is itself a very big thing and I was a newcomer back then . Fortunately, that was an online semester and most of us submitted copied report from the internet.
Satisfied

How I get started

I looked at this repo. But still going through official Gtk documentation was difficult for me, I went through this book. But some things still were not clear to me. It turns out I needed to learn about GObject and then it became more difficult. Hopefully, there was vala which works with objects similar to java,c++.This playlist is must watch, after watching this and coding alongside, I developed some confidence and then following my principle (use tech to learn it) I tried to write this gtk app (although it is still work in progress), while working on this application I realized that a lot of code has to be written . So to get some idea what are good practices for coding and proper way to structure the project I started to understand gnome-clocks codebase and then one fine day I made my first MR .
But everything isn't in vala and how does gobject works that I still wanted to know , then finally, I found these two gems 💎 one is chapter 2 of "The Official GNOME 2 Developer's Guide" and this documentation.

Besides, I also asked many of my doubts on newcomers channel .

How I got outreachy internship ?

When I made my first contribution to gnome (!194 to clocks) ,
that was the time around february and in that month, I also filled my initial application of outreachy, then around 25 march I received mail that my initial application has been accepted. So when project list got finalized , I started contributing to Gtranslator . Then I filled my final application with contributions and submitted it. On 20 May I was on cloud nine , when I saw this mail in Inbox.

mail of acceptance

About my project

My task in this internship is to port the gtranslator from gtk3 to gtk4 under mentorship of Daniel Garcia Moreno .
Gtranslator screenshot
Gtranslator is a gui program which helps the translators to translate a application , under the hood this internationalization happens with the use of gettext library .
In this porting we plan to achieve these tasks -

  1. Updating Gtk version from gtk3 to gtk4.
  2. Replacing libhandy with libadwaita.
  3. Update custom styles to make app work with dark theme.
  4. Adapt the app's ui to gnome HIG.

--

NOTE: All the books I mentioned can be found online for free with google searches . And second thing is I didn't use gnome-builder while writing vtodo app, I just followed youtube playlist way. Third I didn't read all the books completely , but rather just some specific chapters.

Amberol

In the beginning…

In 1997, I downloaded my first MP3 file. It was linked on a website, and all I had was a 56k modem, so it took me ages to download the nearly 4 megabytes of 128 kbit/s music goodness. Before that file magically appeared on my hard drive, if we exclude a brief dalliance with MOD files, the only music I had on my computer came either in MIDI or in WAV format.

In the nearly 25 years passed since that seminal moment, my music collection has steadily increased in size — to the point that I cannot comfortably keep it in my laptop’s internal storage without cutting into the available space for other stuff and without taking ages when copying it to new machines; and if I had to upload it to a cloud service, I’d end up paying monthly storage fees that would definitely not make me happy. Plus, I like being able to listen to my music without having a network connection — say, when I’m travelling. For these reasons, I have my music collection on a dedicated USB3 drive and on various 128 GB SD cards that I use when travelling, to avoid bumping around a spinning rust drive.

In order to listen to that first MP3 file, I also had to download a music player, and back in 1997 there was this little software called Winamp, which apparently really whipped the llama’s ass. Around that same time I was also dual-booting between Windows and Linux, and, obviously, Linux had its own Winamp clone called x11amp. This means that, since late 1997, I’ve also tested more or less all mainstream, GTK-based Linux music players—xmms, beep, xmms2, Rhythmbox, Muine, Banshee, Lollypop, GNOME Music—and various less mainstream/non-GTK ones—shout out to ma boi mpg123. I also used iTunes on macOS and Windows, but I don’t speak of that.

Turns out that, with the very special exception of Muine, I can’t stand any of them. They are all fairly inefficient when it comes to managing my music collection; or they are barely maintained; or (but, most often, and) they are just iTunes clones—as if cloning iTunes was a worthy goal for anything remotely connected to music, computing, or even human progress in general.

I did enjoy using Banshee, up to a point; it wasn’t overly offensive to my eyes and pointing devices, and had the advantage of being able to minimise its UI without getting in the way. It just bitrotted with the rest of the GNOME 2 platform even before GNOME bumped major version, and it still wasn’t as good as Muine.

A detour: managing a music collection

I’d like to preface this detour with a disclaimer: I am not talking about specific applications; specific technologies/libraries; or specific platforms. Any resemblance to real projects, existing or abandoned, is purely coincidental. Seriously.

Most music management software is, I feel, predicated on the fallacy that the majority of people don’t bother organising their files, and are thus willing to accept a flat storage with complex views built at run time on top of that; while simultaneously being willing to spend a disproportionate amount of time classifying those files—without, of course, using a hierarchical structure. This is a fundamental misunderstanding of human nature.

By way of an example: if we perceive the Universe in a techno-mazdeist struggle between a πνεῦμα which creates fool-proof tools for users; and a φύσις, which creates more and more adept fools; then we can easily see that, for the entirety of history until now, the pneuma has been kicked squarely in the nuts by the physis. In other words: any design or implementation that does not take into account human nature in that particular problem space is bound to fail.

While documents might benefit from additional relations that are not simply inferred by their type or location on the file system, media files do not really have the same constraints. Especially stuff like music or videos. All the tracks of an album are in the same place not because I decided that, but because the artist or the music producers willed it that way; all the episodes of a series are in the same place because of course they are, and they are divided by season because that’s how TV series work; all the episodes of a podcast are in the same place for the same reason, maybe divided by year, or by season. If that structure already exists, then what’s the point of flattening it and then trying to recreate it every time out of thin air with a database query?

The end result of constructing a UI that is just a view on top of a database is that your UI will be indistiguishable from a database design and management tool; which is why all music management software looks very much like Microsoft Access from circa 1997 onwards. Of course you can dress it up however you like, by adding fancy views of album covers, but at the end of the day it’s just an Excel spread sheet that occasionally plays music.

Another side effect of writing a database that contains the metadata of a bunch of files is that you’ll end up changing the database instead of changing the files; you could write the changes to the files, but reconciling the files with the database is a hard problem, and it also assumes you have read-write access to those files. Now that you have locked your users into your own database, switching to a new application becomes harder, unless your users enjoy figuring out what they changed over time.

A few years ago, before backing up everything in three separate storages, I had a catastrophic failure on my primary music hard drive; after recovering most of my data, I realised that a lot of the changes I made in the early years weren’t written out to music files, but were stored in some random SQLite database somewhere. I am still recovering from that particular disaster.

I want my music player to have read-only access to my music. I don’t want anything that isn’t me writing to it. I also don’t want to re-index my whole music collection just because I fixed the metadata of one album, and I don’t want to lose all my changes when I find a better music player.

Another detour: non-local media

Yes, yes: everyone listens to streamed media these days, because media (and software) companies are speed-running Adam Smith’s The Wealth of Nations and have just arrived at the bit about rentier economy. After all, why should they want to get paid once for something, when media conglomerates can “reap where they never sowed, and demand a rent even for its natural produce”.

You know what streaming services don’t like? Custom, third party clients that they can’t control, can’t use for metrics, and can’t use to serve people ads.

You know what cloud services that offer to host music don’t like? Duplicate storage, and service files that may potentially infringe the IP of a very litigious industry. Plus, of course, third party clients that they can’t use to serve you ads, as that’s how they can operate at all, because this is the Darkest Timeline, and adtech is the modern Moloch to which we must sacrifice as many lives as we can.

You may have a music player that streams somebody’s music collection, or even yours if you can accept the remote service making a mess of it, but you’re always a bad IPO or a bad quarterly revenue report away from losing access to everything.

Writing a music player for fun and no profit

For the past few years I’ve been meaning to put some time into writing a music player, mostly for my own amusement; I also had the idea of using this project to learn the Rust programming language. In 2015 I was looking for a way to read the metadata of music files with Rust, but since I couldn’t find anything decent, I ended up writing the Rust bindings for taglib. I kept noodling at this side project for the following years, but I was mostly hitting the limits of GTK3 when it came to dealing with my music collection; every single iteration of the user interface ended up with a GtkTreeView and a replica of iTunes 1.0.

In the meantime, though, the Rust ecosystem got exponentially better, with lots of crates dedicated to parsing music file metadata; GTK4 got released with new list widgets; libadwaita is available to take care of nice UI layouts; and the Rust bindings for GTK have become one of the most well curated and maintained projects in the language bindings ecosystem.

Another few things that happened in the meantime: a pandemic, a year of unemployment, and zero conferences, all of which pushed me to streaming my free and open source software contributions on Twitch, as a way to break the isolation.

So, after spending the first couple of months of 2022 on writing the beginners tutorial for the GNOME developer documentation website, in March I began writing Amberol, a local-only music player that has no plans of becoming more than that.

Desktop mode

Amberol’s scope sits in the same grand tradition of Winamp, and while its UI started off as a Muine rip off—down to the same key shortcuts—it has evolved into something that more closely resembles the music player I have on my phone.

Mobile mode

Amberol’s explicit goal is to let me play music on my desktop the same way I typically do when I am using my phone, which is: shuffling all the songs in my music collection; or, alternatively, listening to all the songs in an album or from an artist from start to finish.

Amberol’s explicit non goals are:

  • managing your music collection
  • figuring out your music metadata
  • building playlists
  • accessing external services for stuff like cover art, song lyrics, or the artist’s Wikipedia page

The actual main feature of this application is that it has forced me to figure out how to deal with GStreamer after 15 years.

I did try to write this application in a way that reflects the latest best practices of GTK4:

  • model objects
  • custom view widgets
  • composite widgets using templates
  • property bindings/expressions to couple model/state to its view/representation
  • actions and actionable widgets

The ability to rely on libadwaita has allowed me to implement the recoloring of the main window without having to deal with breakage coming from rando style sheets:

The main thing I did not expect was how much of a good fit was Rust in all of this. The GTK bindings are top notch, and constantly improving; the type system has helped me much more than hindering me, a poor programmer whose mind has been twisted by nearly two decades of C. Good idiomatic practices for GTK are entirely within the same ballpark of idiomatic practices for Rust, especially for application development.

On the tooling side, Builder has been incredibly helpful in letting me concentrate on the project—starting from the basic template for a GNOME application in Rust, to dealing with the build system; from the Flatpak manifest, to running the application under a debugger. My work was basically ready to be submitted to Flathub from day one. I did have some challenge with the AppData validation, mostly caused by appstream-utils undocumented validation rules, but luckily it’s entirely possible to remove the validation after you deal with the basic manifest.

All in all, I am definitely happy with the results of basically two months of hacking and refactoring, mostly off an on (and with two weeks of COVID in the middle).

Update on Niepce

Here we go, when I started that project in 2006, I had plenty of ideas. I still have, but everything else is in the way, including me.

Since there have been some amazing apps, like RawTherapee, Darktable, and possibly some other I miss, apps fullfilling some of the uses I envisioned for Niepce back then. Not to mention a few other apps that did just disappear ; that's life, it's hard to find maintainers or keep being motivated.

Anyway.

Still slowly working on it, far from an MVP.

But here are some recent developments:

  1. Port to Rust: most of the backend including the database (but not sqlite3) is written in Rust. I squashed a few bugs in the process, improving the architecture. There are some technical challenges involving bridging C++ and Rust. Some widgets have been rewritten in Rust and progressively everything is getting the treatement. Ideally I'd not write a single new feature in C++ anymore but sadly that's not how it work.
  2. Port to Gtk4: the app started with Gtk2 back then. It was quickly ported to Gtk3 early in the last decade, thanks to the help of Gtkmm. A few weeks ago I did port it to Gtk4. And it's still a mess of C++ with Gtkmm and Rust. I do have plan to add libadwaita.
  3. Library import: this one I worked on it out of spite between the Rust port and the Gtk4 port, and it's not merged yet. The goal is to import an Adobe Ligthroom™ library (up to version 6). I wrote the base code in Rust a while ago, and last November I just worked on integrating the crate into Niepce. The current status is works slowly, as there are some serious reachitecturing that need to happen. For the longer term, I have support for Capture One and Apple Aperture 3 it two other crates. The Aperture 3 crate was actually one of my first practical Rust project back in 2015.

To be fair I don't know where this will be going. It's more like permanent construction.