Developers Dashboard
You can use the Developers Dashboard to manage your API keys, webhook endpoints, and view webhook event and API request log activity:
- Find your default API version and all versions used by your account
- Determine the reason an API request has failed
- Find common integration errors and filter requests
- Create a local webhook events listener
- Register and test a webhook endpoint
Your default API version
Stripe APIs use your API secret key to authenticate requests on your server. You can specify a different API version when calling Stripe APIs, which is helpful when testing an API version upgrade. If you don’t specify an API version, Stripe uses your account’s default API version. Use these steps to find all of the API versions used by your account within the last week. If you’re using the latest API version, the version is labeled Latest.
- Open the Developers Dashboard.
- Your account’s default API version is labeled
Default.
To view a list of versions, see the API changelog.
Filter API request logs
When you call Stripe APIs in your app, with the Stripe CLI, or by modifying Stripe resources in the Dashboard, Stripe logs the API request in the Developers Dashboard. For example, when you create a product in the Dashboard, Stripe logs the Create a product API call. You can view your API requests and any requests that failed by source or filter errors.
Source | API call | Logs |
|---|---|---|
| API | Call an API with the Stripe CLI. | Logs the API call on the Logs page. |
| API | Call an API in your app. | Logs the API call on the Logs page. |
| Dashboard | Call an API by modifying your Stripe resources in the Dashboard. | Logs the API call on the Logs page. |
To learn more, see Call APIs with the Stripe CLI.
View API requests by source
Use these steps to filter requests by an API call source.
- Open the Logs page.
- Click More.
- In Source, select Dashboard or API to filter requests by source.
- Click Apply.
Find common integration errors
You can view common integration errors by error code and API endpoint in Recent errors. Use this filter to discover common integration errors.
- Open the Developers Dashboard.
- In Recent errors, select the filter button ().
- Select an error type.
- Click an error to view the request payload that failed and the reason.
Filter by resource ID
When you create, update, or delete a Stripe resource using Stripe APIs, Stripe returns a resource ID in the response payload. For example, when you Create a customer, Stripe returns a customer ID (in id), such as cus_ImZZa3EEvvQQQU. Use these steps to filter API requests by resource ID.
- Open the Logs page.
- Enter the resource ID in the Filter by resource ID text field.
Apply advanced filters
You can use the inline navigation to filter API requests by Date, Status, Method and API endpoint, or apply additional filters to troubleshoot requests. Use these steps to filter API requests by API version, error type, error code, and other filters, such as an IP address.
- Open the Logs page.
- Click More.
- To filter by version, select an option in the API version dropdown menu. For example,
2020-08-27. - To filter by error type, select an option in the Error type dropdown menu. For example,
card_error. - To filter by error message, select an option in the Error code dropdown menu. For example,
bank_account_unverified.
- To filter by version, select an option in the API version dropdown menu. For example,
- Click Apply.

Filter events
When you call Stripe APIs in your app, with the Stripe CLI, or by modifying Stripe resources in the Dashboard, Stripe logs the API request in the Developers Dashboard. For example, when you create a product in the Dashboard, Stripe logs the Create a product API call. You can also discover and trigger events manually with the Stripe CLI.
Source | Trigger | Events |
|---|---|---|
| API | Manually trigger an event with the Stripe CLI. | Logs the event on the Events page. |
| API | Call an API in your app or with the Stripe CLI. | Logs the event on the Events page. |
| Dashboard | Call an API by modifying your Stripe resources in the Dashboard. | Logs the event on the Events page. |
To stream events, see Stream real-time Stripe events.
Event object payload
Stripe APIs log events and their event object payloads in the Developers Dashboard. This payload contains a Stripe resource nested under data. You can create a webhook endpoint that receives and executes backend actions in response to these events. The first thing to know about using events in a webhook endpoint is that your webhook endpoint needs to “read” and parse information from the event object payload.

Filter events
Use these steps to view events and their event object payload.
- Open the Events page.
- To filter by event, click Filter, Type:
- Enter an event name. For example,
payment_intent.created. - Enter an event with the wild card character. For example,
payment_intent.*.
- Enter an event name. For example,
To create a webhook endpoint, see the Webhooks page.
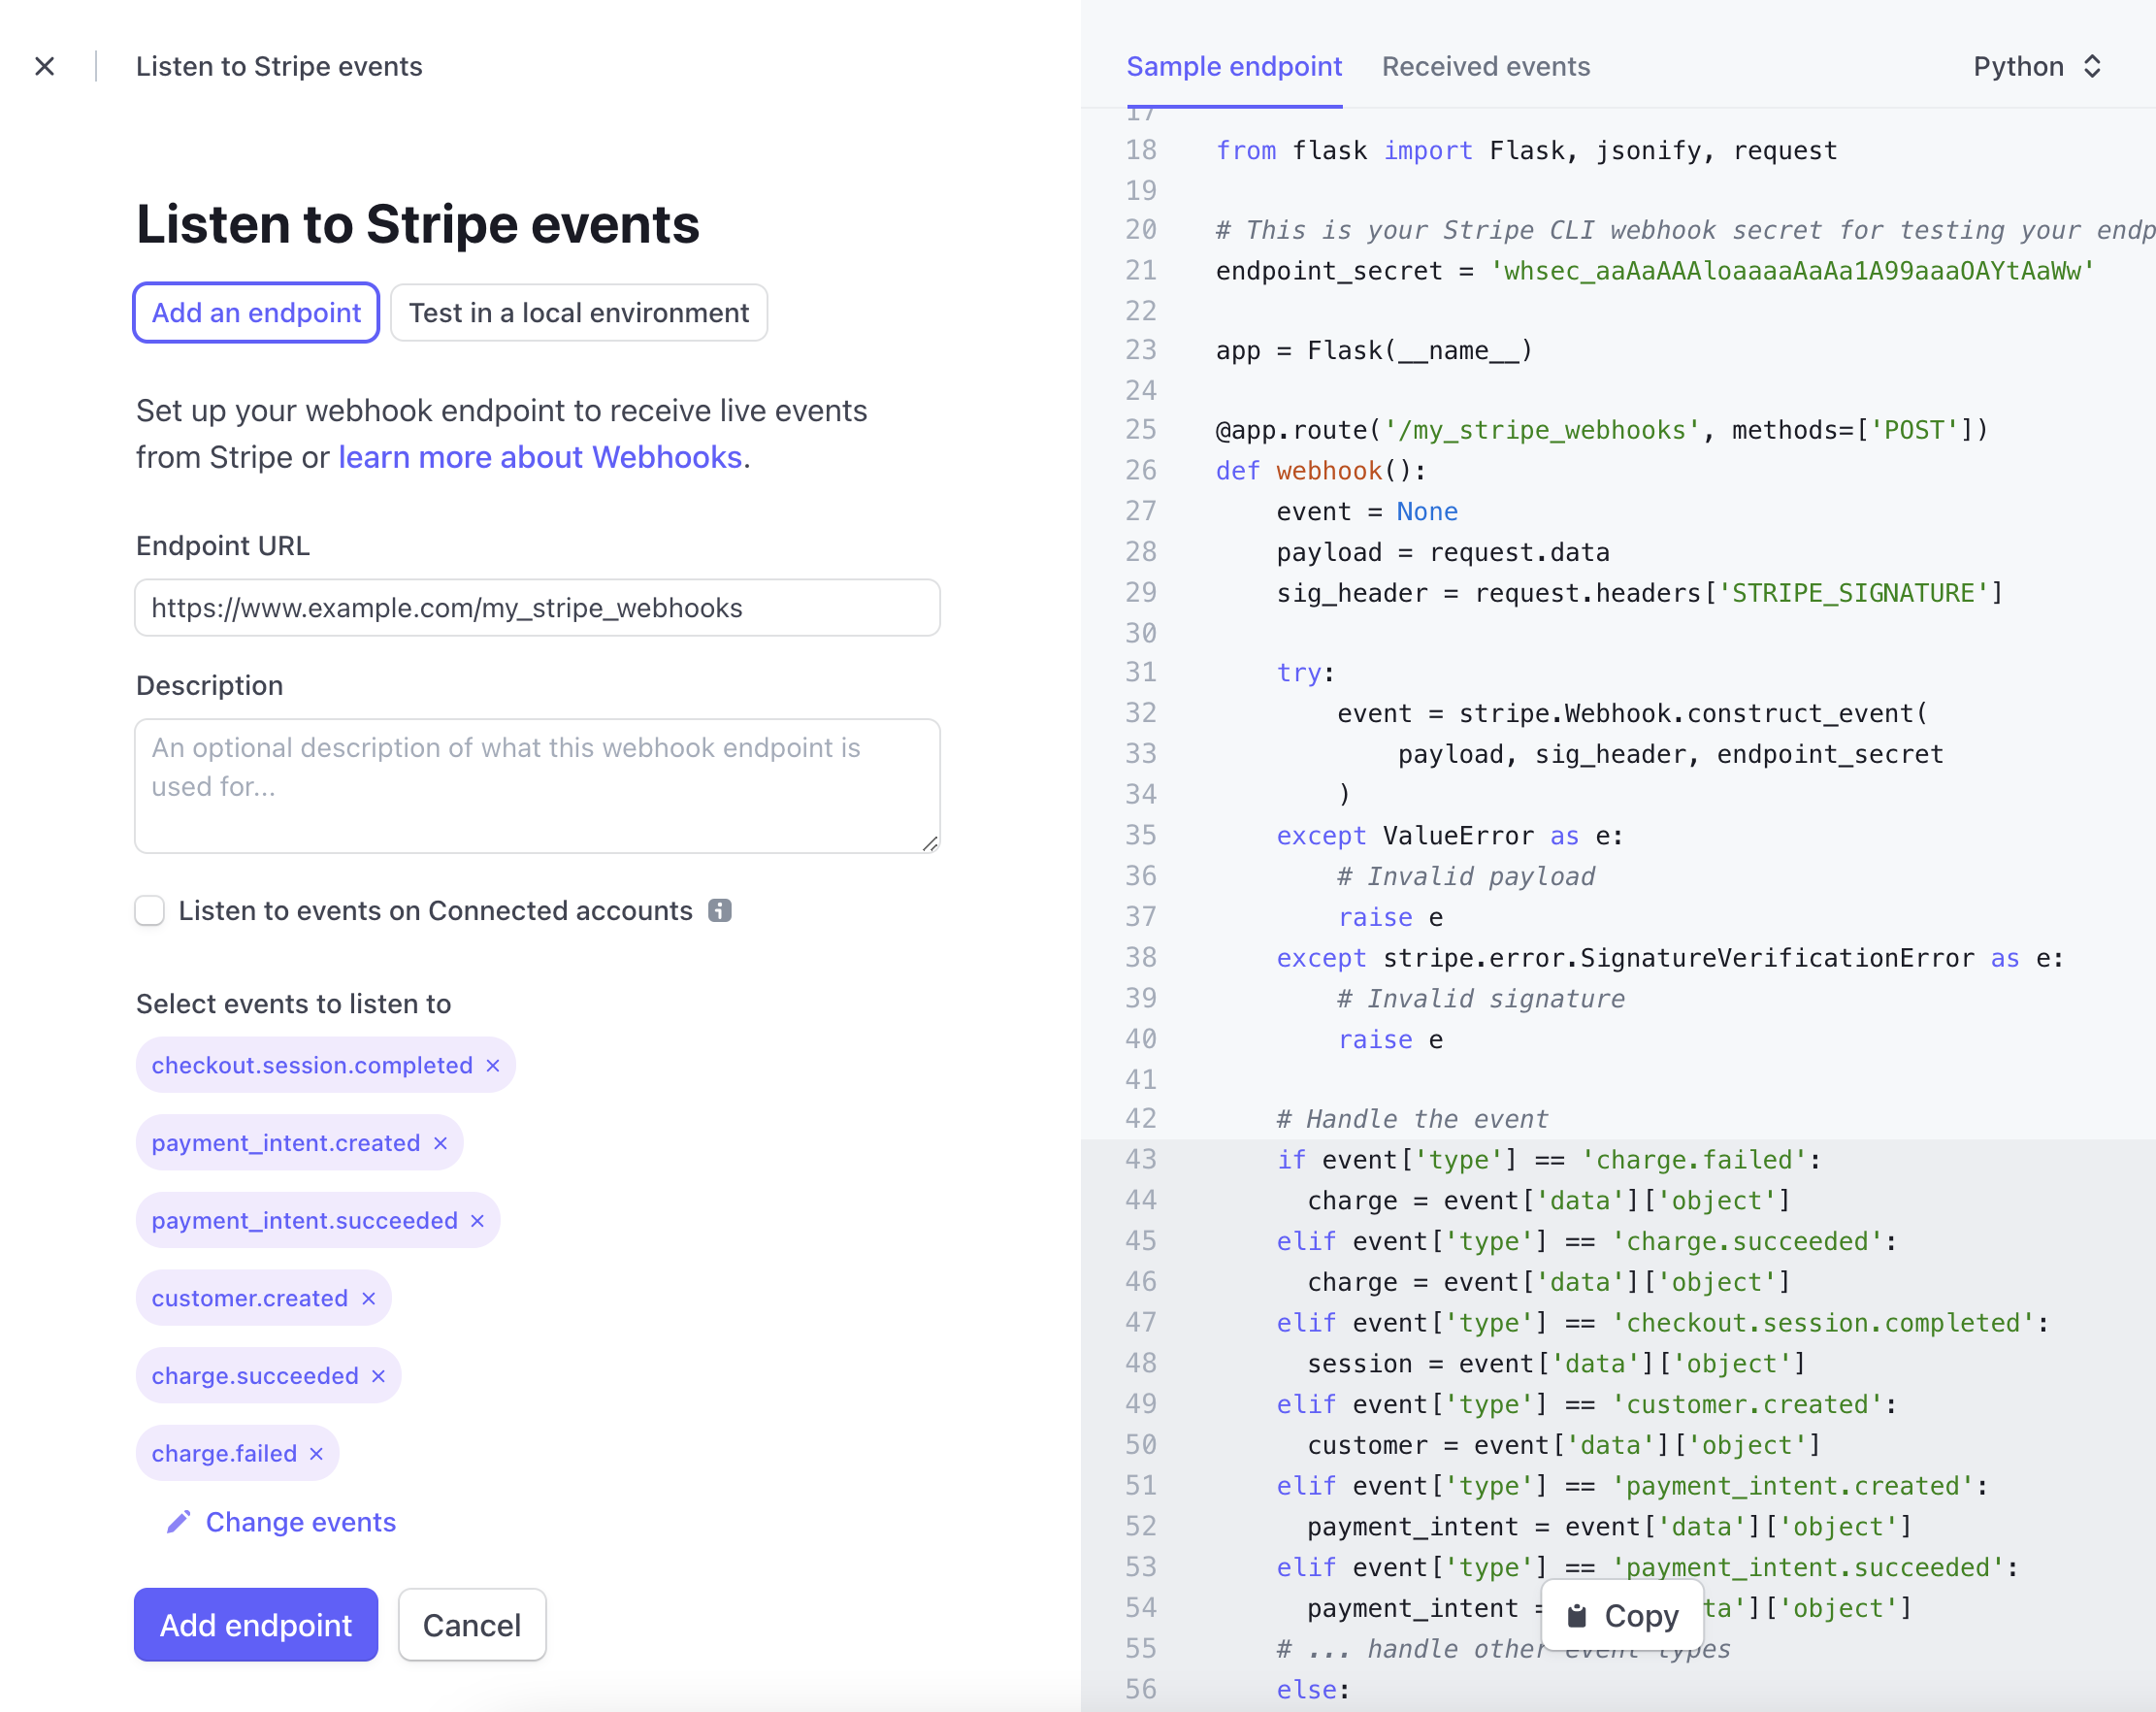
Create a local webhook events listener
You can use the Stripe CLI to trigger and listen to real-time webhook events triggered by your account. This is helpful when testing a webhook endpoint that executes actions in your backend systems. For example, you can fulfill an order after you receive the checkout.session.completed event.
Add a local listener
Use the following steps to create a local webhook endpoint that parses an event object payload. By default, the code sample on the local listener setup page parses the payment_intent.succeeded event object payload, and returns a 200 response.
- Open the Webhooks page.
- Click Add local listener.
- Select your programming language (top right) on the Listen to Stripe events setup page.
- Copy the sample code locally, then follow the steps on the setup page.
- Open the Received events tab to see the events received.

To learn more ways to forward events, see Forward events to a local webhook endpoint.
Find local listener events
Use these steps to find the event object payloads.
- Open the Events page.
- Select a device name in Webhook CLI responses.

To learn more ways to trigger events, see Trigger Stripe events to test a webhooks integration.
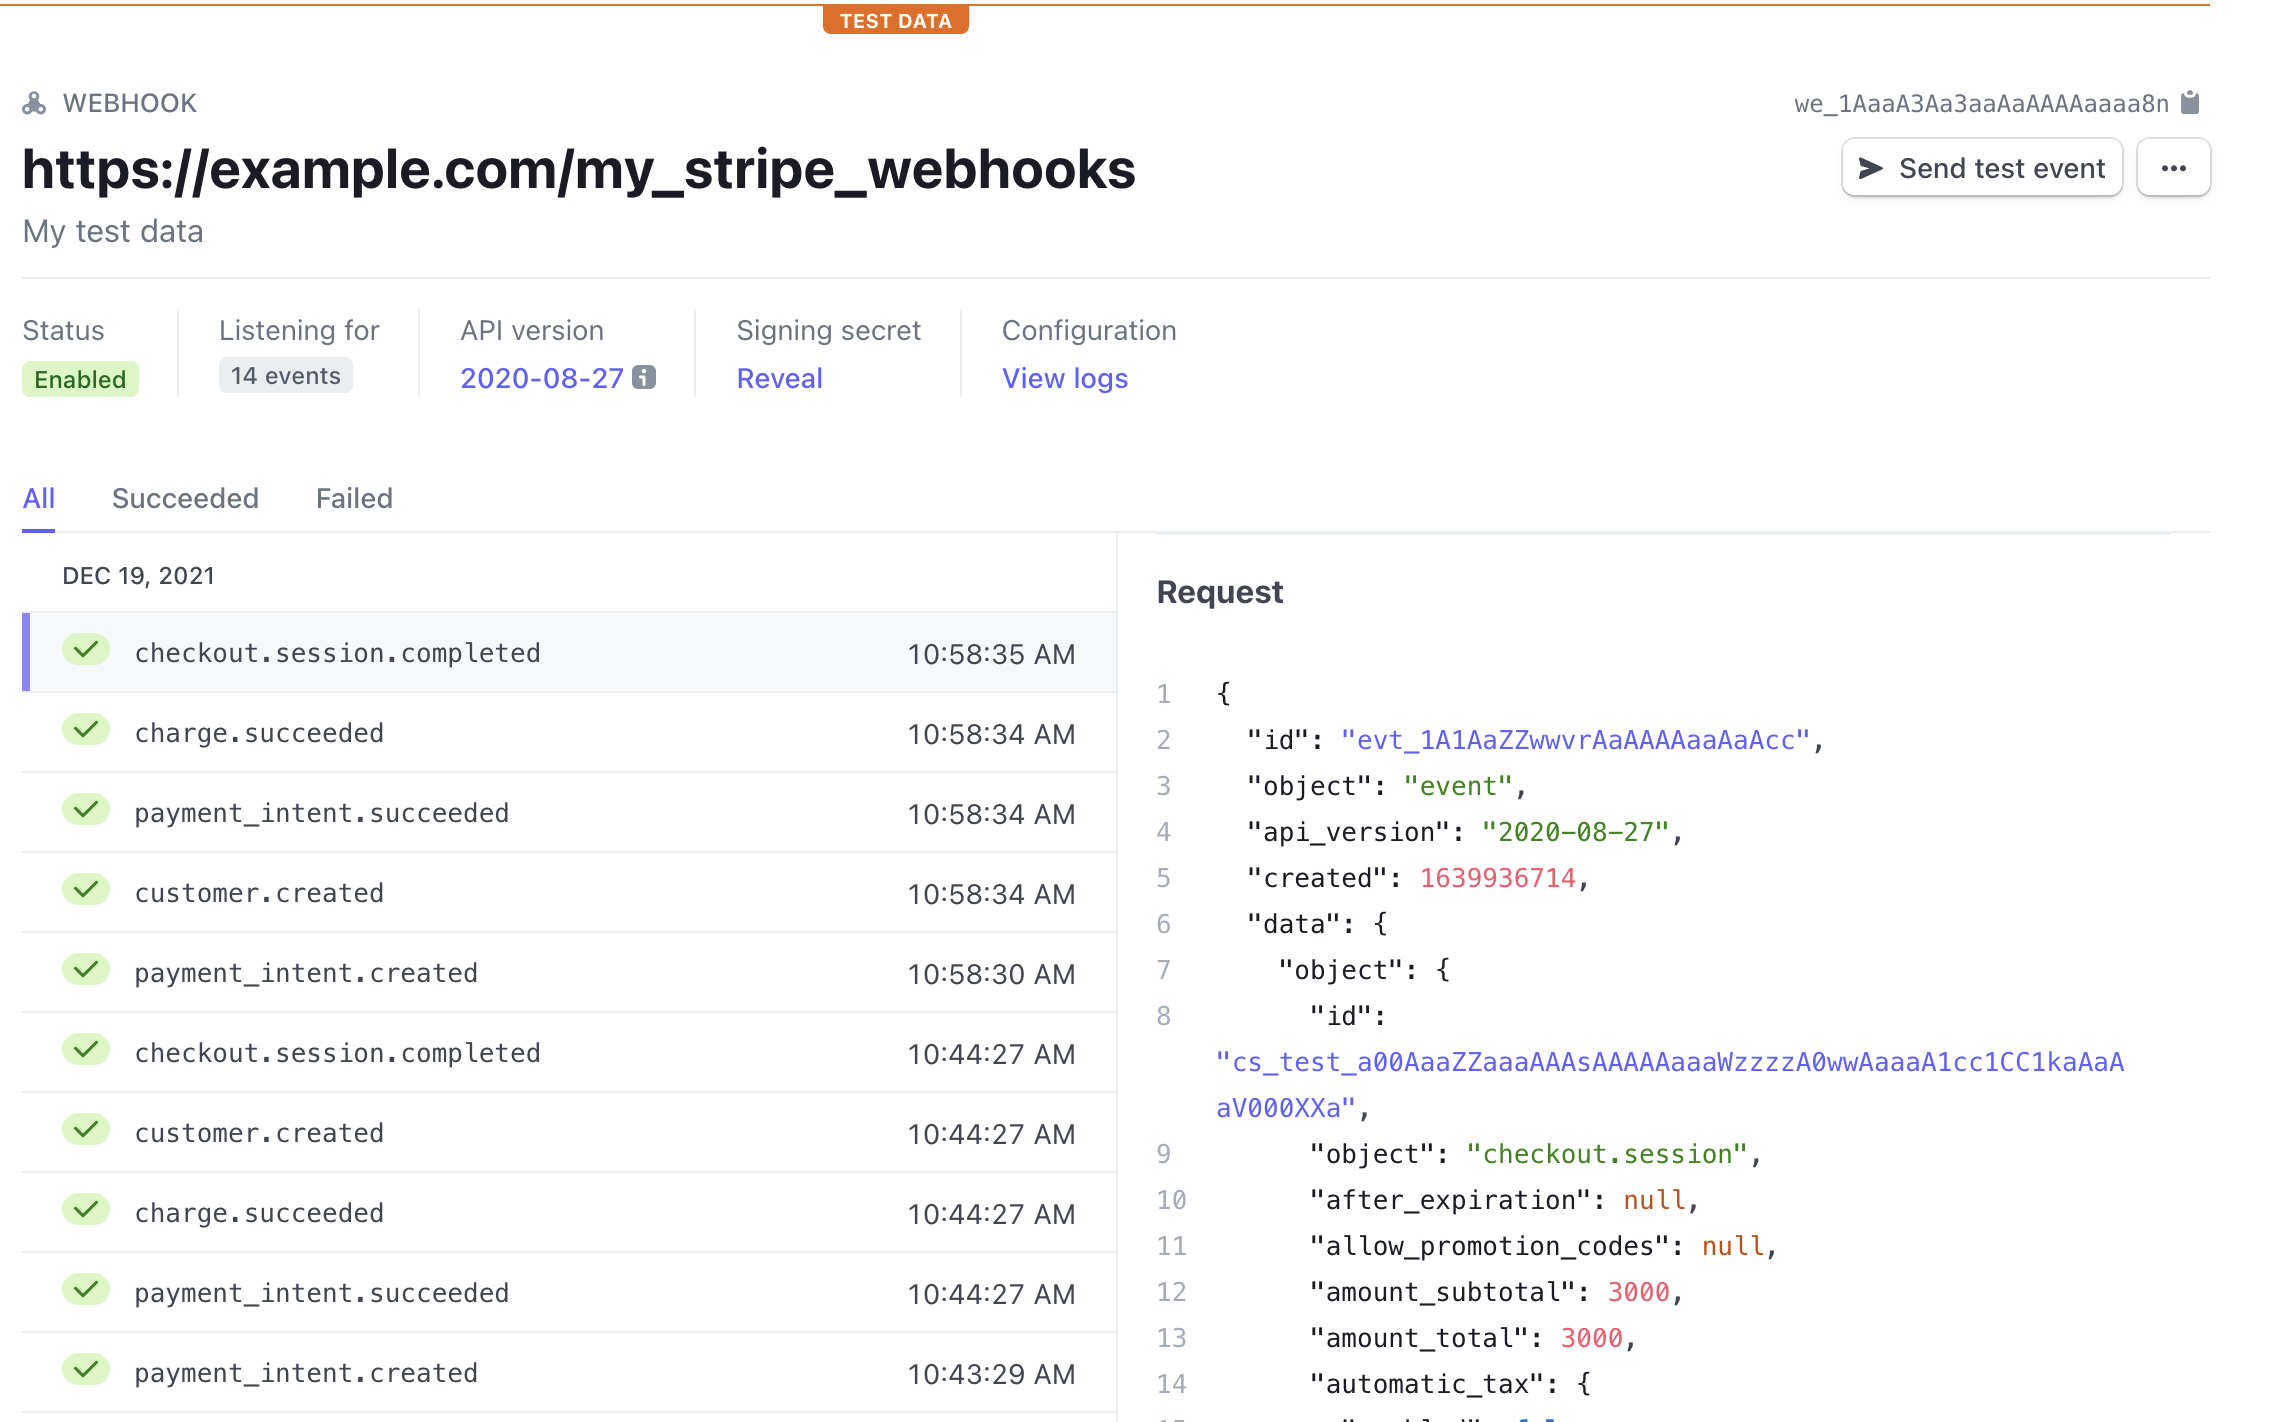
Register a webhook endpoint
Stripe needs to know where to send events. You can register up to 16 webhook endpoints with Stripe. To register your webhook endpoint, provide the publicly accessible HTTPS URL to your webhook endpoint, and select the type of events you’re receiving in your endpoint. The URL format to register a webhook endpoint is:
https://<your-website>/<your-webhook-endpoint>
For example, if your domain is https://mycompanysite.com and the route to your webhook endpoint is @app.route('/stripe_webhooks', methods=['POST']), specify https://mycompanysite.com/stripe_webhooks as the endpoint URL.
Add a webhook endpoint
Stripe supports two endpoint types, Account and Connect. Create an endpoint for Account unless you’ve created a Connect application. Use the following steps to register a webhook endpoint in the Developers Dashboard.
- Open the Webhooks page.
- Click Add endpoint.
- Add your webhook endpoint’s HTTPS URL in Endpoint URL.
- If you have a Stripe Connect account, enter a description and select Listen to events on Connected accounts.
- Select the event types you’re currently receiving in your local webhook endpoint in Select events.
- Click Add endpoint.
Test your registered webhook endpoint
Use these steps to send a test event to your registered webhook endpoint.
- Open the Webhooks page.
- Click your webhook endpoint, then click Send test webhook.
- Select an event to test, then click Send test webhook again.