The Internet Archive discovers and captures web pages through many different web crawls.
At any given time several distinct crawls are running, some for months, and some every day or longer.
View the web archive through the Wayback Machine.
Outside, the scorching heat of the British summer could not have made a starker contrast with the icy cold atmosphere of the main living room of Lord Ellington's mansion. All fifteen people sitting around it were staring at the plump Belgian private inspector, who seemed to take great pleasure in waxing his mustache and letting the audience simmer in their own sweat. Finally he spoke.
"You may have wondered why I have called all you here. It has to do with the untimely death of Lady Sybill. We have reason to believe that the three dozen stab wounds in her back were not an accident but that she was in fact ..."
He paused for effect.
"... murdered."
Madame Smith shrieked in terror and dropped her tea cup, which shattered into a million trillion pieces, each of which glittered with the sparkle of a thousand suns. Which was strange, since the curtains were closed and there were no sources of direct light in the room.
"Exactly, mon frére" he said to her, even though his mother tongue was French and he should have known not to call a woman "my brother". And also to spell his sentences properly. But who cares about trivial details such as these when there is a mystery afoot?
"And furthermore, I'm happy to tell you all that our investigation on this has finally come to a conclusion."
Poirot took off his monocle, polished it and then put it back on.
"Oui, we can finally reveal that the identity of the murderer ... will remain unknown forever. Even with our plethora of clues, we could not determine what actually happened. Whoever the murderer was, they got away scott free as we are shutting down the investigation. Mon dieu, that makes this our seventy-sixth unsuccessful murder investigation in a row!"
The audience in the salon seemed perplexed, so captain Hastings chose to interject.
"It could also be space aliens!"
"My money is on an interdimensional time travel accident" countered Inspector Japp with the calm voice of an experienced police officer.
For a while, the room was enveloped in silence. Then the house was blown up by nazis.
In the last post, I talked about how I’ve started working on Implementing active resource management in GNOME, creating an extension to track windows and setting extended attributes along with tinkering with uresourced to handle these events.
A lot of time has passed and I want to highlight how the project has progressed since then.
Updates to uresourced
uresourced is the place where most of the changes have taken place, I am done with implementing the basic structure for monitoring changes and then allocating resources. A better way to explain these changes would be to describe the modules.
We have `r-app-monitor` which recursively monitors changes to the app.slice directory and sub-directories, I.e. the cgroups inside app.slice and emits changed signals.
Then we have `r-app-policy` which on receiving these signals makes allocation decision based on 2 indicators the `timestamp`, which indicates whether the application is currently active and `boosted`, to give additional boost to a particular application regardless of it being active or not.
After having this structure in place I started working on using an additional indicator, `pipewire` in this case to allocate more CPU weight to an application currently playing audio and that’s why we have the `boosted` flag. This serves as a heuristic for detecting interactive applications so that they aren’t as throttled as non-active applications.
So having an extension which does the job of setting extended attributes on cgroup directories is fine for testing but we obviously want these things to happen in a more subtle way and that’s where mutter comes into play.
Like the PID associated with every `MetaWindow` we also plan on having a cgroup associated with it. For now it’s a GFile identifying the cgroup directory for that particular MetaWindow and hence the application. Whenever there’s a focus update detected the code takes care of updating the timestamp xattr on that application’s cgroup directory.
Talking about more places where we can utilize these cgroup features, we have currently put up a proposal to implement a way for large applications to manage multiple worker processes. This will be beneficial in providing better resource distribution and isolating bad actors.
A portal where one can manage worker processes independently of systemd will allow applications to further divide their processes into separate scopes(cgroups) and provide more information about them. The desktop environment(resource control daemons) can then act on this information if desired.
I gave my very first presentation at this years GUADEC Intern Lightning Talks and the whole event was an amazing experience for me!
Right from getting to know what other interns have been working on, to the positive feedback from people in this community. I did attend a few other talks and BoFs and was truly fascinated by the work that has been going on.
I have a plenty of stuff to talk about. But, first let's talk about my GSoC project update.
Project update:
As of now I'm two weeks away from GSoC final project evaluation deadline (August 23rd). So, I'm a bit late for the project update blog post. A quick reminder, my project is to integrate Trusted platform module (TPM) support into GNOME/libsecret. I'm happy to report that 95% of the work are completed and integration is the only part that remains.
Recently, I gave my very first talk regarding the very same topic; libsecret project update. You can find it from here. As well as the slides from here if you're interested.
My work is focused on libsecret's local storage (file-backend). Which is a new feature that allows a user to store secrets in a file. Current libsecret file-backend design support two options to encrypt the secrets/passwords inside the file database (a file). Option one is only for test purposes. And option two is using the user's login password to encrypt the file database. This design has a single point of failure. If the user's login password get compromised, then the contents of the file database get compromised too. This situation could be improved if the password is protected by hardware. So, that's when a TPM comes into play. A TPM is a physical hardware security module that performs everyday cryptographic needs. To simply put, my work is to add a third option to libsecret's file-backend design that adds TPM support. With this in place, if an attacker needs to get hold of your secrets, then they must have physical access to your computer system. In most cases this an impossible situation.
There are three APIs (API levels based on the abstraction) to work with a TPM. For our specific needs, we have decided to work with the TSS Enhanced System API (ESAPI).
Don't worry about egg_ prefix. It means the API and its implementations are in the incubation area. A place where newest/proposed features get included until they become a part of the official libsecret API or other GNOME libraries. Folks who have access to a TPM can test out these new changes by building from the source.
Lessons learned:
In my early days of the internship, I have struggled a lot. Due to lack of TPM learning and API resources. I was at a stage where I couldn't even write a single line of code for days. That's when my mentors suggested to work on a toy project. It was a huge success. So, when you're stuck with a complicated project, work on a minimal toy project.
Always work with a design doc (a simple diagram). A design doc is a simple diagram that showcase what needs to implemented. It doesn't have to be long or a fancy one. Just include enough information to get started and update as you move forward.
Apart from programming language proficiency. Git proficiency is a must. A lot of day to day programming related stress could be avoided if you're proficient in Git. So, learn Git thoroughly.
Remember to include your contact information in your presentation slides.
The new “Show Pointer” toggle in the screenshot UI
First of all, I made the window selection mode work across multiple screens and ensured that it works correctly with HiDPI and mixed DPI setups. Each screen gets its own Overview-like view of all the windows, letting you pick the one you need at your leisure.
In this and the following showcases, you can see GNOME Shell running with two virtual monitors: one regular DPI on the left, and one high DPI (200% scaling) on the right. Both virtual monitors use the same resolution, which is why the right one appears two times smaller.
Window selection working across two monitors
Next, I implemented the screen selection mode which lets you choose a full monitor to screenshot.
Screen selection with the primary monitor selected
Finally, I embarked on an adventure to add a “Show Pointer” toggle. Following the spirit of the screenshot UI, you should be able to hit your Print Screen key first and adjust the screenshot contents afterwards. That is, you should be able to show and hide the mouse pointer and see it on the preview in real-time.
But first things first: let’s figure out how to add a menu. There’s a handy PopupMenu class that you can inherit to make your own menu:
class UIMenu extends PopupMenu.PopupMenu {
    constructor(sourceActor) {
        // The third argument controls which side
        // the menu "points" to. Here the menu
        // will point to the left.
        super(sourceActor, 0, St.Side.LEFT);

        Main.uiGroup.add_actor(this.actor);
        this.actor.hide();
    }

    toggle() {
        if (this.isOpen)
            this.close(BoxPointer.PopupAnimation.FULL);
        else
            this.open(BoxPointer.PopupAnimation.FULL);
    }
}
To show the menu on a button press, we also need a PopupMenuManager:
let button = new St.Button();

let menu = new UIMenu(button);
let manager = new PopupMenu.PopupMenuManager(button);
manager.addMenu(menu);

button.connect('clicked', () => menu.toggle());
Let’s add a switch to our menu. PopupSwitchMenuItem is exactly what we need:
Pay attention to the last line. Signals.addSignalMethods() does a bit of magic that lets you use GObject signal methods (connect() and emit()) on plain JavaScript classes. In this case I use it to thread through a signal for toggling the “Show Pointer” switch.
The mouse cursor on the preview is just another St widget. Its visibility is connected to the state of the “Show Pointer” switch:
let cursor = new St.Widget();

menu.connect('show-pointer-toggled', (_menu, state) => {
    cursor.visible = state;
});

// Set the initial state.
cursor.visible = menu.showPointer;
When screenshot UI captures a snapshot of the screen, it will also snapshot the current cursor texture, position and scale. These variables are used to configure the cursor widget so it shows in the same spot in the screenshot UI as where it was on screen:
// Get a snapshot of the screen contents.
let [content, scale, cursorContent, cursorPoint, cursorScale] =
    await screenshot.to_content();

// Set the cursor texture.
cursor.set_content(cursorContent);
// Set the cursor position.
cursor.set_position(cursorPoint.x, cursorPoint.y);

// Get the cursor texture size.
let [, w, h] = cursorContent.get_preferred_size();

// Adjust it according to the cursor scale.
w *= cursorScale;
h *= cursorScale;

// Set the cursor size.
cursor.set_size(w, h);
The scale is needed mainly for HiDPI setups. Clutter operates in logical pixels, which means that, for example, on a monitor with 200% scaling, a widget with a size of 10×10 will occupy a 20×20 physical pixel area. Since get_preferred_size() returns a size in physical pixels, we need to multiply it by cursorScale to convert it to logical pixels.
With this, we have a working cursor preview in the screenshot UI:
How many layers of screenshot UI were used to take this picture?
When writing the final screenshot, we need to composite the cursor texture on the screenshot image. To do it correctly, we need to take into account scale of the screenshot texture, scale of the cursor texture, screen selection and cursor coordinates:
Shell.Screenshot.capture_from_texture(
    // The screen texture.
    texture,
    // Selected area.
    x, y, w, h,
    // Scale of the screen texture.
    scale,
    // The cursor texture.
    cursorTexture,
    // Cursor coordinates in physical pixels.
    cursor.x * scale,
    cursor.y * scale,
    // Scale of the cursor texture.
    cursorScale,
    // ...
);
With this in place, cursor capturing works perfectly across mixed screen and cursor texture scales:
Previewing and capturing the cursor in various configurations
But we’re not done yet! Time for window selection.
In window selection mode, every window gets its own cursor preview sprite since the cursor can overlap multiple windows at once:
Overlapping cursor in screen selection and window selection modes
If you thought scale handling was complicated above, brace yourself because window selection takes it a level further. Apart from the scale of the window buffer (counter-part to the screenshot texture scale from before) and the scale of the cursor texture, there’s also the scale that overview-like window selection applies to windows to fit them all on screen. To handle all of this complex positioning, I overrode the allocate() virtual function of the window preview actor:
vfunc_allocate(box) {
    this.set_allocation(box);

    // Window buffer size in physical pixels.
    let [, windowW, windowH] =
        this.content.get_preferred_size();

    // Compute window scale.
    //
    // Divide by buffer scale to convert
    // from physical to logical pixels.
    let xScale =
        (box.x2 - box.x1) /
        (windowW / this._bufferScale);
    let yScale =
        (box.y2 - box.y1) /
        (windowH / this._bufferScale);

    let cursor = this.get_child();

    // Compute cursor size in logical pixels.
    let [, , w, h] =
        cursor.get_preferred_size();
    w *= this._cursorScale;
    h *= this._cursorScale;

    // The cursor position and size.
    let cursorBox = new Clutter.ActorBox({
        x1: this._cursorPoint.x,
        y1: this._cursorPoint.y,
        x2: this._cursorPoint.x + w,
        y2: this._cursorPoint.y + h,
    });

    // Rescale it to match the window scale.
    cursorBox.x1 *= xScale;
    cursorBox.x2 *= xScale;
    cursorBox.y1 *= yScale;
    cursorBox.y2 *= yScale;

    // Allocate the cursor.
    cursor.allocate(cursorBox);
}
Finally, we need to pass these values to the recording function in a similar fashion to what we did before:
Shell.Screenshot.capture_from_texture(
    // The window texture.
    texture,
    // Special values that mean
    // "record the whole texture".
    0, 0, -1, -1,
    // Scale of the window texture.
    window.bufferScale,
    // The cursor texture.
    cursorTexture,
    // Cursor coordinates in physical pixels.
    window.cursorPoint.x * window.bufferScale,
    window.cursorPoint.y * window.bufferScale,
    // Scale of the cursor texture.
    cursorScale,
    // ...
);
Phew! Now we can lean back and enjoy window screenshots with cursor working perfectly across various screen, window and cursor scales. Don’t forget the cursor can be toggled on and off after the fact—this is what all the trouble was for!
Cursor capture on window selection
With pointer capturing implemented (although with some minor bugfixes still due), the next step is screen recording. You should be able to select an area, a monitor, or a window to record, optionally with a cursor, and start the recording. The design for what happens next is not finalized yet but a natural place to put the recording indicator and the stop button seems to be the top-right menu on the panel.
Thanks for getting all the way through the post and see you in the next update! By the way, check out my GUADEC intern lightning talk about the new screenshot UI in this YouTube recording.
Like everyone else, I’m sad that we can’t have in-person conferences at the moment, especially GUADEC. However, thanks to the lucky/privileged combination of low COVID case numbers in central Europe over the summer, vaccines being available to younger people now, and a relatively large local community in and around Berlin we were able to put together a tiny in-person GUADEC satellite event.
Despite the somewhat different context we did a surprising number of classic GUADEC activities such as struggling to make it to the venue by lunchtime, missing talks we wanted to watch, and walking around forever to find food.
As usual we also did quite a bit of hacking (on Adwaita, Fractal, and Shell among other things), and had many interesting cross-domain discussions that rarely happen outside of physical meetups.
Thanks to Elio Qoshi and Onion Space for hosting, the GNOME Foundation for sponsoring, and everyone for attending. See you all at a real GUADEC next year, hopefully!
In the previous parts of this series (part 1, part 2, part 3, part 4) we looked at how power works within GNOME, and what this means for people wanting to have an impact in the project. An important takeaway was that the most effective way to do that is to get acquainted with the project’s ethos and values, and then working towards things that align with these.
However, you have to start somewhere. In practical terms, how do you do that?
Start Small
Perhaps you have lots of big ideas and futuristic plans for the project, and your first impulse is to start working on those. However, if you’re a new contributor keep the following in mind:
There’s often important context and history around a subject that you may not be aware of yet. Having this context inform your ideas generally makes them better and easier for others to get on board with.
It’s important to build trust with the community. People are likely to be skeptical of super ambitious proposals from people they don’t know yet, and who may not stick around long term.
Learning to effectively advertise your ideas and get buy-in from various people takes time. This goes especially for bigger changes, e.g. ones which impact many different modules.
Ideally the size of the things you propose should be proportionate to how well-integrated into the community you are. Trying to do a complete rewrite of GNOME Shell as your first contribution is likely not going to result in much. Something simple and self-contained, such as an individual view in an app is usually a good place to get started.
This doesn’t mean newcomers shouldn’t dream big (I certainly did). However, realistically you’ll be more successful starting with small tasks and working your way up to larger ones as you gain a better understanding of the project’s history, the underlying technologies, and the interests of various stakeholders.
Jumping In
What exactly to do first depends on the area you’re planning on contributing to. I’ll keep this focused on the areas I’m personally most involved with and which have the most immediate impact on the product, but of course there are lots of other great ways to get involved, such as documentation, engagement, and localization.
For programming there is a newcomer guide that guides you towards your first merge request. Check out the developer portal for documentation and other resources. Beyond the newcomer projects you can of course also just look at open newcomer (and non-newcomer) issues in specific projects written in your language of choice on GNOME Gitlab.
For design it’s easiest to just reach out to the design team and ask them to help you find a good first task. Ideally you’d start working with developers on something real as soon as possible, and the design team usually know what urgently needs design at the moment.
Of course, if you’re a developer there’s also the option of starting out by writing your own third-party apps, rather than contributing to existing ones. A great third-party app is a very valuable contribution to the project, and with GNOME Circle there is a direct path to GNOME Foundation membership.
Community
Becoming a part of the community is not just about doing work. It’s also about generally being active in community spaces, whether that’s hanging out in chat rooms, interacting with fellow contributors on social media, or going to physical meetups, hackfests, and conferences.
Some starting points for that:
Join the Matrix channels for the projects you’re interested in. Depending on the channel it’s possible that not much is going on at the moment, but this tends to be seasonal. Especially app-specific channels can fluctuate wildly in activity depending on how many people are working on the app right now.
Join some of the larger “general” GNOME Matrix channels for project-wide discussions and community stuff.
Reach out to people who work on things you want to get into and ask them about ways to get involved more closely. Of course it’s important to be respectful of people’s time, but most people I know are happy to answer a few quick questions once in a while.
Come to GUADEC, LAS, or other real-world meetups. Meeting other contributors face to face is one of the best ways to truly become part of the community, and it’s a lot of fun! Once it’s possible again COVID-wise, I highly recommend attending an in-person event.
Doing the Work
If you follow the above steps and contribute on a regular basis for a few months you’ll find that you’ve organically become a part of the project.
People will start to ask your opinion about what they’re currently doing, or for you to review their work. You’ll probably specialize in one or a few areas, and maybe become the go-to person for those things. Before you know it someone will ask you if you’re coming to the next hackfest, if you’ve already got your Foundation membership, or if you’d like to become co-maintainer of a module.
If you’ve joined the project with big ideas, this is the point where you can really start moving towards making those ideas a reality. Of course, making big changes isn’t easy even as a long-time contributor. Depending on the scope of an initiative it can take months or years to get something done (for example, our adaptive apps initiative started in 2018 and is still ongoing).
However, as an experienced contributor you have the technical, social, and ideological context to push for your ideas in a way that aligns with other people’s goals and motivations. This not only makes it less likely that your plans will face opposition, but if you’re doing it right it people will join you and help make it happen.
Conclusion
This concludes my 5-part series on how power works in the GNOME community, and how to get your pet feature implemented. Sorry to disappoint if you thought it was going to be quick and easy :)
On the plus side though, it’s a chance to be part of this amazing community. The friends you make along the way are truly worth it!
While this is the end of the series as I originally planned it, there are definitely areas it doesn’t cover and that I might write about in the future. If there are specific topics you’d be interested in, feel free to leave a comment.
TL;DR: Something like an “Apps for GNOME” website might exist pretty soon. This changes nothing about existing pages. You can have a look at the current state of the website. Feedback and contributions are more than welcome.
Currently, most apps in the GNOME ecosystem are represented by a wiki page or README at our GitLab instance. All the information in these wiki pages has to be updated manually in parallel to the other sources like the AppStream MetaInfo file, the screenshots or the DOAP file. I was no longer motivated to do this work manually for my app and started looking for alternative solutions. I quickly wrote a small script that generates an app page. After showing the generated page around, several people proposed to provide such app pages in a centralized fashion for GNOME.
What app pages could provide
Having a standardized page for apps could provide a bunch of useful information to users and contributors. My main focus is less about technical information but more about how to get engaged, how to fill an issue or how to get in touch with the community around an app. Introducing the people that are involved in the apps development could help building up an emotional connection to the app and in the end maybe incentivize users to contribute their time or money to the project.
In contrast to the Flathub pages, a GNOME specific apps website could not only emphasize slightly different aspects of an app. Rather, a separate website would also allow us to provide a GNOME specific curated list of apps. This would make it easier for people to search for apps that are suitable for their desktop.
Apart from that, there are a bunch of apps that will not be available via Flathub for technical reasons (e.g. Settings, Terminal, Files) in the foreseeable future. If we could integrate them in this app pages as well they might profit from more visibility as a project.
One last thing that this project could maybe rectify is that neither our wiki nor the Flathub pages currently provides translated app information. In practice this means, if you are searching the web for a GNOME app you probably only have a chance of reaching a somewhat “official” landing page for an app if you searching in English. As Shaun McCance has recently outlined in his GUADEC talk about documentation, online search is something that we should cover if possible. Notably, translations for AppStream MetaInfo are available in GNOME Software. However, currently the data is hardly accessible anywhere else.
A sled dog makes an attempt
As it turns out, I’m not the first person with the idea to automatically generate pages for apps in GNOME. However, as far as I know, nobody has tried it yet. But so far, it does not look like an impossible feat. Meet “codename malamute.”
Malamute starts by collecting a list of all the core and GNOME Circle apps from their official lists. Next, it uses the pre-build metainfo file from Flathub to obtain the metadata, including translations, for every app. Those data are, for example, supplemented by the maintainers’ GitLab profile information. This data is fed into tera, a Jinja2-like template engine. Within less than one minute run time – and by passing over the rust compile time – we end up with about 150 MB of static page data.
What’s next
I already received some early feedback on the project. A small number of real world tests seem to suggest that the page in it’s current form could already be of use for GNOME users. For example by making them aware of the amount of useful apps that suddenly appeared as part of GNOME Circle.
The purpose of this post is mainly to reach out for broader feedback. I don’t have any conflicts with existing infrastructure on my radar, but please let me know if I am overlooking something. Maintainers can still decide to keep their app wiki pages or to role individual pages in parallel to this project. They can be (and mostly already are) linked from the apps detail page.
A topic I am personally feel very uncertain about is reusing personal data from GitLab or GitHub user profiles. In theory, all those data are public, but they are presented in a different context on app pages. It might even be legally required for people to opt-in to this feature. It would be much appreciated if someone could help me with this question.
There are a ton of technical details that still need to be implemented. The design team already indicated that they might have some words to say about my attempts at designing those pages Another issue is the quality of metadata. I think we should by no means underestimate the quality of the data that already exist! But, this is likely an area that – combined with a shiny new design for Software in GNOME 41 – might gain some new traction.
If you want to give feedback or get involved you can use the issue tracker, hit me up on Rocket.Chat or Matrix or ping me on twitter. Big thanks to everyone who helped with this project so far, especially Alexandre, Tobias, Zander and of course everyone I forgot to list here!
PS: To avoid further questions about the codename, the official name will probably change to something more generic in the future.
Catch up with Muhammet, COOL community call, plugged away
reviewing text, code, finally getting back through the mail queue
from a week away. Positive customer call, Simon N. over in person
for a pleasant meeting - nice to see people in-person.
Played Articulate with the babes, fitted new sink waste
with a slot for overflow: will be nice to have the overflow
working. Some cost-engineer shaved 1cm off the bottom (or I
ordered the wrong one) - ordered a new adjustable trap to
match; annoying.
Dug through accounts & projections for this
& next year.
Hold up, a blog post before a year’s up? I’d best slow down, don’t want to over-strain myself So, a year ago, OffscreenCanvas was starting to become usable but was missing some key features, such as asynchronous updates and text-related functions. I’m pleased to say that, at least for Linux, it’s been complete for quite a while now! It’s still going to be a while, I think, before this is a truly usable feature in every browser. Gecko support is still forthcoming, support for non-Linux WebKit is still off by default and I find it can be a little unstable in Chrome… But the potential is huge, and there are now double the number of independent, mostly-complete implementations that prove it’s a workable concept.
Something I find I’m guilty of, and I think that a lot of systems programmers tend to be guilty of, is working on a feature but not using that feature. With that in mind, I’ve been spending some time in the last couple of weeks to try and bring together demos and information on the various features that the WebKit team at Igalia has been working on. With that in mind, I’ve written a little OffscreenCanvas demo. It should work in any browser, but is a bit pointless if you don’t have OffscreenCanvas, so maybe spin up Chrome or a canary build of Epiphany.
OffscreenCanvas fractal renderer demo, running in GNOME Web Canary
Those of us old-skool computer types probably remember running fractal renderers back on their old home computers, whatever they may have been (PC for me, but I’ve seen similar demos on Amigas, C64s, Amstrad CPCs, etc.) They would take minutes to render a whole screen. Of course, with today’s computing power, they are much faster to render, but they still aren’t cheap by any stretch of the imagination. We’re talking 100s of millions of operations to render a full-HD frame. Running on the CPU on a single thread, this is still something that isn’t really real-time, at least implemented naively in JavaScript. This makes it a nice demonstration of what OffscreenCanvas, and really, Worker threads allow you to do without too much fuss.
The demo, for which you can look at my awful code, splits that rendering into 64 tiles and gives each tile to the first available Worker in a pool of rendering threads (different parts of the fractal are much more expensive to render than others, so it makes sense to use a work queue, rather than just shoot them all off distributed evenly amongst however many Workers you’re using). Toggle one of the animation options (palette cycling looks nice) and you’ll get a frame-rate counter in the top-right, where you can see the impact on performance that adding Workers can have. In Chrome, I can hit 60fps on this 40-core Xeon machine, rendering at 1080p. Just using a single worker, I barely reach 1fps (my frame-rates aren’t quite as good in WebKit, I expect because of some extra copying – there are some low-hanging fruit around OffscreenCanvas/ImageBitmap and serialisation when it comes to optimisation). If you don’t have an OffscreenCanvas-capable browser (or a monster PC), I’ve recorded a little demonstration too.
The important thing in this demo is not so much that we can render fractals fast (this is probably much, much faster to do using WebGL and shaders), but how easy it is to massively speed up a naive implementation with relatively little thought. Google Maps is great, but even on this machine I can get it to occasionally chug and hitch – OffscreenCanvas would allow this to be entirely fluid with no hitches. This becomes even more important on less powerful machines. It’s a neat technology and one I’m pleased to have had the opportunity to work on. I look forward to seeing it used in the wild in the future.
Note that I would still recommend you read the up-to-date project README if you have questions about why this project was necessary, and why a new project was started rather than building on an existing one.
The project was born out of the need to make a firmware feature available to end-users for a number of lines of Lenovo laptops for them to be fully usable on Fedora. For that, I worked with Mark Pearson from Lenovo, who wrote the initial kernel support for the feature and served as our link to the Lenovo firmware team, and Hans de Goede, who worked on making the kernel interfaces more generic.
More generic, but in a good way
With the initial kernel support written for (select) Lenovo laptops, Hans implemented a more generic interface called platform_profile. This interface is now the one that power-profiles-daemon will integrate with, and means that it also supports a number of Microsoft Surface, HP, Lenovo's own Ideapad laptops, and maybe Razer laptops soon.
The next item to make more generic is Lenovo's "lap detection" which still relies on a custom driver interface. This should be soon transformed into a generic proximity sensor, which will mean I get to work some more on iio-sensor-proxy.
Working those interactions
power-profiles-dameon landed in a number of distributions, sometimes enabled by default, sometimes not enabled by default (sigh, the less said about that the better), which fortunately meant that we had some early feedback available.
The goal was always to have the user in control, but we still needed to think carefully about how the UI would look and how users would interact with it when a profile was temporarily unavailable, or the system started a "power saver" mode because battery was running out.
The latter is something that David Redondo's work on the "HoldProfile" API made possible. Software can programmatically switch to the power-saver or performance profile for the duration of a command. This is useful to switch to the Performance profile when running a compilation (eg. powerprofilesctl jhbuild --no-interact build gnome-shell), or for gnome-settings-daemon to set the power-saver profile when low on battery.
The aforementioned David Redondo and Kai Uwe Broulik also worked on the KDE interface to power-profiles-daemon, as Florian Müllner implemented the gnome-shell equivalent.
Promised by me, delivered by somebody else :)
I took this opportunity to update the Power panel in Settings, which shows off the temporary switch to the performance mode, and the setting to automatically switch to power-saver when low on battery.
Low-Power, everywhere
Talking of which, while it's important for the system to know that they're targetting a power saving behaviour, it's also pretty useful for applications to try and behave better.
Maybe you've already integrated with "low memory" events using GLib, but thanks to Patrick Griffis you can be an event better ecosystem citizen and monitor whether the system is in "Power Saver" mode and adjust your application's behaviour.
This feature will be available in GLib 2.70 along with documentation of useful steps to take. GNOME Software will already be using this functionality to avoid large automated downloads when energy saving is needed.
Availability
The majority of the above features are available in the GNOME 41 development branches and should get to your favourite GNOME-friendly distribution for their next release, such as Fedora 35.
In a versatile tool like Inkscape, there are always features that aren’t for you. There are some that really get in your way though, like the recently added canvas rotation.
If you’re like me and constantly keep triggering it by accident (Blender zooming being Inkscape’s panning having to do with it), you’ll be happy to learn it can be completely disabled. Sip on your favorite beverage and dive into the thick preferences dialog again (Edit>Preferences), this time you’re searching for Lock canvas rotation by default in the Interface section. One more thing that might throw you off is that you need to restart Inkscape for the change to have any effect.
If you don’t wish to go nuclear on the function, do note it can be reset from the status bar bottom right.
Last time we left on the general API design. Since then I’ve been refactoring the existing animation-related code so we can reuse it for our public API. Part of that refactoring has been converting the current boxed-type adwaita animation code into a gobject class. I’ve learned a lot of how GObject works under the hood by doing so, so I expect to be a lot quicker implementing the next milestones.
After that work, which is already merged, I started working on timed animations, and moving functionality from the baseclass “adw-animation” into it, as well as starting opening the API (which was completely private until now).
I quickly prototyped a demo page for said timed animations (which is highly WIP, from design to phrasing):
One of the great attributes of SVG is that its text nature lends itself to be easily version controlled. Inkscape uses SVG as its native format (and extends it using its private namespace).
Unfortunately it uses the documents themselves to store things like canvas position and zoom state. This instantly erases one of the benefits for easy version control as every change instantly turns into unsolvable conflict.
Luckily you can at least give up the ability to store the canvas position for the greater good of not having merge conflicts, if you manage to convince your peers to change its defaults. Which is what this blog post is about :)
To change these defaults, you have to dive into the thick forrest that is Inkscape’s preferences (Edit > Preferences). You’ll find then in the Interface > Windows section. The default being the unfortunate Save and restore window geometry for each document needs to be changed either to Don't save window geometry or Remember to use last window's geometry.
From now on, rebasing icon-development-kit won’t cause any more grey hair for you!
Update: Turns out, despite me testing before posting, only Don't save window geometry is safe. Even window geometry appears to be saved into the document.
I’ve written about input before (here and here), and more recently, Carlos and myself gave a Guadec talk about input-related topics (slides). In those writings, I have explained how dead keys work, and how you can type
<dead_acute> A
to produce an Á character.
But input is full of surprises, and I’ve just learned about an alternative to dead keys that is worth presenting here.
Background
First lets recap what happens when you send the <dead_acute> A sequence to GTK.
We receive the first key event and notice that it is a dead key, so we stash it in what we call the preedit, and wait for the next event. When the next key arrives, and it represents a letter (more precisely, is in one of the Unicode categories Ll, Lu, Lt, Lm or Lo), we look up the Unicode combining mark matching the dead_acute, which is U+301 COMBINING ACUTE ACCENT, and then we flip the sequence around. So the text that gets committed is
A <combining acute>
The reason that we have to flip things around is that combining marks go after the base character, while dead keys go before.
This works, but it is a bit unintuitive for writing multi-accented characters. You have to think about the accents you want to apply from top to bottom, since they get applied backwards. For example to create an  with an acute accent on top, you type
<dead_acute> <dead_circumflex> A
which then gets flipped around and ends up as:
A <combinining circumflex> <combining acute>
A better way
To me, it feels much more natural to specify the accents in that order:
give me an A
then put a ^ on top
and then put an ´ on top
The good news is: we can do just that! Keyboard layouts can use any Unicode character as keysyms, so we can just use the combining marks directly, without the detour through dead keys.
For example, the “English (US, Intl, AltGr Unicode combining)” layout contains keys for combining marks. A slight hurdle to using this layout is that it does not show up in the GNOME Settings keyboard panel by default. You have to run
gsettings set org.gnome.desktop.input-sources show-all-sources true
to make it show up.
The combining marks in this layout are placed in a “3rd level”. To use them, you need to set up a “3rd level chooser” key. In the keyboard panel, this is called the “Alternative Characters Key”. A common choice is the right Alt key.
After all these preparations, you can now type A Alt+^ Alt+’ to get an  with an ́ on top. Neat!
For this week’s Outreachy blog post, I’ll be talking about my personal career goals, so it’ll be less GNOME/Librsvg-focused than my recent posts.
I’m looking for work!
The end of my Outreachy internship is fast approaching, and so after August 24th I’ll be available to work either full or part time. I’m currently based in Kansas, US, and I’m open to remote positions based anywhere in the world, along with relocation within the US or internationally.
Who am I?
With that bit out of the way, who am I? What experiences do I have? Do I have to write rhetorical questions? I don’t but it’s fun. To begin, I’ve been a Outreachy intern working with the GNOME Foundation on Librsvg for this cohort, and at the end of it I’ll have 3 months of Rust programming and remote work experience.
What experiences do I have?
In the realm of programming and along with Rust, I have experience using C# to write a video game in university (see things unsaid on madds.hollandart.io), and over the years I’ve used Java, Python, Lua, and PHP.
Aside from the aforementioned programming and remote experience, I also have the experience of using Linux for 9 years as my daily driver for desktop systems and 2 years for my personal server (including the blog you’re reading this on).
Tech has been a constant part of my life, I took a liking to it early on, so I have been the one others called for help for years, both in my jobs and at home. In this, I have learned to listen closely to others, to figure out what issues they’re having then come up with a solution that fits their needs, whether that’s picking laptops for a 1:1 initiative in high school, or troubleshooting multiple projector systems in theatres. I get excited when I get a new challenge, it’s a chance for me to delve into a topic or new technology I may only know a little bit, then use that knowledge to then help someone. What this means then is that I’ve spent the past few years getting better at learning new things quickly, then distilling that information down to pass on to others.
What about school?
I graduated with a bachelors degree in film and media studies, a minor in Japanese language (I can understand to about JLPT N3 or intermediate level), and a global awareness certificate. I earned several departmental awards during my time in university, two for my 360 animated project Feeling Green (see madds.hollandart.io), one for my service to the department, and another for my potential in VFX.
During university I studied abroad, worked in several research positions, a theatre, as an intern for the local Women in Film and TV group, and finally as part of the staff for the film department itself. These jobs were all technical in some way, I had to research VR and computational linguistics in my research positions, learn the wide array of film equipment and its setup and usage in my film department job, and I had to learn how to use a lighting board and its programming language at the theatre. I sought out technical jobs to do, where I would be challenged and be pushed to learn new things while having fun using interesting pieces of technology, and Outreachy is where I ended up.
Outreachy?
If you don’t know, Outreachy is an internship program which helps get underrepresented people into open source technology, so why am I a part of it? Well, I’m LGBT, and I’m neurodivergent, I understand the world from a fundamentally different place than the majority cis straight white man and I want to bring my unique perspective to a team and project. As an example, I literally see differently since I have Visual Snow Syndrome, which means that the visual style of a webpage or application (like repeating high contrast areas, like stripes, which produces a strong visual vibrating effect) can render it nearly unusable depending on how intense the effect is, a consideration for UX design that doesn’t matter for most, but can make some things inaccessible for me.
What job am I looking for?
Right now, I’m looking for a job where I can contribute to and drive forward a really cool project while honing my Rust skills and learning new ones. I am interested in systems programming, similar to what I’ve gotten a taste of working with Librsvg, so I would love to start there. I’m not limited though, as many, many other things are interesting to me too, like servers, system administration, art tools development, VR / video games programming, and so much more.
Thank you!
If you would like to get in touch, send me an email: madds@hollandart.io
Today I am happy to unveil GNOME Web Canary which aims to provide bleeding edge,
most likely very unstable builds of Epiphany, depending on daily builds of the
WebKitGTK development version. Read on to know more about this.
Until recently the GNOME Web browser was available for end-users in two
flavors. The primary, stable release provides the vanilla experience of the
upstream Web browser. It is shipped as part of the GNOME release cycle and in
distros. The second flavor, called Tech Preview, is oriented towards early
testers of GNOME Web. It is available as a Flatpak, included in the GNOME
nightly repo. The builds represent the current state of the GNOME Web master
branch, the WebKitGTK version it links to is the one provided by the GNOME
nightly runtime.
Tech Preview is great for users testing the latest development of GNOME Web, but
what if you want to test features that are not yet shipped in any WebKitGTK
version? Or what if you are GNOME Web developer and you want to implement new
features on Web that depend on API that was not released yet in WebKitGTK?
Historically, the answer was simply “you can build WebKitGTK yourself“.
However, this requires some knowledge and a good build machine (or a lot of
patience). Even as WebKit developer builds have become easier to produce thanks
to the Flatpak SDK we provide, you would still need to somehow make Epiphany
detect your local build of WebKit. Other browsers offer nightly or “Canary”
builds which don’t have such requirements. This is exactly what Epiphany Canary
aims to do! Without building WebKit yourself!
A brief interlude about the term: Canary typically refers to highly unstable
builds of a project, they are named after Sentinel species. Canary birds were
taken into mines to warn coal miners of carbon monoxide presence. For instance
Chrome has been providing Canary builds of its browser for a long time. These
builds are useful because they allow early testing, by end-users. Hence
potentially early detection of bugs that might not have been detected by the
usual automated test harness that buildbots and CI systems run.
To similar ends, a new build profile and icon were added in Epiphany, along with
a new Flatpak manifest. Everything is now nicely integrated in the Epiphany
project CI. WebKit builds are already done for every upstream commit using the
WebKit Buildbot. As those builds are made with the WebKit Flatpak SDK, they
can be reused elsewhere (x86_64 is the only arch supported for now) as long as
the WebKit Flatpak platform runtime is being used as well. Build artifacts are
saved, compressed, and uploaded to a web server kindly hosted and provided by
Igalia. The GNOME Web CI now has a new job, called canary, that generates a
build manifest that installs WebKitGTK build artifacts in the build sandbox,
that can be detected during the Epiphany Flatpak build. The resulting Flatpak
bundle can be downloaded and locally installed. The runtime environment is the
one provided by the WebKit SDK though, so not exactly the same as the one
provided by GNOME Nightly.
Back to the two main use-cases, and who would want to use this:
You are a GNOME Web developer looking for CI coverage of some shiny new
WebKitGTK API you want to use from GNOME Web. Every new merge request on the
GNOME Web Gitlab repo now produces installable Canary bundles, that can be
used to test the code changes being submitted for review. This bundle is not
automatically updated though, it’s good only for one-off testing.
You are an early tester of GNOME Web, looking for bleeding edge version of
both GNOME Web and WebKitGTK. You can install Canary using the provided
Flatpakref. Every commit on the GNOME Web master branch produces an update of
Canary, that users can get through the usual flatpak update or through their
flatpak-enabled app-store.
Update:
Due to an issue in the Flatpakref file, the WebKit SDK flatpak remote
is not automatically added during the installation of GNOME Web Canary. So it
needs to be manually added before attempting to install the flatpakref:
As you can see in the screenshot below, the GNOME Web branding is clearly
modified compared to the other flavors of the application. The updated logo,
kindly provided by Tobias Bernard, has some yellow tones and the Tech Preview
stripes. Also the careful reader will notice the reported WebKitGTK version in
the screenshot is a development build of SVN revision r280382. Users are
strongly advised to add this information to bug reports.
As WebKit developers we are always interested in getting users’ feedback. I hope
this new flavor of GNOME Web will be useful for both GNOME and WebKitGTK
communities. Many thanks to Igalia for sponsoring WebKitGTK build artifacts
hosting and some of the work time I spent on this side project. Also thanks to
Michael Catanzaro, Alexander Mikhaylenko and Jordan Petridis for the reviews in Gitlab.
For the previous week’s update check out my last post.
Week 4
While reading the documentation, I came across a bug that was leading to broken links. After some debugging and testing, I was able to fix the bug. It was due to a missing configuration in the documentation engine.
Resolved all the threads, and marked the MR ready for merge. After few more changes MR was merged, and with this one out of two project goal was achieved.
I began working towards my second milestone. Cloned the nautilus repository and spent few days understanding the codebase. I was also working on my GUADEC presentation (hopefully will write a separate blog for it :-).
Week 7
Opened MR for search by creation time in nautilus, and while writing tests for nautilus discovered a bug and fixed it.
So let’s recap a bit the state of the developers documentation website in
2021, for those who weren’t in attendance at my GUADEC 2021
presentation:
library-web is a
Python application, which started as a Summer of Code project in 2006,
whose job was to take Autotools release tarballs, explode them, fiddle
with their contents, and then publish files on the gnome.org infrastructure.
library-web relies heavily on Autotools and gtk-doc.
library-web does a lot of pre-processing of the documentation to rewrite
links and CSS from the HTML files it receives.
library-web is very much a locally sourced, organic, artisanal pile of
hacks that revolve very much around the GNOME infrastructure from around 2007-2009.
library-web is incredibly hard to test locally, even when running inside
a container, and the logging is virtually non-existent.
library-web is still running on Python 2.
library-web is entirely unmaintained.
That should cover the infrastructure side of things. Now let’s look at the content.
The developers documentation is divided in four sections:
a platform overview
the Human Interface guidelines
guides and tutorials
API references
The platform overview is slightly out of date; the design team has been
reviewing the HIG and using a new documentation
format; the guides and
tutorials still like GTK1 and GTK2 content; or how to port GNOME 2
applications to GNOME 3; or how to write a Metacity theme.
This leaves us with the API references, which are a grab bag of
miscellaneous things, listed by version numbers. Outside of the C API
documentation, the only other references hosted on developer.gnome.org are
the C++ bindings—which, incidentally, use Doxygen and when they aren’t
broken by library-web messing about with the HTML, they have their own
franken-style mash up of gtkmm.org and developer.gnome.org.
Why didn’t I know about this?
If you’re asking this question, allow me to be blunt for a second: the
reason you never noticed that the developers documentation website was
broken is that you never actually experienced it for its intended use case.
Most likely, you either just looked in a couple of well known places and
never ventured outside of those; and/or you are a maintainer, and you never
literally cared how things worked (or didn’t work) after you uploaded a
release tarball somewhere. Like all infrastructure, it was somebody else’s problem.
I completely understand that we’re all volunteers, and that things that work
can be ignored because everyone has more important things to think about.
Sadly, things change: we don’t use Autotools (that much), which means
release archives do not contain the generated documentation any more; this
means library-web cannot be updated, unless somebody modifies the
configuration to look for a separate documentation tarball that the
maintainer has to generate manually and upload in a magic location on the
gnome.org file server—this has happened for GTK4 and GLib for the past two years.
Projects change the way they lay out the documentation, or gtk-doc changes
something, and that causes library-web to stop extracting the right files;
you can look at the ATK
reference for the past year and
a half for an example.
Projects bump up their API, and now the cross-referencing gets broken, like
the GTK3 pages linking GDK2 types.
Finally, projects decide to change how their documentation is generated,
which means that library-web has no idea how to extract the HTML files, or
how to fiddle with them.
If you’re still using Autotools and gtk-doc, and haven’t done an API bump in
15 years, and all you care about is copying a release archive to the
gnome.org infrastructure I’m sure all of this will come as a surprise, and
I’m sorry you’re just now being confronted with a completely broken
infrastructure. Sadly, the infrastructure was broken for everybody else long
before this point.
What did you do?
I tried to make library-web deal with the changes in our infrastructure. I
personally built and uploaded multiple versions of the documentation for
GLib (three different archives for each release) for a year and a half; I
configured library-web to add more “extra tarball” locations for various
projects; I tried making library-web understand the new layout of various
projects; I even tried making library-web publish the gi-docgen references
used by GTK, Pango, and other projects.
Sadly, every change broke something else—and I’m not just talking about the
horrors of the code base. As library-web is responsible for determining the
structure of the documentation, any change to how the documentation is
handled leads to broken URLs, broken links, or broken redirections.
Well, the first step has been made: the new developer.gnome.org website does
not use library-web. The content has been refreshed, and more content is on
the way.
Again, this leaves the API references. For those, there are two things that
need to happen—and are planned for GNOME 41:
all the libraries that are part of the GNOMESDK run time, built by
gnome-build-meta must
also build their documentation, which will be published as part of the
org.gnome.Sdk.Docs extension; the contents of the extension will also
be published online.
every library that is hosted on gnome.org infrastructure should publish
their documentation through their CI pipeline; for that, I’m working on
a CI template file and image that should take care of the easy projects,
and will act as model for projects that are more complicated.
I’m happy to guide maintainers to deal with that, and I’m also happy to open
merge requests on various projects.
In the meantime, the old documentation is still
available as a static snapshot, and the
sysadmins are going to set up some redirections to bridge us from the old
platform to the new—and hopefully we’ll soon be able to redirect to each
project’s GitLab pages.
Can we go back, please?
Sadly, since nobody has ever bothered picking up the developers
documentation when it was still possible to incrementally fix it, going back
to a broken infrastructure isn’t going to help anybody.
We also cannot keep the old developer.gnome.org and add a new one, of
course; now we’d have two websites, one of which broken and unmaintained and
linked all over the place, and a new one that nobody knows exists.
The only way is forward, for better or worse.
What about Devhelp
Some of you may have noticed that I picked up the maintenance of
Devhelp, and landed a few fixes to
ensure that it can read the GTK4 documentation. Outside of some visual
refresh for the UI, I also am working on making it load the contents of the
org.gnome.Sdk.Docs run time extension, which means it’ll be able to load
all the core API references. Ideally, we’re also going to see a port to GTK4
and libadwaita, as soon as WebKitGTK for GTK4 is more wideley available.
After the first post, some more time was spent on building O3DE with Meson. This is the second and most likely last post on the subject. Currently the repository builds all of AzCore basic code and a notable chunk of its Qt code. Tests are not built and there are some caveats on the existing code, which will be discussed below. The rest of the conversion would most likely be just more of the same and would probably not provide all that much new things to tackle.
Code parts and dependencies
Like most projects, the code is split into several independent modules like core, testing, various frameworks and so on. The way Meson is designed is that you traverse the source tree one directory at a time. You enter it, do something, possibly recurse into subdirectories and then exit it. Once exited you can never again return to the directory. This imposes some extra limitations on project structure, such as making circular dependencies impossible, but also makes it more readable.
This is almost always what you want. However there is one exception that many projects have: the lowest layer library has no internal dependencies, the unit testing library uses that library and the tests for the core library use the unit testing library. This is not a circular dependency as such, but if the unit tests are defined in the same subdir as the core library, this causes problems as you can't return to it. This needs to be broken in some way, like the following:
Most large projects have a code generator. O3DE is no exception. Its code generator is called AutoGen and it's a Python script that expands XML using Jinja templates. What is strange is that it is only used in three places, only one of which is in the core code. Further, if you look at the actual XML source file it only has a few definitions. This seems like a heavy weighted way to go about it. Maybe someone could summon Jason Turner to constexrpify it to get rid of this codegen.
This part is not converted, I just commented out the bits that were using it.
Extra dependencies
There are several other dependencies used that seem superfluous. As an example the code uses a standalone library for MD5, but it also uses OpenSSL, which provides an MD5 implementation. As for XML parsers, there are three, RapidXML, Expat and the one from Qt (though the latter is only used in the editor).
Editor GUI
Almost all major game engines seem to write their own GUI toolkits from scratch. Therefore it was a bit surprising to find out that O3DE has gone all-in on Qt. This makes it easy to use Meson's builtin Qt 5 support, though it is not without some teething issues. First of all the code has been set up so that each .cpp file #includes the moc file generated from its header:
#include "Components/moc_DockBarButton.cpp"
Meson does things differently and builds the moc files automatically so users don't have to do things like this. They are also written in a different directory than what the existing configuration uses so this include could not work, the path is incorrect. This #include could be removed altogether, but since you probably need to support both at the same time (due to, for example, a transition period) then you'd need to do something like this:
#ifndef MESON_BUILD
#include "Components/moc_DockBarButton.cpp"
#endif
What is more unfortunate is that the code uses Qt internal headers. For some reason or another I could not make them work properly as there were missing private symbols when linking. I suspect that this is because distro Qt libraries have hidden those symbols so they are not exported. As above I just commented these out.
The bigger problem is that O3DE seems to have a custom patches in their version. At least it refers to style enum values that do not exist. Googling for the exact string produces zero relevant matches. If this is the case then the editor can not be used with official Qt releases. Further, if said patches exist, then they would need to be provided to the public as per the LGPL, since the project is providing prebuilt dependency binaries. As mentioned in the first blog post, the project does not provide original sources for their patched dependencies or, if they do, finding them is not particularly easy.
What next?
Probably nothing. It is unlikely that upstream would switch from CMake to Meson so converting more of the code would not be particularly beneficial. The point of this experiment was to see if Meson could compile O3DE. The answer for that is yes, there have not been any major obstacles. The second was to see if the external dependencies could be provided via Meson's Wrap mechanism. This is also true, with the possible exception of Qt.
The next interesting step would be to build the code on multiple platforms. The biggest hurdle here is the dependency on OpenSSL. Compiling it yourself is a bear, and there is not a Wrap for it yet. However once this merge request is merged, then you should be able to build OpenSSL as a Meson subproject transparently. Then you could build the core fully from source on any platform.
The last couple of months have been particularly busy:
A few more releases down the road, the portal permissions support in Flatseal has finally matured. I took the opportunity to fix a crash in Flatpak’s permission store and to complete its permissions API, to pave the way for existing and future Flatseal-like front ends.
I took a short break to take care of my twenty five Sugar applications. Released a new version of the BaseApp, and updated every application to the latest upstream release and GNOME runtime.
On a personal note, I have been mentoring some brilliant interns at work, which is a refreshing experience after so many months of lockdown due to COVID.
What’s new in Portfolio?
On the visuals department, this new release brings a refreshed icon by @jimmac, which looks fantastic and takes it closer to the modern art style in GNOME.
Regarding features, well, there’s quite a lot. The most noticeable one is the Trash folder.
One of my goals for Portfolio is that, for the little it does, it should just work. It shouldn’t matter what the users environment might be or how it’s being distributed. This imposes some technical challenges and, I imagine, is one of the reasons why a few file managers available on Flathub don’t provide feature parity with their non-flatpak versions.
Because of this, I prototyped different Trash folder implementations. Initially, I went for the right way and simply relied on the gvfsd. Sadly, there were a few issues with the sandbox interaction that prevented me from fulfilling my goal. Therefore, I stuck to my own implementation of freedesktop’s Trash spec. I must admit though, that I really enjoy reading these specs for Portfolio.
But there’s more!
A common issue among users, of the Flatpak version, is that they can’t see the real root directory. This is understandably confusing. Therefore, Portfolio now includes a Host device shortcut, as a best-effort attempt to mitigate this.
If you have been using Portfolio on devices with slow storage, you have probably seen that loading screen a few times when opening folders. I will eventually get around to something more elaborated but, for the time being, I reduced these load times with a bit of cache.
Among other improvements, there are now proper notifications when removing devices, filtering and sorting options will persist between sessions, and the files view will restore its scroll position to the previous directory when navigating back.
As for the bugs, kudos to @craftyguy for fixing a couple ones that prevented Portfolio to run on Postmarket OS.
After getting thouroughly nerd-sniped a few weeks back, we now have FreeBSD support through qemu in the freedesktop.org ci-templates. This is possible through the qemu image generation we have had for quite a while now. So let's see how we can easily add a FreeBSD VM (or other distributions) to our gitlab CI pipeline:
.freebsd: variables: FDO_DISTRIBUTION_VERSION: '13.0' FDO_DISTRIBUTION_TAG: 'freebsd.0' # some value for humans to read
Now, so far this may all seem quite familiar. And indeed, this is almost exactly the same process as for normal containers (see Part 1), the only difference is the .fdo.qemu-build base template. Using this template means we build an image babushka: our desired BSD image is actual a QEMU RAW image sitting inside another generic container image. That latter image only exists to start the QEMU image and set up the environment if need be, you don't need to care what distribution it runs out (Fedora for now).
Because of the nesting, we need to handle this accordingly in our script: tag for the actual test job - we need to start the image and make sure our jobs are actually built within. The templates set up an ssh alias "vm" for this and the vmctl script helps to do things on the vm:
# copy our current working directory to the VM # (this is a yaml multiline command to work around the colon) - | scp -r $PWD vm:
# Run the build commands on the VM and if they succeed, create a .success file - /app/vmctl exec "cd $CI_PROJECT_NAME; meson builddir; ninja -C builddir" && touch .success || true
# Copy results back to our run container so we can include them in artifacts: - | scp -r vm:$CI_PROJECT_NAME/builddir .
# kill the VM - /app/vmctl stop
# Now that we have cleaned up: if our build job before # failed, exit with an error - [[ -e .success ]] || exit 1
Now, there's a bit to unpack but with the comments above it should be fairly obvious what is happening. We start the VM, copy our working directory over and then run a command on the VM before cleaning up. The reason we use touch .success is simple: it allows us to copy things out and clean up before actually failing the job.
Obviously, if you want to build any other distribution you just swap the freebsd out for fedora or whatever - the process is the same. libinput has been using fedora qemu images for ages now.
The type system at the base of our platform, GType, has various kinds of derivability:
simple derivability, where you’re allowed to create your derived version of an existing type, but you cannot derive your type any further;
deep derivability, where you’re allowed to derive types from other types;
An example of the first kind is any type inheriting from GBoxed, whereas an example of the second kind is anything that inherits from GTypeInstance, like GObject.
Additionally, any derivable type can be marked as abstract; an abstract type cannot be instantiated, but you can create your own derived type which may or may not be “concrete”. Looking at the GType reference documentation, you’ll notice various macros and flags that exist to implement this functionality—including macros that were introduced to cut down the boilerplate necessary to declare and define new types.
The G_DECLARE_* family of macros, though, introduced a new concept in the type system: a “final” type. Final types are leaf nodes in the type hierarchy: they can be instantiated, but they cannot be derived any further. GTK 4 makes use of this kind of types to nudge developers towards composition, instead of inheritance. The main problem is that the concept of a “final” type is entirely orthogonal to the type system; there’s no way to programmatically know that a type is “final”—unless you have access to the introspection data and start playing with heuristics about symbol visibility. This means that language bindings are unable to know without human intervention if a type can actually be inherited from or not.
In GLib 2.70 we finally plugged the hole in the type system, and we introduced the G_TYPE_FLAG_FINAL flag. Types defined as “final” cannot be derived any further: as soon as you attempt to register your new type that inherits from a “final” type, you’ll get a warning at run time. There are macros available that will let you define final types, as well.
Thanks to the “final” flag, we can also include this information into the introspection data; this will allow language bindings to warn you if you attempt at inheriting from a “final” type, likely using language-native tools, instead of getting a run time warning.
If you are using G_DECLARE_FINAL_TYPE in your code you should bump up your GObject dependency to 2.70, and switch your implementation from G_DEFINE_TYPE and friends to G_DEFINE_FINAL_TYPE.
Thanks to the work done by Josè Expòsito, libinput 1.19 will ship with a new type of gesture: Hold Gestures. So far libinput supported swipe (moving multiple fingers in the same direction) and pinch (moving fingers towards each other or away from each other). These gestures are well-known, commonly used, and familiar to most users. For example, GNOME 40 recently has increased its use of touchpad gestures to switch between workspaces, etc. Swipe and pinch gestures require movement, it was not possible (for callers) to detect fingers on the touchpad that don't move.
This gap is now filled by Hold gestures. These are triggered when a user puts fingers down on the touchpad, without moving the fingers. This allows for some new interactions and we had two specific ones in mind: hold-to-click, a common interaction on older touchscreen interfaces where holding a finger in place eventually triggers the context menu. On a touchpad, a three-finger hold could zoom in, or do dictionary lookups, or kill a kitten. Whatever matches your user interface most, I guess.
The second interaction was the ability to stop kinetic scrolling. libinput does not actually provide kinetic scrolling, it merely provides the information needed in the client to do it there: specifically, it tells the caller when a finger was lifted off a touchpad at the end of a scroll movement. It's up to the caller (usually: the toolkit) to implement the kinetic scrolling effects. One missing piece was that while libinput provided information about lifting the fingers, it didn't provide information about putting fingers down again later - a common way to stop scrolling on other systems.
Hold gestures are intended to address this: a hold gesture triggered after a flick with two fingers can now be used by callers (read: toolkits) to stop scrolling.
Now, one important thing about hold gestures is that they will generate a lot of false positives, so be careful how you implement them. The vast majority of interactions with the touchpad will trigger some movement - once that movement hits a certain threshold the hold gesture will be cancelled and libinput sends out the movement events. Those events may be tiny (depending on touchpad sensitivity) so getting the balance right for the aforementioned hold-to-click gesture is up to the caller.
As usual, the required bits to get hold gestures into the wayland protocol are either in the works, mid-flight or merge-ready so expect this to hit the various repositories over the medium-term future.
Now that Text Editor has spell checking integrated I needed a way to print without displaying tags such our “misspelled word” underline squiggles. So GtkSourceView 5.2 will include gtk_source_print_compositor_ignore_tag() to do the obvious thing.
Previously, If you wanted to do this, you had to remove all your tags and then print, only to restore them afterwards. This should be a lot more convenient for people writing various GtkSourceView-based text editors. Although, I’m suspect many of them weren’t even doing this correctly to begin with, hence this PSA.
GUADEC 2021 took place July 21 – 25. This year’s conference was to be held online and last five days. The first two days of the conference, July 21 – 22, was dedicated to presentations. The 23 – 24 were Birds of a Feather sessions and workshops, and the last day will be for social activities.
The latest release of GNOME Internet Radio Locator 12.0.1 features 4 Free Radio Transmissions from San Francisco, California (SomaFM Groove Salad, SomaFM The Trip, SomaFM Dub Step Beyond, and SomaFM DEF CON).
Hey everyone! Welcome to my new blog post. This post will tell you about my mid-point progress and something related to the project expectations, “actual vs. expected.” I am currently working on “Making GNOME Asynchronous!”. If you’re interested in reading more about my project, kindly read this blog post where I explained what my project is all about.
Let’s start by talking about my original internship project timeline
I had to solve two major issues in my internship project. So I created two significant tasks in the timeline for issue#1 and issue#2. Then I divided the central issue of this internship which is issue#2, into multiple jobs.
Until my 8th week of internship, I completed all the tasks specified for May and June ’21. In addition, I have implemented the annotations without using heuristics. And also added the tests specified in the Second half of the Internship timeline.
The changes I would make in the timeline if I were starting the project over.
What exactly should a timeline represent? Should it tell us all about the tasks to be completed by the end of the tenure? or should it be seen as a decision-making tool?
I misunderstood it as the former one, but it represents the latter one. Due to this, I didn’t focus on prioritising the tasks and sub-tasks while creating the timeline. As a result, I had to prioritise the tasks while working on them, which took up a lot of my time.
There might be times when things occur differently from what you had initially planned. If we look at the kinds of adaptations that we can make to a timeline. The first kind is, When we do have information, in the beginning, but we didn’t use it optimally, and the other is when we uncover new information and need to adapt. Let’s understand both of these adaptations using some examples.
As seen in the “accomplished goals” section, I’m glad that even after modifying the expectations, I completed the tasks till the 8th week according to the expectations set in the timeline. And then came the GUADEC’21 (GNOME community conference). I was very enthusiastic about participating in the “Intern lightning talk” at the GUADEC’21, scheduled for 23rd July ’21. I spent a whole week in preparation, which as a result, affected my timeline, and I had to modify the expectations again. As the first kind of adaptation states, I should have taken the information about GUADEC into account while creating the timeline.
As for the second kind, the timeline I created with the given information was realistic. Still, software engineering is a constant process of uncovering new information, which we must adapt to. Like in my project, “I didn’t realise that the annotation had to be added to girparser.py as well.” The problem with this kind of adaptation is that one cannot foresee it. So even if I were to start over the project, I would not be able to adapt it in the timeline, which is totally acceptable.
There might be many aspects that can become obstacles for you to abide by your timeline.
In my case, If I were to start over the project, I would talk to the projects’ mentor to determine a smaller scope for the project and prioritise what parts are to be completed, leaving the rest unfinished. It will eliminate the timeline fluctuations and improve production time. In addition to that, I would also try to add GUADEC to the timeline
My new plan for the second half of the internship
Mid-July’21 (from 9th week)
GUADEC preparation (till 23rd July’21)
Implementing the func using the heuristic for FUNC annotation
August’21
Adding the gobject-introspection APIs that is C API’s g_callable_infor_get_async_func and g_callable_infor_get_finish_func for accessing the change in GJS
Adding these changes in GJS to use this new GObject-introspection feature
We are making progress and will continue to make it better!
I’m almost done with my actual implementation and will be ready to move on to the Stretch goals of my internship soon enough. This project has taught me many new things. There were times when I felt exhausted, but my mentor is very supportive. Without his guidance, I wouldn’t have achieved what I’ve accomplished so far. This internship is indeed going to be the most wonderful part of my life. I’m learning a lot and am excited to work on my next task. I am looking forward to learning more.
Earlier today I saw a social-media post saying, essentially, “Microsoft ought to release its new emoji font as FOSS!” with the addendum that doing so would “give some competition to Noto,” which the post-writer claimed to love. Doesn’t matter who wrote it. You do see people ostensibly in the FOSS community say stuff like that on a fairly frequent basis.
For starters, though, begging for a proprietary software vendor to re-license its product under FOSS terms is, at best, a wild misinterpretation of Why Vendors Do What They Do. Microsoft doesn’t re-license products on a whim, or even because they’re asked nicely, and they don’t decide to make something open source / free software accidentally. When they do it, it’s because a lot of internal offices have debated it and weighed the options and all that other corporate-process stuff. I think that’s fairly well-understood, so let’s skip to the font-specific parts.
That original post elicits eye-rolls in part because it undervalues fonts and emoji, as if the ONLY way that end users are going to get something of quality is if a “better” (read: proprietary) project makes it for them and then takes pity and releases into the wild. It also elicits some eye-rolls because it smacks of “ragequit Google products”, although naturally it’s hard to know if that’s really happening behind the scenes or not. I’m pretty active on Mastodon, and one of the peculiarities of the “fediversal” mindset is that there are a lot of folks with a knee-jerk reaction of hating on any software project deemed too-close-for-comfort with one of the Big Suspicious Vendors. It can be hard to adequately extract & reframe material from that pervasive context. So who can say; maybe there’s none of that.
Un-regardless, the bit in the original post that’s most obviously and demonstrably off-base in the suggestion that Noto is in want of competition on the “FOSS emoji” front in the first place. I can think of four other FOSS-emoji-font projects off the top of my head.
But it got me thinking I wonder how many such projects there are, in total, since I’m certain I’m not up-to-date on that info. A couple of years ago, I made a list, so I at least had a start, but I decided to take a few minutes to catalog them just for procrastination’s sake. Consider this a spiritual sequel/spin-off of the earlier “how many font licenses are there” post. Here’s a rough approximation, loosely grouped by size & relationship:
Noto Emoji (Color) [src] — the obvious one, referred to above.
Noto Emoji B&W [same repo, different build] — which you might not be as familiar with. This is an archived black-and-white branch (think “IRC and terminal”) which is still available. Interested parties could pick it back up, since it’s FOSS.
Blobmoji [src] — this is another fork of Noto, in color, but which preserves the now-dropped “blob” style of smiley/person. [Side note: most emoji fonts these days are color-only; I’ll point out when they’re not. Just flagging the transition here.]
Twemoji [src] — This is the other giant, corporate-funded project (developed by Twitter) which everyone ought to be familiar with.
EmojiTwo [src] — This is perhaps the biggest and most active of the not-part-of-another-project projects. It’s a fork of the older EmojiOne [src] font, which in classic fashion used to be FOSS, then got taken proprietary as of its 3.0 release.
EmojiOne Legacy [src] — This is the last available FOSS(ish; depending on who you ask) version of EmojiOne, said to be c. version 1.5.4. As the name implies, not being developed. If you take a liking to it, clone the repo because it could go away.
EmojiOne 2.3 / Adobe [src] — This is another rescue-fork (I think we need a better word for that; hit me up) created by Adobe Fonts, around EmojiOne 2.3.
FxEmojis [src] — This is a no-longer-developed font by Mozilla, originally part of the FirefoxOS project. I tested a FirefoxOS phone back in the day. It was a little ahead of its time; perhaps the emoji were as well…?
Adobe Source Emoji [src] — This is a black-and-white emoji font also by Adobe Fonts, originally designed for use in Unicode Consortium documents. Does not seem to be actively updated anymore, however.
Openmoji [src] — This is a pure-FOSS project on its own, which includes both color and black-and-white branches.
Symbola [src] — This is an older emoji font that predates a lot of more formalized FOSS-font-licensing norms. But it is still there.
GNU Unifont [src] — Last but not quite least, Unifont is not a traditional font at all, but a fallback pan-Unicode BMP font in dual-width. It does, however, technically include emoji, which is quite an undertaking.
Emojidex [src] — Last and certainly least is Emojidex, a fork-by-the-same-author of an older emoji font project named Phantom Open Emoji. Both the older project (despite its name) and the new one have a hard-to-parse, not-really-free, singleton license that I suspect is unredistributable and likely self-contradictory. But it seems like the license quirks are probably more to be chalked up to being assembled by a non-lawyer and not reviewed, rather than being intentionally hard on compatibility. So who knows. If you get curious, maybe it’d be an easy sell to persuade the author to re-evaluate.
I’m sure there are more. And that’s not even getting into other symbol-font projects (which are super popular, especially among chat & social app developers for flair and reaction stickers). Just Raw Unicode Code Point stuff.
Making an emoji font is a LOT of hard work. Maintaining one is a LOT of hard work, too. The visual assets take a tremendous amount of time to design and hone for consistency and test; the engineering and font-building process is extremely difficult (with different font-compilation toolchains and different source-file editors than other fonts, not to mention the fact that there are multiple binary formats and the files themselves are utterly massive in size when compared to other font binaries).
Most of the fonts above are not packaged for Debian/Ubuntu nor, I’d be willing to wager, for many other distributions. So there’s a big, unprotected barn-side project there. The Noto Color emoji font is, because, well, it builds, thanks to the toolchain the team maintains. Want to find one from a different source and revive it or freshen & update it?
All of the above projects are under-staffed. So if you actually care about FOSS emoji fonts, they’re where you should start contributing.
This is Part 4 in a series about the Discovery Docs initiative, which I will present about in my upcoming GUADEC talk. In Part 1: Discovering Why, I laid the groundwork for why I think we should focus our docs on discovery. In Part 2: Templates and Taxonomies, I talked about how to structure topics differently to emphasize learning. In Part 3: Voice and Style, I proposed using a more casual, direct writing style. In this post, I’ll look at increasing reader engagement.
“Nobody reads the docs.” This is a common complaint, a cliché even. It has some truth to it, but it misses the bigger picture. For this post, the more important point is that people don’t often seek out the docs. So if we’re writing interesting material, as I’ve discussed throughout this blog series, how do we reach interested people?
This post is all about how we encourage people to discover.
Help menus
I have been trying to rethink help menus for over a decade. From the venerable Help ▸ Contents, to the Help item in the deprecated app menu, to the Help item in the hamburger menu, Help has always been a blind target. What’s on the other side of that click? A helpful tutorial? A dusty manual? An anthropomorphic paperclip? Who knows.
This design presents the users with topics that are relevant to what they’re doing right now. In these mockups, the example topics are mostly simple tasks. As I’ve discussed in this blog series, I want to move away from those. Combining this design with longer learning-based material can encourage people to explore and learn.
Learning
Speaking of learning, is “Help” even the right term anymore? That word is deeply ingrained in UI design. (Remember right-aligned Help menus in Motif applications?) And it fits well with the bite-sized tasks we currently write, probably better than it fit old manuals. But does it fit content focused on learning and discovery? Are people looking for help at all?
As we shift our focus, perhaps we should shift our language toward the word “Learn”. Use “Learn” instead of “Help” whenever it appears in the UI. Change the docs website from help.gnome.org to learn.gnome.org. Rename the app to something like “Help & Learning”.
Side note: I’ve never been a fan of the help buoy icon, and have always preferred the question mark in a blue circle. Somebody smart might be able to think of something even better for learning, although there’s also value in sticking with iconography that people know.
Web design
I mentioned the docs website. It needs more than a new URL. The current site uses an old design and is difficult to maintain. We have a documentation team initiative to redo the site using a documentation build tool designed to do these kinds of things. Here’s what it looks like at the moment:
This is extremely important for the docs team, regardless of whether we shift to learning-based content or not.
Visual presentation makes a difference in how people feel about your documentation. For comparison, imagine using GNOME 40 with the same user interaction, but using the boxy beveled aesthetics of GNOME 1. It’s just not as exciting.
To that end, it would be good to open up our designs to more people. I don’t scale when it comes to chasing design trends. The styling has been locked up in XSLT, which not many people are familiar with. One thing I did recently was to move the CSS to separate template files, which helps me at least. For a more radical change, I’ve also spent a bit of time on doing document transforms and styling entirely with JavaScript, Handlebars, and Sass. Unfortunately, I don’t have the bandwidth to finish that kind of overhaul as a free time project.
Social media
Imagine we have interesting and exciting new content that people enjoy reading. Imagine it’s all published on a visually stunning new website. Now what? Do we wait for people to stumble on it? Remember that the focus is on discovery, not stumbling.
Any well-run outreach effort meets people where they are. If you run a large-scale project blog or resource library, you don’t just quietly publish an article and walk away. You promote it. You make noise.
If we have topics we want people to discover, we should do what we can to get them in front of eyeballs. Post to Twitter. Post to Reddit. Set up a schedule of lessons to promote. Have periodic themes. Tie into events that people are paying attention to. Stop waiting for people to find our docs. Start promoting them.
Sometimes when we transition from one route to another, it takes a little time to do so due to different factors. Behind the scenes, it may be rendering a complex page component or doing an API call. In such cases, the app looks like it has frozen for some seconds and then suddenly transitions to the next route. This results in a poor UX. In such cases, it is better to add a progress bar to our application which gives our users a sense that something is loading.
In this tutorial, we learn how to implement a progress bar in a Next.js application.
A progress update for my Outreachy internship on Librsvg. Also, GUADEC is happening this week, are you registered?
Learning
My first steps into working on this internship with Librsvg was learning about what to learn about. From Rust to the internals of Librsvg itself, I had a lot of unfamiliar things thrust at me, but I used the bits of time I had the first weeks and poured time into learning about everything I could for this project. I tried to go into this with as much of an open mind as I could, learning about all these new things with eagerness. Largest on the to-do list was organizing what needed to be done, so I did what I generally do and made a list! I listed out in a spreadsheet a subset of the features SVG 2 had added, then Federico (my mentor, maintainer of Librsvg and GNOME co-founder, for those of you not seeing this post on planet GNOME) and I sorted that list, removed things that weren’t applicable, and added things that were, until we got a more detailed list up on the Librsvg Gitlab wiki.
First Bits of Code
Following this first step, Federico gave me some tasks to focus on, so I got to coding! The first task I worked on was implementing orient=”auto-start-reverse” as a property for the marker element. This required changing quite a few files and learning a lot about how the code fit together for the orientation and rendering of markers, but Federico walked me through the code to help me learn how it all fit together, leaving notes for how it should be implemented, and after a long walkthrough of the code with a lot of notes, I got to working on it. It was a bit rough, especially with me fighting Git to actually get everything in order, but Federico helped me along the way to finally get it done and the merge request made! Git can be a very complex and annoying machine to a newcomer, and my experience with it was (and still is) no exception.
One example of auto-start-reverse is this train map, this is the fixed version.
The original image, see the grey arrows that point where the lines go? From Wikimedia: https://commons.wikimedia.org/wiki/File:S-Bahn_RheinNeckar2020.svg (SVG is GPLv3)
Following that was another set of changes that required learning an entirely different part of the code, context-fill and context-stroke for the marker element, or allowing an element to get its fill and stroke from another object by context (context meaning a convoluted process of inheritance that depends on the element being referenced). This also took a tour of the code to get implemented, which was exciting, as it delved more deeply with the rendering code and how it all fit together, and how elements got their final colors from the SVG file all the way to the final render. It was fascinating to learn about the rendering pipeline and the process of all the property values getting their values parsed and stored (something which I’m about to tackle more in depth in the future). It’s still work-in-progress for the second half, implementing for the use element, but it’s close to being done!
This is one of the tests for context fill and stroke, with this one being the fixed version, here the circles on the green line and corners of the blue square render how they’re supposed to.
This is how it used to render, the differences are especially noticeable on the circles on the green bar, and the corners of the blue square.
Learning Some More
This was the step where I learned the most about Git, and how to use it in a way that wasn’t my old ‘everything goes on the main branch and I’ll just delete it and re-download when it is too much to handle or I need to sync with the main repository’ method of making it work. Now I make a new branch, keep my main branch in sync with the upstream, and can even merge new changes to main back into the changes I made in the separate branch! It’s a wondrous boost to my ease of use and happiness.
Aside from that, I spent an evening making some scripts to run a docker image of OpenSUSE on my Fedora machine to then run the Librsvg test suite inside of it. It was fun, as I had last worked with Docker when running Nextcloud through it, so learning how to work with it in a slightly less complex environment was quite educational. So now there’s a fairly functional set of scripts to run the test suite in a OpenSUSE, Fedora, or Debian docker container, for all your development needs! These scripts also allowed Federico to debug a sporatic memory bug that’s been crashing our Gitlab CI for a while, which was eventually traced back to a bug with Pango and has been fixed upstream!
The next feature I tackled after that was implementing paint-order for text, which allows someone to specify whether a bit of text’s fill is supposed to go on top of or below the stroke, or outline. It’s a very useful feature, and this is the first feature that I completed the first draft of without too much assistance. It was awesome seeing it working when I finished. See here:
This is one of the tests for paint-order on text, with the right ‘pizazz’ being marked to have the fill on top of the stroke.
This is how it used to render, with the right one having the fill completely hidden by the stroke.
After that I began working on auto width and height for image, rect, and SVG elements. This feature varies depending on the element it’s applied to, but the part of the code that needed to be modified was about the same for each of them, so I was able to get it mostly done by myself with just some questions and feedback on it. This was also the first changes where I practiced using Git to merge my mess of commits down into one to ease merging upstream, which was really satisfying to understand how to use.
GUADEC & The Future
Finally, we’re to the present day! GUADEC is this week, and I’ll be participating in the intern lighting talks on Friday, so make sure to register for it and attend! Learning about so many different things and becoming a part of this community has been an amazing experience so far, I’m very thankful for the past half of the internship and so excited about the future. Thank you!
This is Part 3 in a series about the Discovery Docs initiative, which I will present about in my upcoming GUADEC talk. In Part 1: Discovering Why, I laid the groundwork for why I think we should focus our docs on discovery. In Part 2: Templates and Taxonomies, I talked about how to structure topics differently to emphasize learning. In this post, I’ll talk about how we should write to be engaging, but still clear.
One of the main goals of Discovery Docs is to be more engaging and to create enthusiasm. It’s hard to create enthusiasm when you sound bored. Just as your speaking voice can either excite or bore people, so too can your writing voice affect how people feel while reading. Boring docs can leave people feeling bored about the software. And in a world of short-form media, boring docs probably won’t even be read.
This post has been the hardest in the series for me to write. I’ve been in the documentation industry for two decades, and I’ve crafted a docs voice that is deliberately boring. It has been a long learning process for me to write for engagement and outreach.
To write for engagement, we need to adopt a more casual voice that addresses the reader directly. This isn’t just a matter of using the second person. We do that already when giving instructions. This is a matter of writing directly to the reader. Think about how blog posts are often written. Think about how I’m writing this blog post. I’m talking to you, as if I’m explaining my thoughts to you over a cup of coffee.
This doesn’t mean our writing should be filled with needless filler words, or that we should use complicated sentences. Our writing should still be direct and concrete. But it can still be friendly and conversational. Let’s look at an example.
#1: Some users need to type accented characters that are not available on their keyboards. A number of options are available.
#2: You may need to type accented characters that are not available on your keyboard. There are a number of ways you can do this.
#3: Maybe you need to type an accented character that’s not on your keyboard. You have a few options.
#1 is stuffy. It talks about hypothetical users in the third person. It is stiff and boring, and it uses too many words. Don’t write like this.
#2 is more direct. It’s how most of our documentation is written right now. There’s nothing wrong with it, but it doesn’t feel exciting.
#3 is more casual. It uses the fewest words. It feels like something I would actually say when talking to you.
Using a more casual and direct voice helps get readers excited about the software they’re learning about. It makes learning feel less like grunt work. A combination of exciting material and an engaging writing style can create docs that people actually want to read.
What’s more, an engaging writing style can create docs that people actually want to write. Most people don’t enjoy writing dry instructions. But many people enjoy writing blogs, articles, and social media posts that excitedly show off their hard work. Let’s excitedly show off our hard work in our docs too.
I have been following the “This Week in Matrix” blog series with great interest for some time now, and wondered:“Why isn’t there something like this for GNOME?”
To summarize the principle in a few words: A short, weekly summary in which maintainers briefly announce what they worked on for the past week.
For example, the following may be included in a weekly summary:
General news about a project
Presentation of new projects
New features
Instructions / Tutorials
Conferences / Meetings
General interesting thoughts that might be of public interest
… and much more! Just scroll through the Matrix blog and you”ll understand the principle very quickly.
After discussing the idea with other GNOME members, and agreeing that this is an idea with great potential, I started to implement the necessary technical requirements. We ran it as an experiment with a reduced set of maintainers. Here is our very first issue!
Read through the blog post – it’s full of exciting news, and that’s just the beginning!
How does it work?
A user sends a message in the TWIG matrix room, mentioning the bot at the beginning of the message:
The bot will automatically recognize this message, and save it. In order for this message to appear in the next summary, it must be approved by an editor. This is done by adding the “” emoji (only editors have this permission).
Likewise, editors can add messages to a specific section, or to a specific project.
In this example I have done the following
: I have approved this message.
: I have added the project description “Shortwave” to this message
: I have added this message to the “Circle Apps” section.
When a week has passed, an editor will create a new summary: this is a list of all the pieces people have been reporting since the last summary. To issue it, an editors runs the “!render-file” command in the administration room.
All collected messages with related information will be summarized in a markdown document. This can be used to create a new blog post using Hugo for example.
The message shown above would result in the following (raw markdown preview using Apostrophe):
The technical basis for this is hebbot – a matrix bot I developed in Rust using the matrix-rust-sdk. I tried to make this bot as generic and adaptable as possible, so that other communities can reuse it.
There have already been failed attempts to do monthly summaries, so why should it work with a weekly rhythm?
There are several reasons why it is very difficult to publish a monthly summary blog in the long term:
The time period is too long. A lot happens in one month. The longer the period, the more difficult (and time-consuming!) it is to summarize what has happened. Do you remember what you did in detail during this month? No? Neither do I.
Someone had to prepare the information so it could be shared in the form of a blog post. Either a central editor does this, or the submitter does it themselves. Either way, it’s a tedious and time-consuming process that many people don’t want to do.
TWIG has the following advantages here:
It’s super easy and quick to share news. You just need to open your chat client and send a short message to the TWIG room. You just finished a new feature on your project? Send a short (!) message about it, so that it will appear in the next weekly summary. A few words and maybe a screenshot/video are totally sufficient, no need to write a detailed blog post! Fire and forget!
The administrative workload is very low. An editor only has to approve and categorize the messages, the bot does the rest completely automatically.
Let’s show the world together what we do!
I’ve been involved in the GNOME project for quite some time now, and can say from personal experience that an outsider has absolutely no idea how much valuable work is being done behind the scenes.
Give the community the opportunity to share information with a large mass. GNOME Foundation members have access to the WordPress infrastructure, but there are many members who are not part of the Foundation. For TWIG, in principle, information can be shared by anyone, no matter who, as long as it is relevant to GNOME and newsworthy.
News first hand. We all know what happens when news / information gets out to the public via 5 different detours. Most of the time important information is lost or distorted. With TWIG there is a reliable and central source of truth.
Attract interested people / newcomers. The more people become aware of something / see what is happening, the more interest there will be.
Let us know what you’re working on, what cool feature you have released, or what bugs you have fixed! Join #thisweek:gnome.org and drop a message, we’ll do the rest!
GUADEC 2021 is less than a week away!Please make sure toregister online for the conference if you have not done so yet.
GUADEC is the GNOME community’s main conference. This year’s event takes place remotely between July 21st-25th and featurestalks from many community members and contributors covering a range of subjects.
GUADEC 2021 also features two fantastic keynote speakers.
The first, Shauna Gordon-McKeon, programmer and community organizer, will present on July 21 at 20:30 UTC. The second, Hong Phuc Dang, the founder of FOSSASIA, will present on July 22 at 15:00 UTC.
Don’t forget about the social events! Our GUADEC 2021 schedule is packed with post-conference social activities. You can find all the details online.
No GUADEC would be complete without a new t-shirt. The GUADEC 2021 event shirt is available for purchased on the GNOME Shop.
More information about GUADEC 2021 is available on the official event page.
Hope you enjoy it!
Particpants walking outside of the GUADEC 2018 venue
This summer I’m implementing a new screenshot UI for GNOME Shell. In this post I’ll show my progress over the past two weeks.
The new screenshot UI in the area selection mode
I spent the most time adding the four corner handles that allow you to adjust the selection. GNOME Shell’s drag-and-drop classes were mostly sufficient, save for a few minor things. In particular, I ended up extending the _Draggable class with a drag-motion signal emitted every time the dragged actor’s position changes. I used this signal to update the selection rectangle coordinates so it responds to dragging in real-time without any lag, just as one would expect. Some careful handling was also required to allow dragging the handle past selection edges, so for example it’s possible to grab the top-left handle and move it to the right and to the bottom, making it a bottom-right handle.
Editing the selection by dragging the corner handles
I’ve also implemented a nicer animation when opening the screenshot UI. Now the screen instantly freezes when you press the Print Screen button and the screenshot UI fades in, without the awkward screenshot blend. Here’s a side-by-side comparison to the previous behavior:
Comparison of the old and new opening animation, slowed down 2×
Additionally, I fixed X11 support for the new screenshot capturing. Whereas on Wayland the contents of the screen are readily available because GNOME Shell is responsible for all screen compositing, on X11 that’s not always the case: full-screen windows get unredirected, which means they bypass the compositing and go straight through the X server to the monitor. To capture a screenshot, then, GNOME Shell first needs to disable unredirection for one frame and paint the stage.
This X11 capturing works just as well as on Wayland, including the ability to capture transient windows such as tooltips—a long-requested feature. However, certain right-click menus on X11 grab the input and prevent the screenshot UI hotkey (and other hotkeys such as Super to enter the Overview) from working. This has been a long-standing limitation of the X11 session; unfortunately, these menus cannot be captured on X11. On Wayland this is not a problem as GNOME Shell handles all input itself, so windows cannot block its hotkeys.
Finally, over the past few days I’ve been working on window selection. Similarly to full-screen screenshots, every window’s contents are captured immediately as you open the screenshot UI, allowing you to pick the right window at your own pace. To capture the window contents I use Robert Mader’s implementation, which I invoke for all windows from the current workspace when the screenshot UI is opening. I arrange these window snapshots in a grid similar to the Overview and let the user pick the right window.
Window selection in action
As usual, the design is nowhere near finished or designer-approved. Consider it an instance of my “programmer art”.
My goal was to re-use as much of the Overview window layout code as possible. I ended up making my own copy of the WorkspaceLayout class (I was able to strip it down considerably because the original class has to deal with windows disappearing, re-appearing and changing size, whereas the screenshot UI window snapshots never change) and directly re-using the rest of the machinery. I also made my own widget compatible with WindowPreview, which exports the few functions used by the layout code, once again considerably simplified thanks to not having to deal with the ever changing real windows.
The next step is to put more work into the window selection to make sure it handles all the different setups and edge cases right: the current implementation is essentially the first working draft that only supports the primary monitor. Then I’ll need to add the ability to pick the monitor in the screen selection mode and make sure it works fine with different setups too. I also want to figure out capturing screenshots with a visible cursor, which is currently notably missing from the screenshot UI. After that I’ll tackle the screen recording half.
Also, unrelated to the screenshot UI, I’m happy to announce that my merge request for reducing input latency in Mutter has finally been merged and should be included in Mutter 41.alpha.
That’s it for this post, see you in the next update!
This only affects GNOME Nightly, if you are using the stable runtimes you have nothing to worry about
It’s that time of the year again. We’ve updated the base of the GNOME Nightly Flatpak runtime to the Freedesktop-SDK 21.08 beta release.
This brings lots of improvements and updates to the underlying toolchain, but it also means that between yesterday and today, there is an ABI break and that all your Nightly apps will need to be rebuilt against the newer base.
Thankfully this should be as simple as triggering a new Gitlab CI pipeline. If you merge anything that will also trigger a new build as well.
I suggest you also take the time to set up a daily scheduled CI job so that your applications keep up with runtime changes automatically, even if there hasn’t been new activity in the app for some time. It’s quite simple.
Go to the your project, Settings -> CI/CD -> Schedules -> New schedule button -> Select the daily preset.
After reading “Community Power Part 4: The GNOME Way“, unlike the other articles of the series, I was left with a bittersweet taste in my mouth. Strangely, reading it triggered some intense negative feelings on me, even if I fundamentally agree with many of the points raised there. In particular, the “The Hows” and “In Practice” sections seemed to be the most intense triggers.
Reading it over and over and trying to understand the reason I had such strong reactions gave me some insights that I’d like to share. Perhaps they could be useful to more people, including to the author of article.
On Pronouns
I think one of the misleading aspects of the article is the extensive usage of “we” and “us”. I’d like to remind the reader that the article is hosted on a personal blog, and thus its content cannot be taken as an official statement of the GNOME community as a whole. I’m sure many members of the community read this “Community Power” series as “Tobias’ interpretation of the dynamics of the community”, but this may not be clear to people outside of this community.
In this particular article, I feel like the usage of these plural pronouns may have had a bad side effect. They seem to subtly imply that the GNOME community think and act on a particular way – perhaps even contradicting the first part of the series – which is not a productive way to put it.
On Nuance And Bridges
The members of the GNOME community seem to broadly share some core values, yes, and these values permeate many aspects of daily interactions in varying degrees. Broad isn’t strict, though, and there actually is a surprising amount of disagreement inside the community. Most of the times, I think this is beneficial to both personal and collective growth. Ideas rarely go uncontested. There is nuance.
And nuance is precisely where I think many statements of the article fail.
Let’s look at an example:
Shell extensions are always going to be a niche thing. If you want to have real impact your time is better invested working on apps or GNOME Shell itself.
If I take the individual ideas, they make sense. Yes, contributing to GNOME Shell itself, or apps themselves, is almost always a good idea, even if it takes more time and energy. Yes, Shell extensions fill in the space for very specialized features. So, what’s the problem then?
Let me try and analyze this backwards, from how I would have written this sentence:
Shell extensions aren’t always the best route. If a particular feature is deemed important, contributing to GNOME Shell directly will have a much bigger impact. Contributors are encouraged to share their ideas and contribute upstream as much as possible.
Writing it like this, I think, gives a stronger sense of building bridges and positive encouragement while the core of the message remains the same. And I think that is achieved by getting rid of absolutes, and a better choice of words.
Compare that to the original sentence. “Niche” doesn’t necessarily convey a negative meaning, but then it is followed by “if you want to have real impact […]“, implying that niche equals unsubstantial impact. “Your time is better invested” then threateningly assumes the form of “stop wasting your time“. Not only it seems to be an aggressive way of writing these ideas, but it also seems to put down the efforts of contributors who spent time crafting extensions that help the community.
It burns bridges instead of building them.
Another example:
The “traditional desktop” is dead, and it’s not coming back. Instead of trying to bring back old concepts like menu bars or status icons, invent something better from first principles.
These are certainly bold statements! However, it raises some questions:
Is the “traditional desktop” really dead? I’m sure the people using Windows and Mac outnumber people using GNOME by many degrees of exponentiality. Or perhaps was Tobias only thinking about the experience side of things?
Is it really not coming back?
Are old concepts necessarily bad? Do they need to be reinvented?
I am no designer or user experience expert, evidently. I’m just playing the devil’s advocate here. These are unsubstantiated claims that do sound almost dogmatic to me. In addition to that, saying that a tradition is dead cannot be taken lightly. It is, in essence, a powerful statement, and I think it’s more generally productive to avoid it. Perhaps it could have been written in a less threatening and presumptuous way?
Let’s try and repeat the rewriting exercise above. Here’s my take:
GNOME’s focus on getting out of the way, and creating meaningful and accessible interfaces, conflicted with many elements that compose what we call the “traditional desktop”, such as menus and status icons. We set ourselves on a hard challenge to invent better patterns and improve the experience of using the desktop, and we feel like we are progressing the state of the art of the desktop experience.
My goal was to be less confrontational, and evoke the pride of working on such a hard problem with a significant degree of success. What do you, reader, think of this rewritten sentence?
Epilogue
To conclude this piece, I’m honestly upset with the original article that was discussed here. Over the past few years, I and many others have been working hard to build bridges with the extended community, specially extension developers, and it’s been extremely successful. I can clearly see more people coming together, helping the platform grow, and engaging and improving GNOME. I personally reviewed the first contribution of more than a dozen new contributors.
It seems to me that this article comes in the opposite direction: it puts down people for their contributions; it generates negativity towards certain groups of the extended GNOME community; it induces readers into thinking that it is written on the behalf of the GNOME community when it is not.
Now that it is already out there, there is little I can do. I’m writing this hoping that it can undo some of the damage that I think the original article did. And again: despite using “we” and “us” extensively, the article is only the Tobias’ personal interpretation of the community.
Github recently announced Copilot, a machine learning system that makes suggestions for you when you're writing code. It's apparently trained on all public code hosted on Github, which means there's a lot of free software in its training set. Github assert that the output of Copilot belongs to the user, although they admit that it may occasionally produce output that is identical to content from the training set.
Unsurprisingly, this has led to a number of questions along the lines of "If Copilot embeds code that is identical to GPLed training data, is my code now GPLed?". This is extremely understandable, but the underlying issue is actually more general than that. Even code under permissive licenses like BSD requires retention of copyright notices and disclaimers, and failing to include them is just as much a copyright violation as incorporating GPLed code into a work and not abiding by the terms of the GPL is.
But free software licenses only have power to the extent that copyright permits them to. If your code isn't a derived work of GPLed material, you have no obligation to follow the terms of the GPL. Github clearly believe that Copilot's output doesn't count as a derived work as far as US copyright law goes, and as a result the licenses on the training data don't apply to the output. Some people have interpreted this as an attack on free software - Copilot may insert code that's either identical or extremely similar to GPLed code, and claim that there are no license obligations created as a result, effectively allowing the laundering of GPLed code into proprietary software.
I'm completely unqualified to hold a strong opinion on whether Github's legal position is justifiable or not, and right now I'm also not interested in thinking about it too much. What I think is more interesting is what the impact of either position has on free software. Do we benefit more from a future where the output of Copilot (or similar projects) is considered a derived work of the training data, or one where it isn't? Having been involved in a bunch of GPL enforcement activities, it's very easy to think of this as something that weakens the GPL and, as a result, weakens free software. That was my initial reaction, but that's shifted over the past few days.
Let's look at the GNU manifesto, specifically this section:
The fact that the easiest way to copy a program is from one neighbor to another, the fact that a program has both source code and object code which are distinct, and the fact that a program is used rather than read and enjoyed, combine to create a situation in which a person who enforces a copyright is harming society as a whole both materially and spiritually; in which a person should not do so regardless of whether the law enables him to.
The GPL makes use of copyright law to ensure that GPLed work can't be taken from the commons. Anyone who produces a derived work of GPLed code is obliged to provide that work under the same terms. If software weren't copyrightable, the GPL would have no power. But this is the outcome Stallman wanted! The GPL doesn't exist because copyright is good, it exists because software being copyrightable is what enables the concept of proprietary software in the first place.
The powers that the GPL uses to enforce sharing of code are used by the authors of proprietary software to reduce that sharing. They attempt to forbid us from examining their code to determine how it works - they argue that anyone who does so is tainted, unable to contribute similar code to free software projects in case they produce a derived work of the original. Broadly speaking, the further the definition of a derived work reaches, the greater the power of proprietary software authors. If Oracle's argument that APIs are copyrightable had prevailed, it would have been disastrous for free software. If the Apple look and feel suit had established that Microsoft infringed Apple's copyright, we might be living in a future where we had no free software desktop environments.
When we argue for an interpretation of copyright law that enhances the power of the GPL, we're also enhancing the power of giant corporations with a lot of lawyers on hand. So let's look at this another way. If Github's interpretation of copyright law holds, we can train a model on proprietary code and extract concepts without having to worry about being tainted. The proprietary code itself won't enter the commons, but the ideas it embodies will. No more worries about whether you're literally copying the code that implements an algorithm you want to duplicate - simply start typing and let the model remove the risk for you.
There's a reasonable counter argument about equality here. How much GPL-influenced code is going to end up in proprietary projects when compared to the reverse? It's not an easy question to answer, but we should bear in mind that the majority of public repositories on Github aren't under an open source license. Copilot is already claiming to give us access to the concepts embodied in those repositories. Do these provide more value than is given up? I honestly don't know how to measure that. But what I do know is that free software was founded in a belief that software shouldn't be constrained by copyright, and our default stance shouldn't be to argue against the idea that copyright is weaker than we imagined.
(Edit: this post by Julia Reda makes some of the same arguments, but spends some more time focusing on a legal analysis of why having copyright cover the output of Copilot would be a problem)
Gingerblue music recording session screen. Click “Next” to begin session.
The default name of the musician is extracted from g_get_real_name(). You can edit the name of the musician and then click “Next” to continue ((or “Back” to start all over again) or “Finish” to skip the details).
Type the name of the musical song name. Click “Next” to continue ((or “Back” to start all over again) or “Finish” to skip any of the details).
Type the name of the musical instrument. The default instrument is “Guitar”. Click “Next” to continue ((or “Back” to start all over again) or “Finish” to skip any of the details).
Type the name of the audio line input. The default audio line input is “Mic” ( gst_pipeline_new("record_pipe") in GStreamer). Click “Next” to continue ((or “Back” to start all over again) or “Finish” to skip the details).
Enter the recording label. The default recording label is “GNOME” (Free label). Click “Next” to continue ((or “Back” to start all over again) or “Finish” to skip the details).
Enter the Computer. The default station label is a Fully-Qualified Domain Name (g_get_host_name()) for the local computer. Click “Next” to continue ((or “Back” to start all over again) or “Finish” to skip the details).
Notice the immediate, live recording file. The default immediate, live recording file name falls back to the result of g_strconcat(g_get_user_special_dir(G_USER_DIRECTORY_MUSIC), "/", gtk_entry_get_text(GTK_ENTRY(musician_entry)), "_-_", gtk_entry_get_text(GTK_ENTRY(song_entry)), "_[",g_date_time_format_iso8601 (datestamp),"]",".ogg", NULL) in gingerblue/src/gingerblue-main.c
Click on “Cancel” once in GNOME Gingerblue to stop immediate recording and click on “Cancel” once again to exit the application (or Ctrl-c in the terminal).
The following Multiple-Location Audio Recording XML file [.gingerblue] is created in G_USER_DIRECTORY_MUSIC (usually $HOME/Music/ on American English systems):
You’ll find the recorded Ogg Vorbis audio files along with the Multiple-Location Audio Recording XML files in g_get_user_special_dir(G_USER_DIRECTORY_MUSIC) (usually $HOME/Music/) on GNOME 40 systems configured in the American English language.
The appstream specification, used for appdata files for apps on Linux, supports specifying what input devices and display sizes an app requires or supports. GNOME Software 41 will hopefully be able to use that information to show whether an app supports your computer. Currently, though, almost no apps include this metadata in their appdata.xml file.
Please consider taking 5 minutes to add the information to the appdata.xml files you care about. Thanks!
If your app supports (and is tested with) touch devices, plus keyboard and mouse, add:
Note that there may be updates to the definition of display_length in appstream in future for small display sizes (phones), so this might change slightly.
Another example is what I’ve added for Hitori, which supports touch and mouse input (but not keyboard input) and which works on small and large screens.
See the full specification for more unusual situations and additional examples.


 Another issue is the quality of metadata. I think we should by no means underestimate the quality of the data that already exist! But, this is likely an area that – combined with a shiny new design for Software in GNOME 41 – might gain some new traction.

 So, a year ago, OffscreenCanvas was starting to become usable but was missing some key features, such as asynchronous updates and text-related functions. I’m pleased to say that, at least for Linux, it’s been


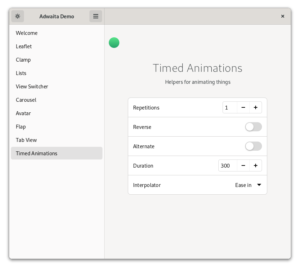


 . It shouldn’t matter what the users environment might be or how it’s being distributed. This imposes some technical challenges and, I imagine, is one of the reasons why a few file managers available on Flathub don’t provide feature parity with their non-flatpak versions.


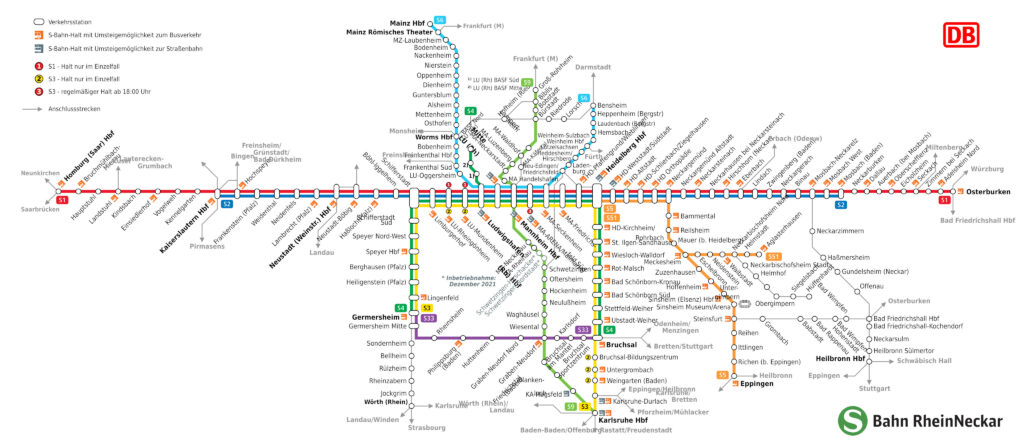


 ” emoji (only editors have this permission).
 : I have added the project description “Shortwave” to this message
 : I have added this message to the “Circle Apps” section.


