Medusa Portrait by Zara Alfonso
Oh my god MARRY ME
Rinku! Rinku Rinku Rinku! ‘Long Hair’!!!
Oh goodness! This is beautiful!

Rinku | ace | non-binary he/they | Art blog for fandom stuff. Mainly Sanders Sides.
Please don’t post my art on other sites, thanks. Icon by the amazing Kieraelieson.
Medusa Portrait by Zara Alfonso
Oh my god MARRY ME
Rinku! Rinku Rinku Rinku! ‘Long Hair’!!!
Oh goodness! This is beautiful!

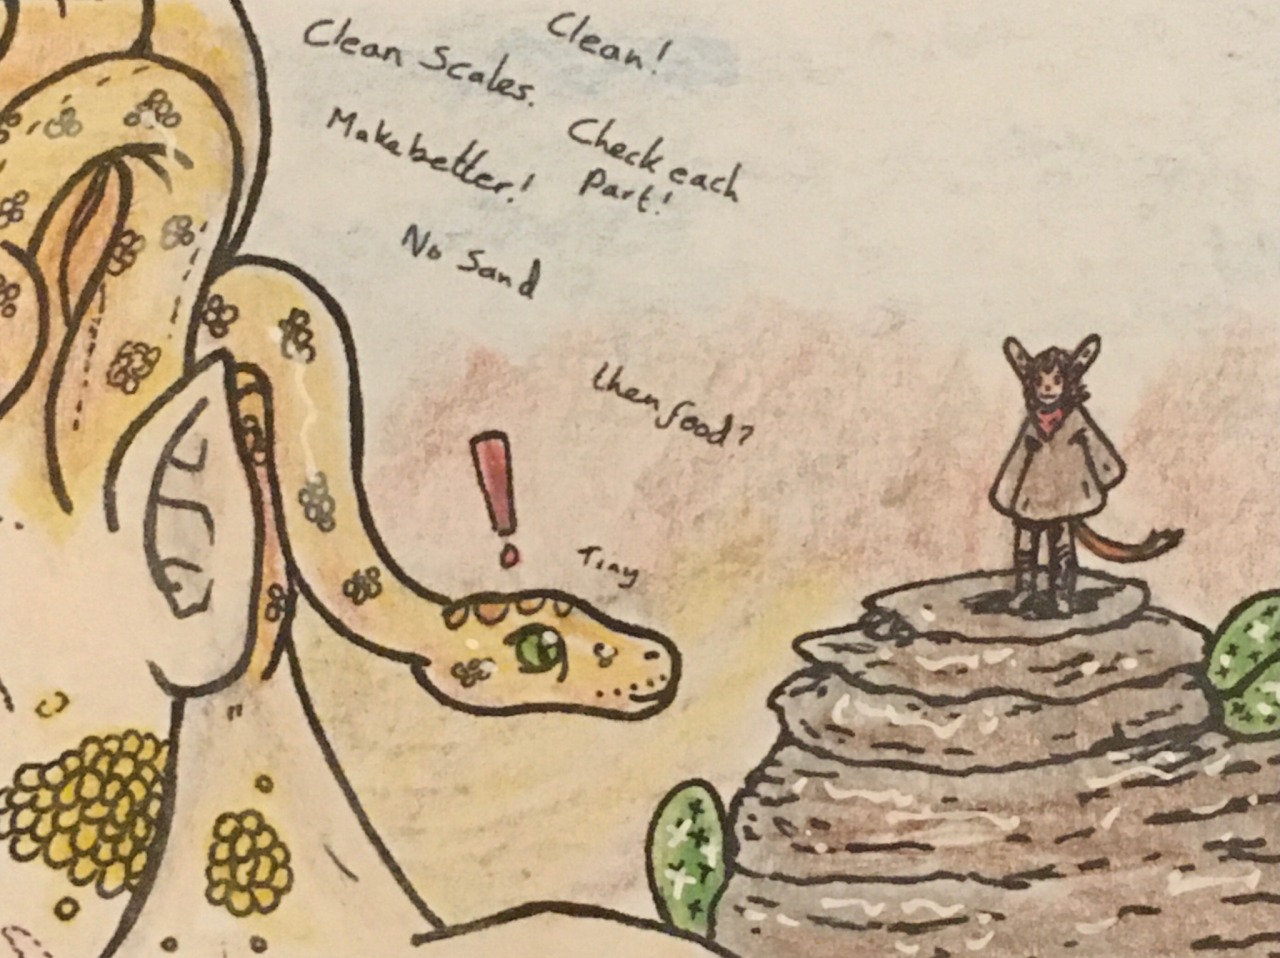
Extra arms for all the important things.
Petting snakes and fixing attire.
(Click for better quality.)
Anonymous asked:
I have an art idea!
(you don't have to draw if you don't want to)
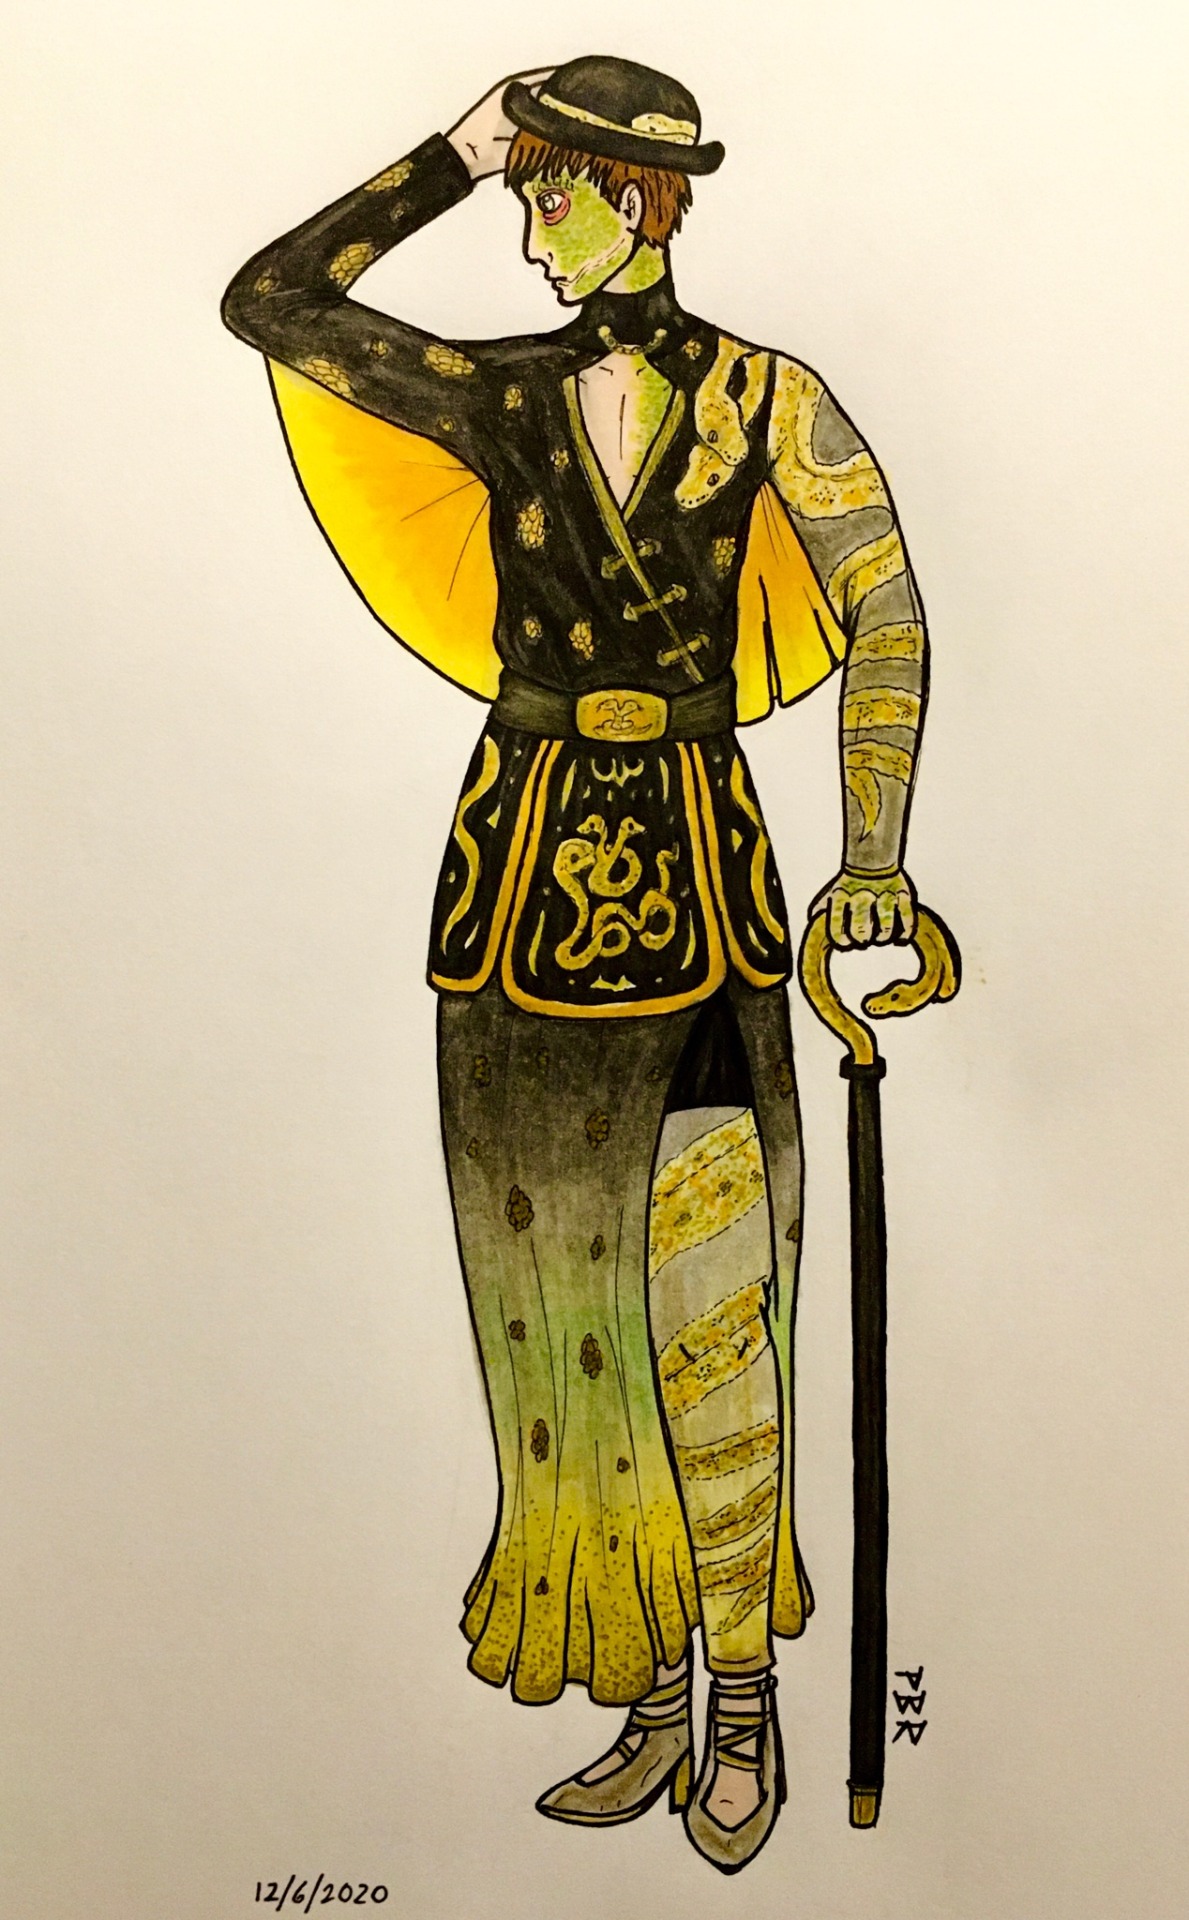
What ifffffff, for example: Roman exchanges his sword with Janus' cane.
Can`t see Roman just giving away his sword.
Might be best to ask Janus first…
———–


——–
Thanks for the ask anon. This was fun.
(Click for better quality.)
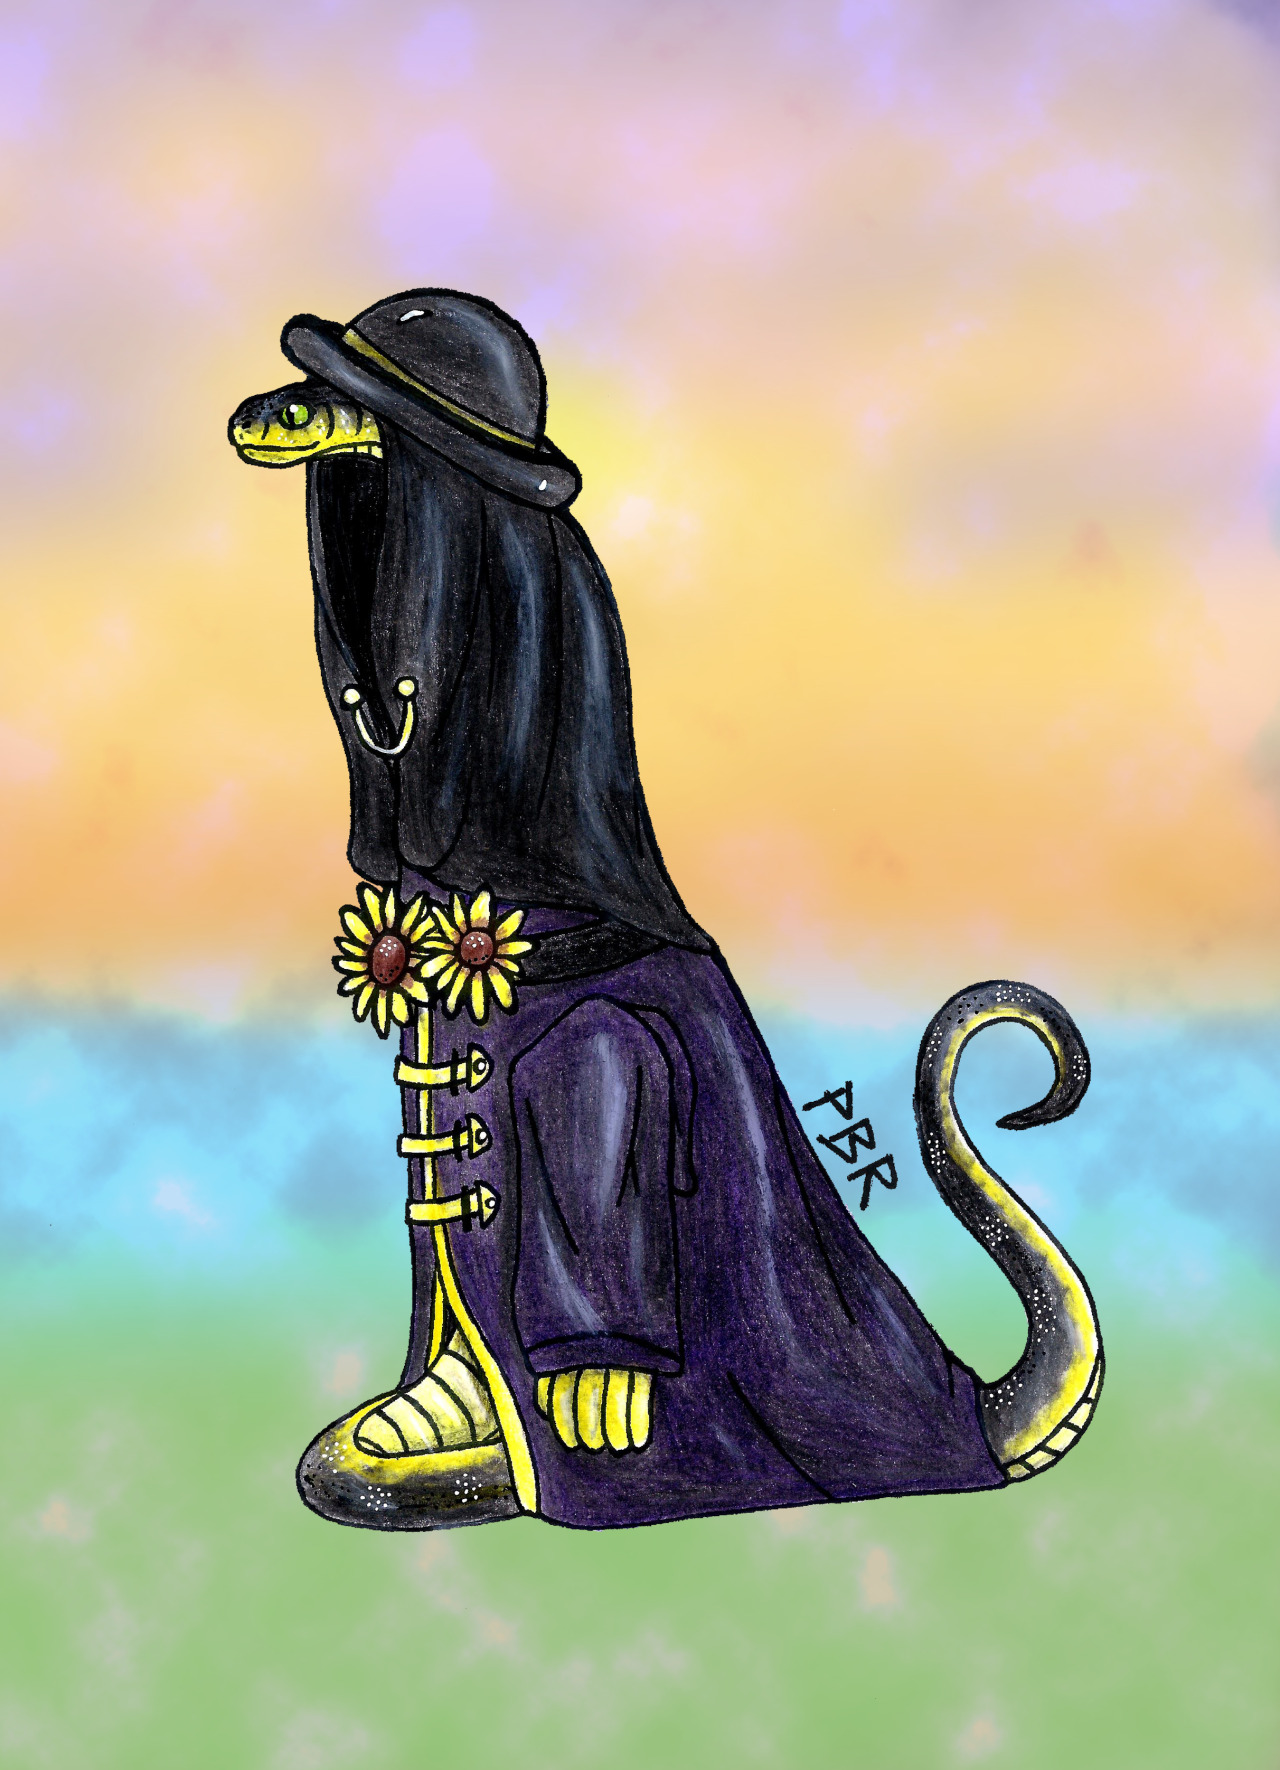
Janus as Summer
Summer is not only a snake but big on self care. Perfect fit.
Flower is a black eye susan.
(Click for better quality.)

(Click for better quality.)
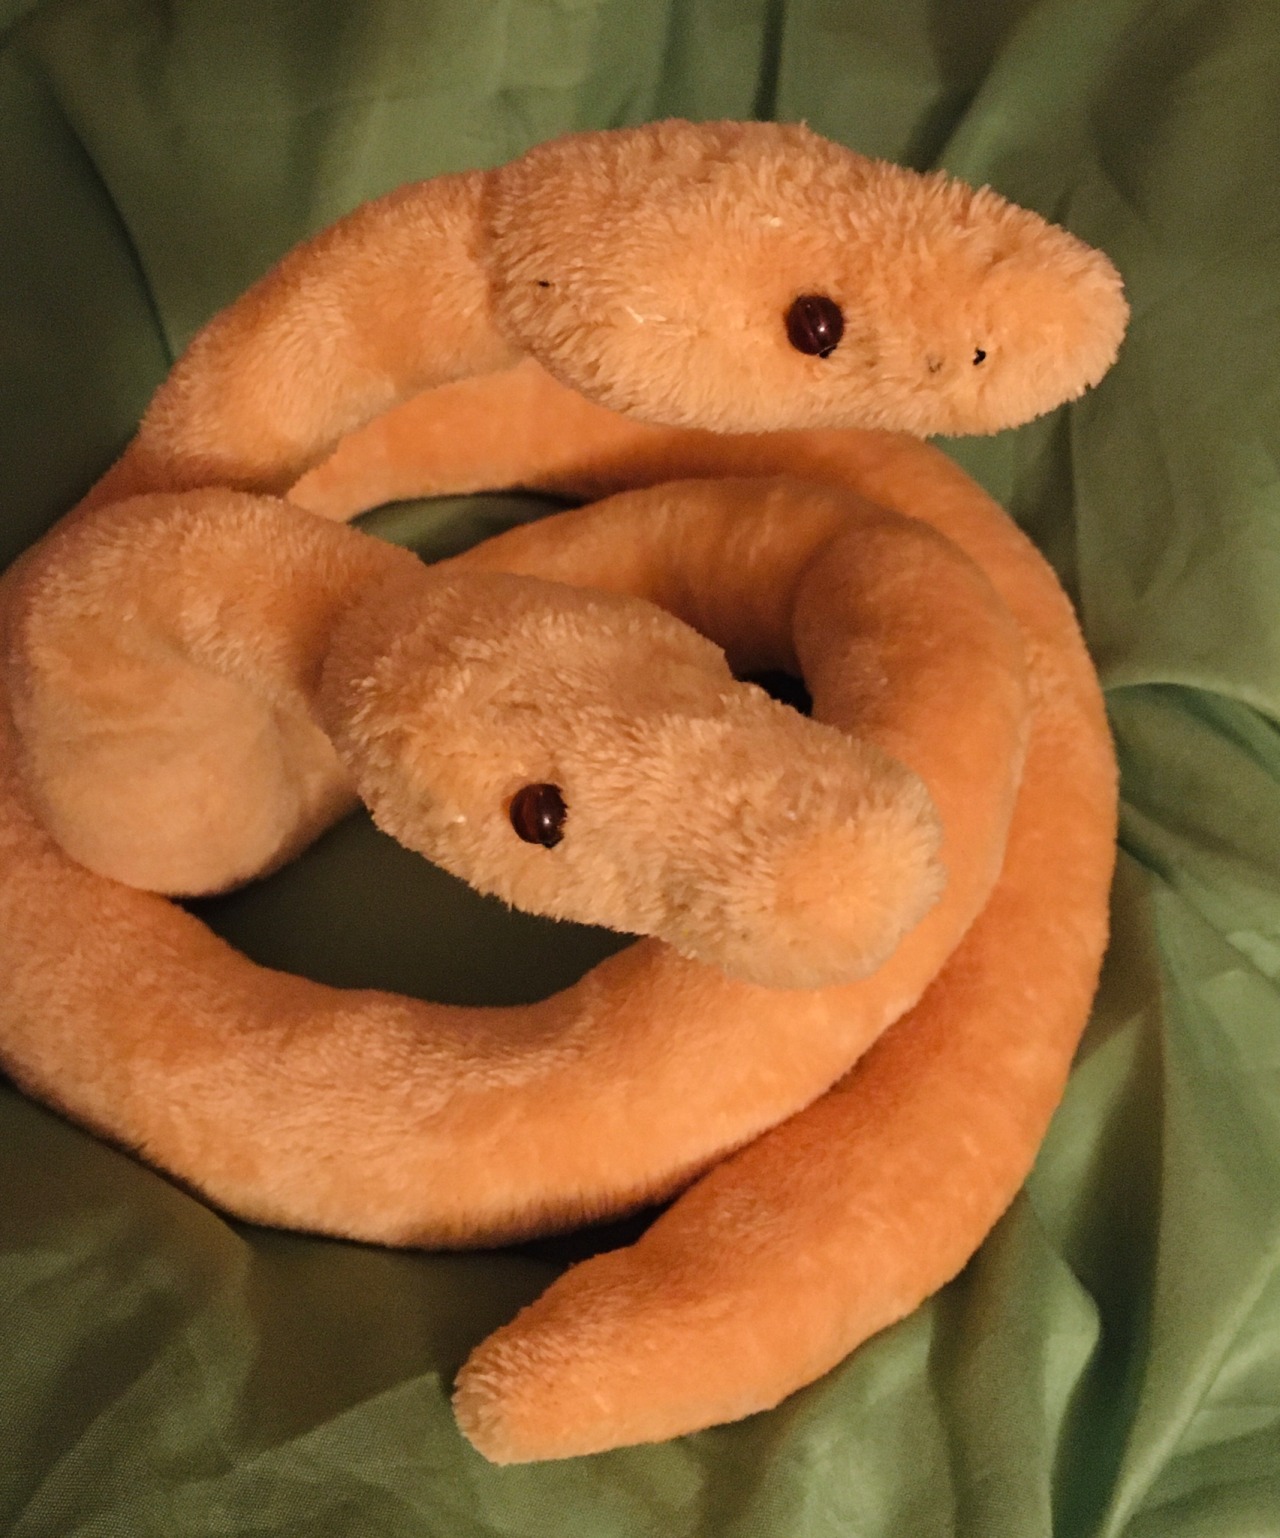
A few people asked how I made Heckle and Jeckle, so I made this tutorial.
A few side notes,
This is a very basic make a pattern, cut out fabric and sew together. It can be applied to any plushie not just a snake.
I’m lazy as heck with my sewing, I hardly use pins to hold things together and my patterns change as I go. I’m not the best at explaining stuff, but hopefully this make sense and helps.
Feel free to ask me anything.
This is not the first plushie I’ve made. So please don’t be disheartened if you don’t get something straight away. (the pillow will collect your screams.) Just take your time and keep at it. You can do it!
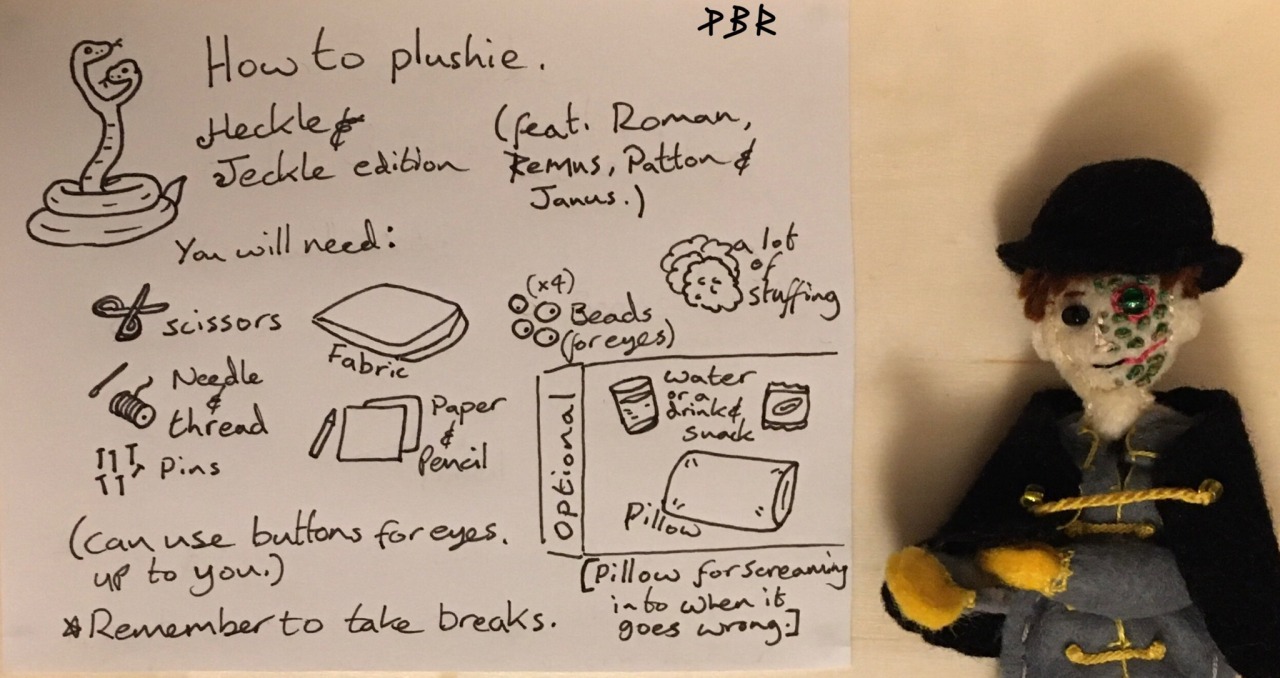
• Think about the type of fabric you’re going to be using, I used a yellow throw blanket. (No, I didn’t steal it from Markiplier.) Some fabrics don’t have as much give when stretched so can change the look of the finished piece when stitched together.
•Plan how big you want your plushie and think about the scale of the head compared to the body.
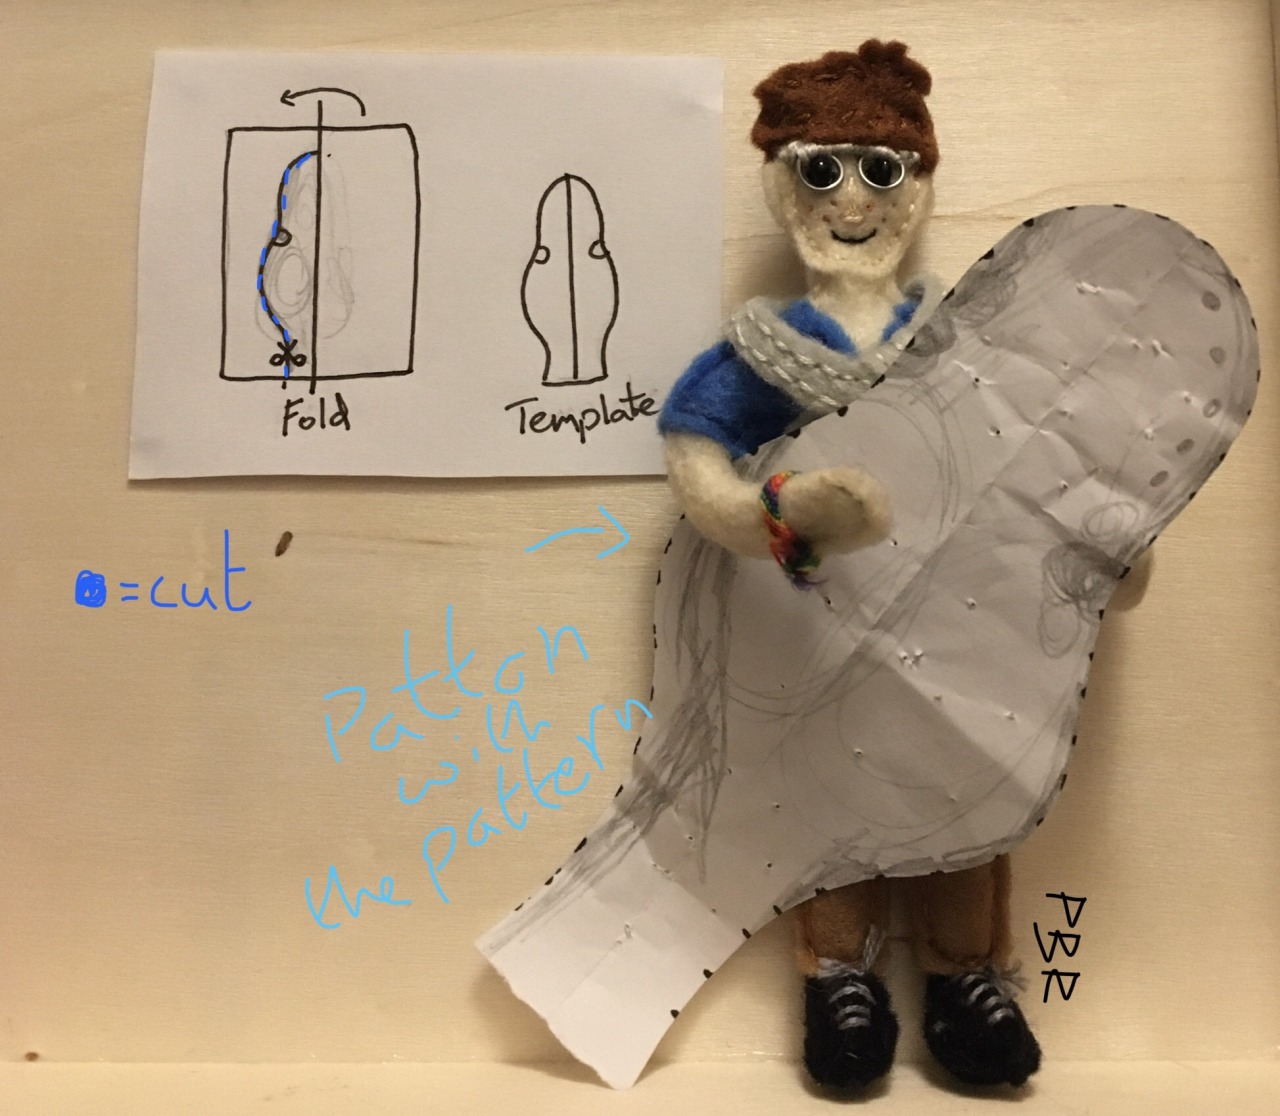
•Sketch out the head shape on paper, folding it in half to mark the middle. (Messy and only half the face works fine.)
• Folding the paper in half while cutting out your pattern makes it symmetrical.
Okay it looks a lot but bear with me.
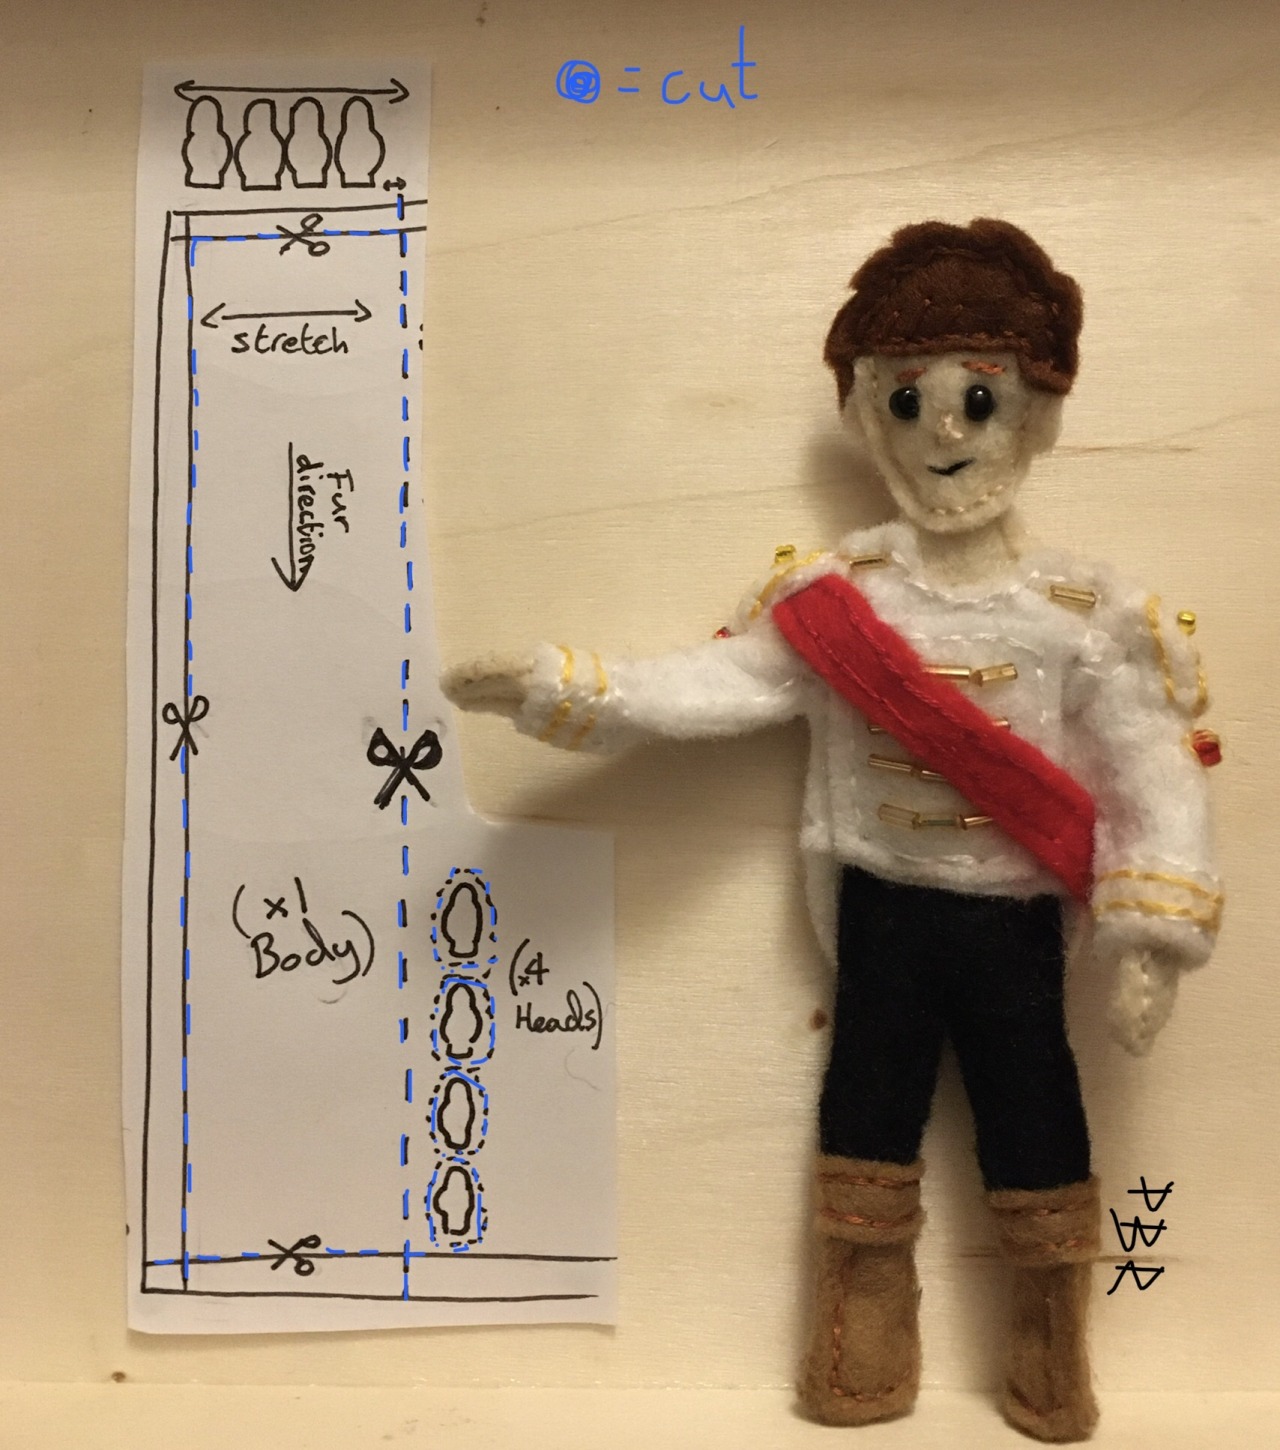
• because mine was a throw I cut the hemmed edges off.
• I made sure the fur direction was natural. ( umm like stroking a cat/dog the fur goes snoot to tail.) and the fabrics give I used widthways, this helped the bodys shape later.
• I used the head pattern and measured 4 heads across the top, (plus 1 inch for seam allowance) for the width, then cut down the blankets full length to get the rectangle for the body.
• Pin the head pattern in place and cut around it leaving about ½ inch gap for seam allowance. (making sure the fur direction goes from snoot to tail.) Repeat till you have 4 head shapes cut out.
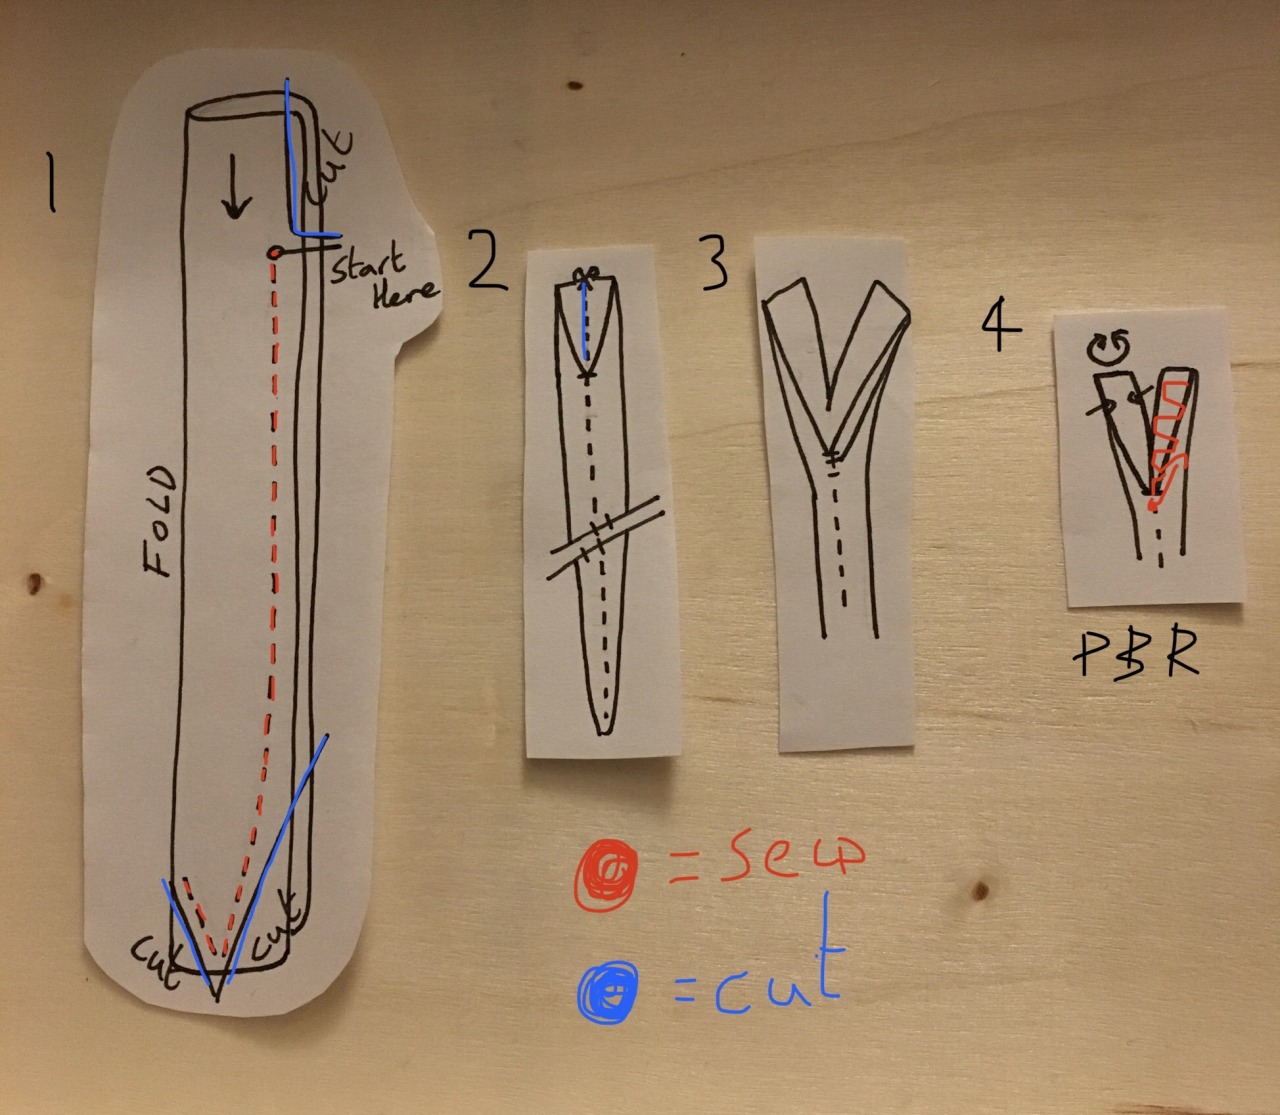
• 1. Fold the rectangle in half lengthways. Sew on the opposite edge to the fold, I used a back stitch for this. Leave a 5 inch gap for the necks and start sewing down to the bottom. Taper towards the middle and double back on yourself tapering towards the folded side, to form a V shape for the tail. Cut off the exsece fabric. Turn it inside out and fill with stuffing. (up to you how squishy you make them.) I use a knitting needle to push the stuffing to the end of the tail.
•2 and 3. Cut 5 inches down the folded side the match the gap the left above the sewing. These will form the necks.
• 4. Using a ladder stitch, start at the base of the V and one at a time work up each neck. Once done add stuffing.
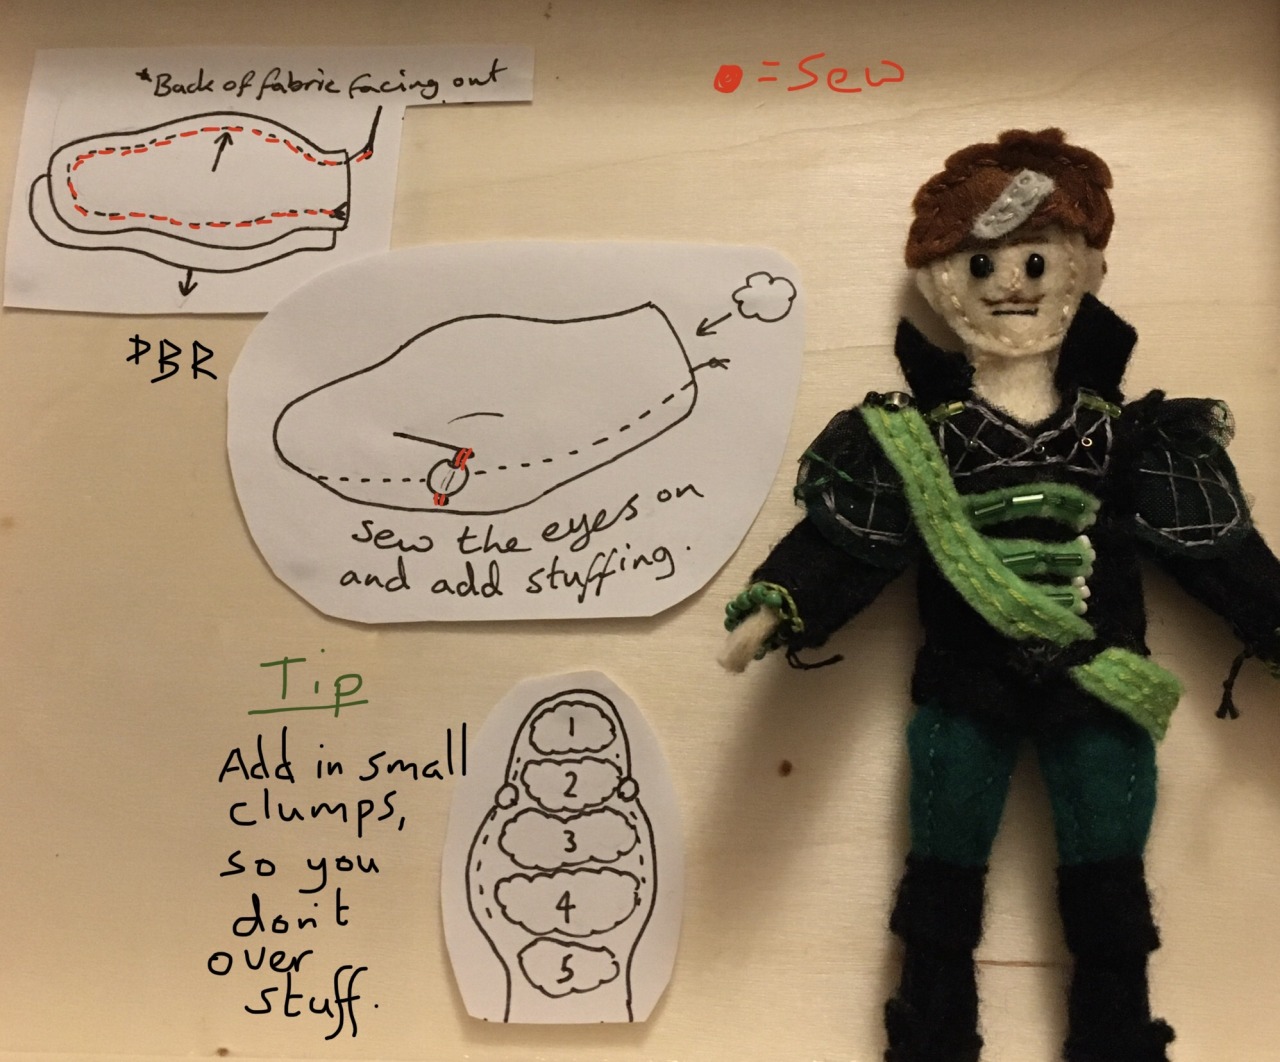
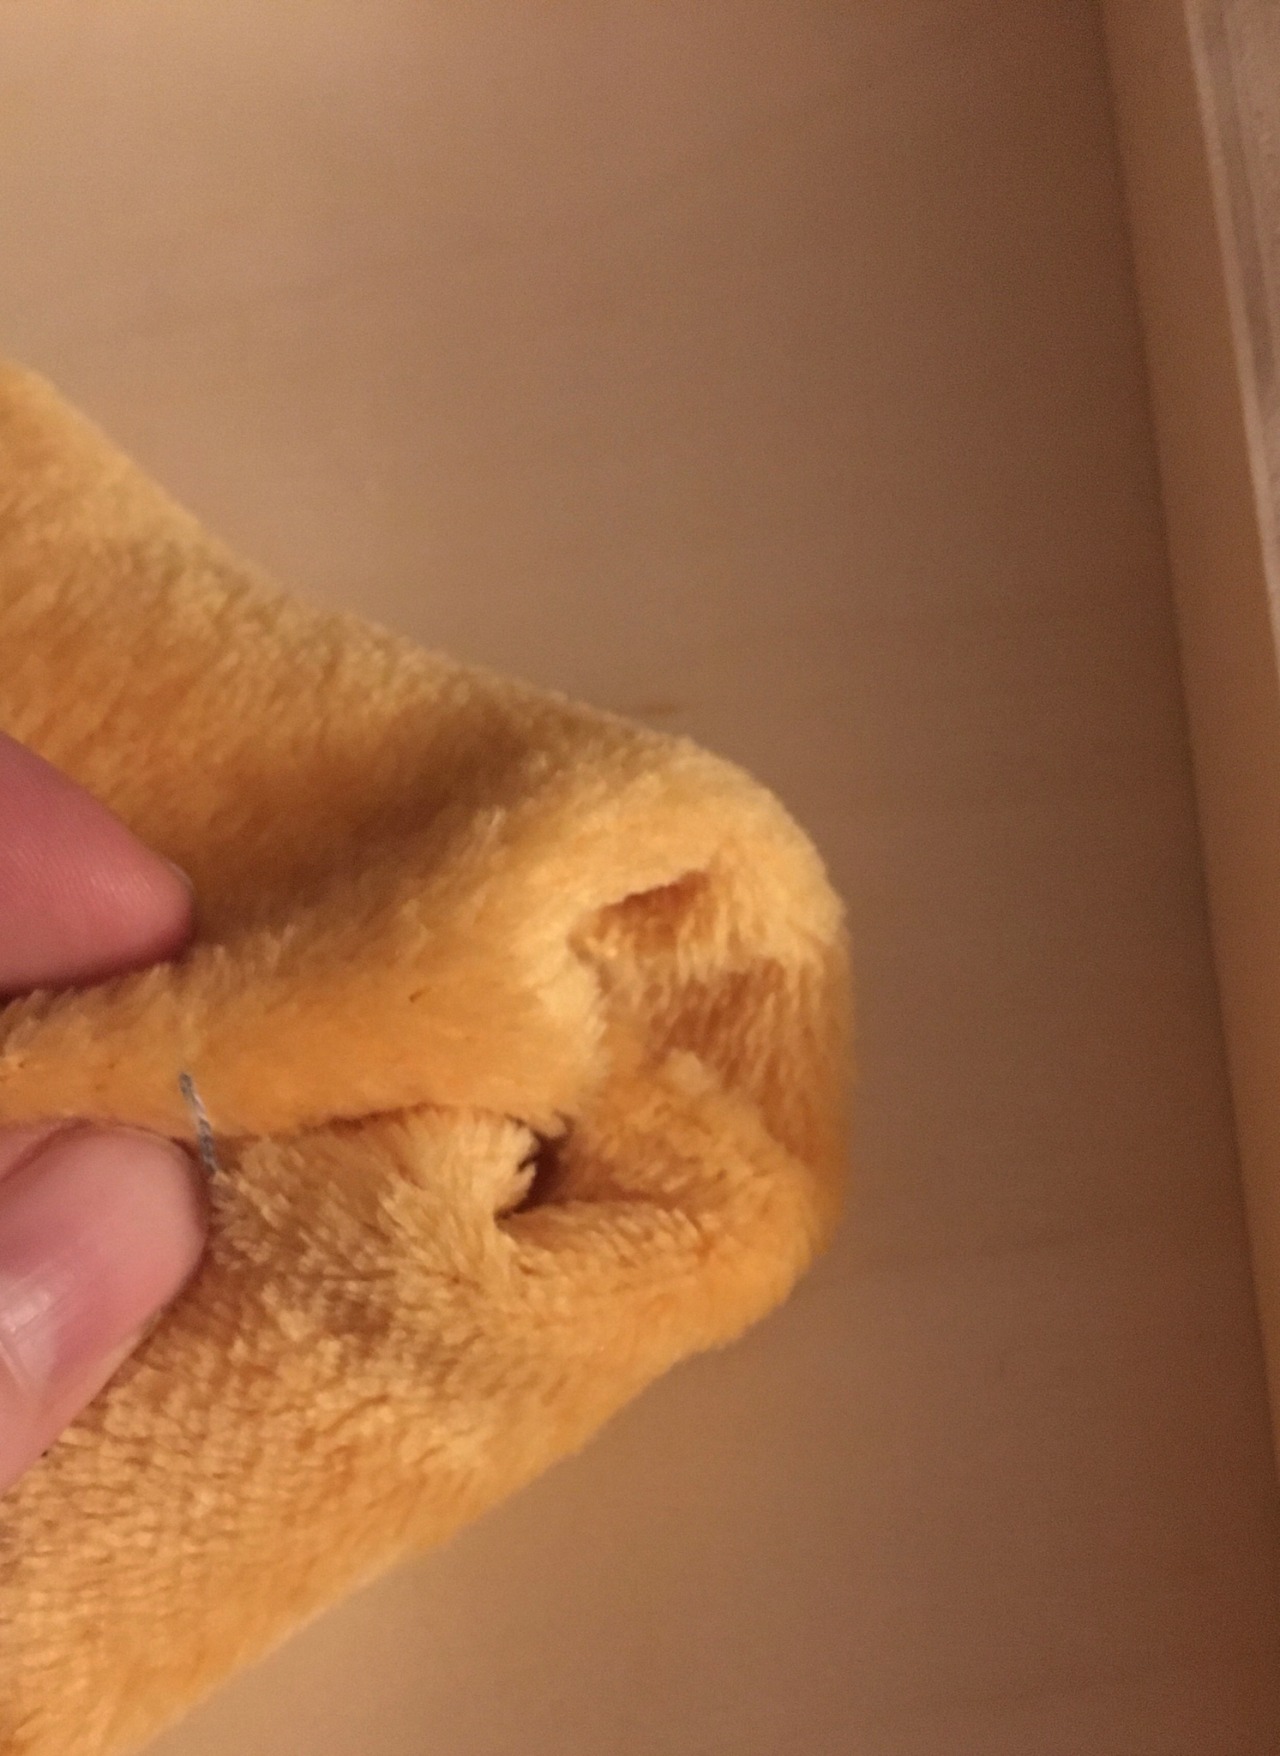
• Sandwich two head shapes together, with the back of the fabric facing out on both. Sew together with a back stitch. Leave about ½ inch sem allowance from the edge.
• Turn it inside out. Sew on your buttons or beads on for the eyes.
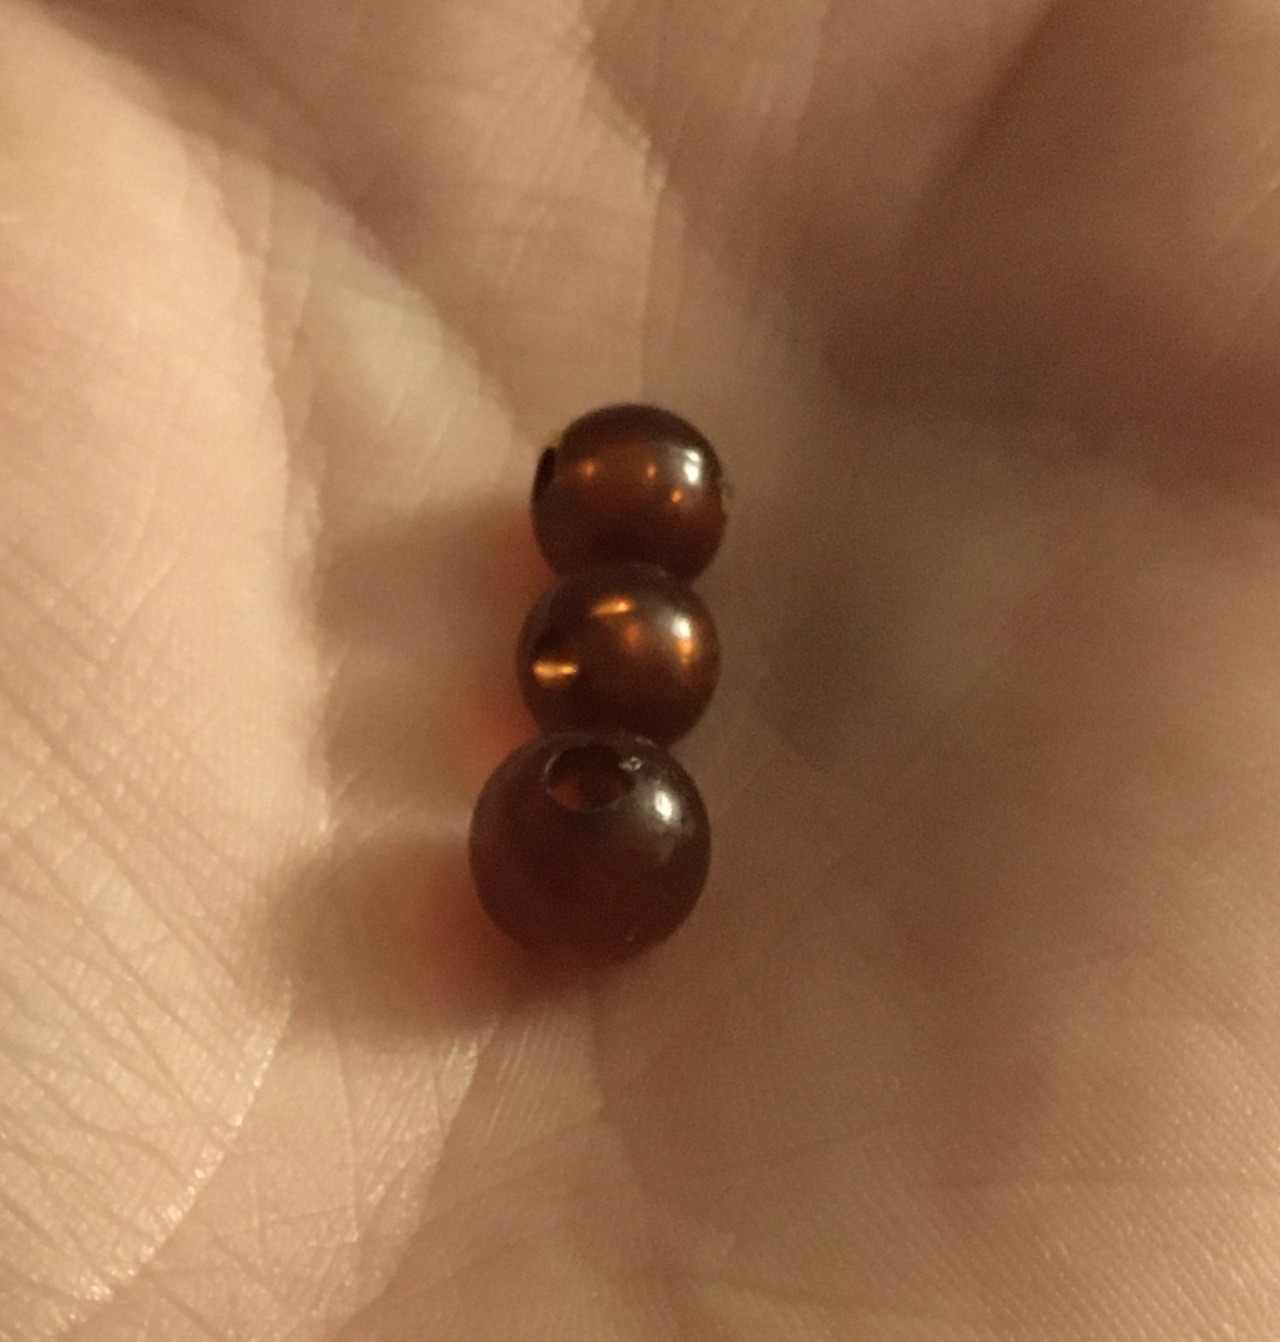
(I found some cool translucent brown beads that made awesome eyes.)
• Add the stuffing. Tip: add a little at a time so you don’t overstuff. (up to you how squishy.)
•Repeat these steps with the other head, so you end up with two.

• Tuck the edges of the neck and head in and add a bit of stuffing. Use a ladder stitch to connect the two.
•Repeat with the other head so they’re both attached.
• And Ta-da! You have a plushie perfect for hugs and cosplay needs.
(Optional: I used embroidery threads to make a few clusters of scales on each head and four black dot a long the lower snoot for the pits. I thought about adding seed beads in a few clusters for scales and some little tongues, but got lazy.)
Thank for all the love on the original post.
Hopefully this make some sense and is helpful.
Check online for stitch tutorials.