What color to paint kitchen with honey oak cabinets

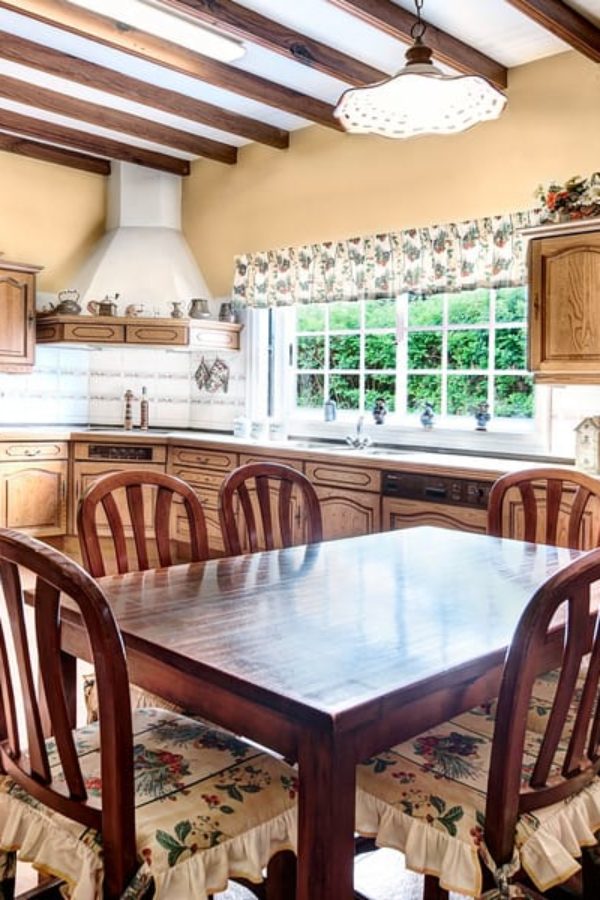
If your kitchen is surrounded by honey oak, then this article will be best for you. Looking for the best to paint your kitchen cabinet made from honey oak can be a bit challenging for most individuals out there. Honey oaks are highly specious, and choosing the right color to paint them is vital. Since there are various colors to choose from, you will have to settle for the one that best suits you. As a result, we shall be focusing on what color to paint kitchen with honey oak cabinet in this article.

Orange

Since honey oak is orange, choosing an orange color will be best for your kitchen cabinet. When selecting paints, it is ideal to asses if it best suits that specific color before going for it. In this case, the vital aspect that you need to understand is that honey oak features a natural color, which is orange, if not yellow-orange. Therefore, choosing an orange color for your honey oak kitchen cabinet, it will be highly essential.

Light and creamy

For individuals with a honey oak kitchen cabinet that has lost its distinct look, a light and creamy paint will be best for you. You might consider using painting your kitchen wall pale gold or creamy white this will drastically improve the look of your oak cabinet, giving an incredible look like never before. Cannibal Kitchen has many samples, you can check there.

Steamed milk

Also referred to as SW7554, steamed milk is an incredible paint that will best suit your honey oak kitchen cabinet when painted on the wall. This paint features a sleek design, and it offers a breathtaking view. If you are looking for a kitchen wall with a color that will best suit your honey oak cabinet, then this will be best for you.

Cucumber

If you are into green color, then the cucumber SW6722 will be best for you. This green will do an incredible trick with your walls, making it perfect for a kitchen with honey oak cabinet. In addition to that, it is bright enough to create a statement; however, it is also subdued blending in with several colors out there. This makes it perfect for use in a kitchen, a honey oak cabinet.

Navy blue

Most interior decorating experts agree that the vibrant shade of navy blue will beautify and harmonize a kitchen with a honey oak cabinet. As a result, you might consider giving this color a try by painting it in your kitchen wall with your honey oak cabinet in place.

Warm beige

If you are looking for a warmer color, then the warm beige will be best for you. This color matches perfectly in a kitchen with a honey oak cabinet. Since they feature heavy brown undertones, this makes it perfect for your kitchen wall, particularly those with a honey oak cabinet.

Final verdict


There are various colors for you to choose for your kitchen wall; however, selecting the one that will best match your kitchen cabinet is highly essential. For individuals with honey oak cabinet kitchen, the above-mentioned colors will be best to give a try.

How to clean honey on the bidet toilet seat

When you are trying to remove honey from any surface it can often be a difficult task. If the honey has been there for awhile then it might have hardened and you will have better luck cleaning it if you can warm it up in some way. This can easily be done by placing a very hot towel over the honey for a few seconds, a minute or more. You will be able to have a much easier time with wiping it from your bidet if you have any honey stuck on it. Use a cleaning cloth and warm it up with boiling water or run the hot water tap for a few seconds and then get it nice and wet. Take it over to the honey and set it down on the spot, after a few seconds try wiping it and see if that does not help to remove any.

Make A Cleaning Solution

What you should use to clean the honey is any sort of at home cleaning solution that you might have around the house. You can try to make your own by mixing one teaspoon of simple dishwashing detergent with at least two cups of warm water. Once you have this mixture together then you can dip your cloth in that mixture and try to clean the honey from the bidet. You can also use other things around the house for cleaning like apple cider vinegar or lemon juice, or also some baking soda.

If you want to know how to clean honey on the bidet toilet seat the important thing to know is that it can be done and there are multiple ways to go about trying to clean it. You can spray some sort of cleaning detergent on the spot and wait for that to sink in, then give it a scrub and see if that does not help to make it come off from the toilet seat. You could also try to heat it up some and pour hot water over the spot or use a hot cloth to try and warm it up while or before scrubbing it off the toilet seat. These are two easy steps to try and take at first to see if you cannot get it to easily come off the toilet seat. If there is a great deal of honey on the bidet toilet seat then you might want to scrape some of that off with a spatula or use toilet paper. But if the honey is stuck right on there, a butter knife can also do the trick unless you are worried about marking up your bidet toilet seat.

Use What You Have

The best thing to try and use are at home cleaning ingredients that you might have around the house. Hot water can usually do the trick, especially if you use boiling hot water but you need to be careful when pouring that water. You also need to be careful when you go dipping the cloth into the hot water as well. If you have tried other attempts to clean it and the honey is still stuck then think about trying to go with the hot water and you might get a much better result.

There are some very simple at home cleaning techniques that you can use and they involve low cost cleaning supplies like lemon juice or a lemon, mixed with warm water. You can also use baking soda or apple cider vinegar. These are great solutions to opt for if you do not have a specific household cleaner in your cabinet right now to use, or any bathroom cleaner.

You might already have your very own specific bathroom cleaner that you regularly use at home, one that you like to use for your toilet seat and that can be used with simple scrubbing and your cleaning cloth. Combining that bathroom cleaner with the hot water is going to give you a better chance at removing the honey that is stuck on there. So when you want to know how to clean honey on the bidet toilet seat the answer is putting a little elbow work into the mix and combining that with cleaning supplies or hot water to increase chances of removal.

How to remove roller brush from shark vacuum?

It’s always important to read the manual instructions for every shark vacuum model before you start the process of removing the roller brush. After some time you’ll find that your roller vacuum does not clean the floor well as it used to before. This is because the roller brush gets worn out after some time. Your shark brush is usually made of wood, plastic or in other instances metallic material.

What makes it ineffective is that it might have accumulated a lot of dust over time hence it’s always important to wash it regularly. Another issue is your brush might get worn out over time due to getting old hence it’s important to replace it with a new one after some time.

You’ll also find that some of the new models of shark vacuum clean themselves as they have this capability that has been developed over time. But it’s important to familiarize yourself on how to remove roller brush when it gets worn out.

In this article, I’m going to discuss how to remove the roller brush from shark vacuum.

  •    First, unplug shark vacuum from the power source

When you unplug the vacuum it’s important since it prevents your vacuum from getting broken in case the engine might still be running.

This is important since it ensures that you aren’t electrocuted.  You’ll find that switching off the power on the socket is not enough to mean that you’re safe. You have to unplug the power it from the switch so that you ensure there is no current flowing at all as this can lead to death in some worst scenarios.

  •    Search for the roller brush

Different shark vacuum models have their roller brush located in different locations.  Mostly it’s usually located on the underside of the shark vacuum. By placing it upside down your shark vacuum machine you’re in a position to see the roller brush location.

  •    Remove the screws from your vacuum

When you locate roller brush, you’ll now have to remove the screws so that you can remove it. This is made possible by the fact that every model comes with a set of screws that can be used to unscrew it. Hence all you have to do is locate the fitting screw and use it to unscrew.

It’s always important to place the screws in a safe place so that you don’t lose them.

  •    You have to detach roller brush from the shark vacuum

After you have removed the screw you’ll finally remove the roller brush from the vacuum. You’ll pull one end of the roller as the other end slides as you remove it.

It’s always important to rotate your roller brush in clockwise direction whenever you find that your roller is stuck with other components so that you loosen.

Conclusion

It’s always important to remove the roller brush from your shark vacuum with a lot of care. You should ensure that you ensure that you’re in a position to reassemble back all the parts after you remove them. If you find it quite challenging it’s always important to consult a qualified professional when it comes to this.

how to remove roller brush from shark rocket vacuum?

Among the essential appliances, we should have in our homes are the vacuums. They are important machines to clean up our houses without necessarily touching with our hands. Herein you will learn how to remove roller brush from the popular model in the market, the shark vacuum so that it will work more efficiently for an extended period. Easy steps to carry out this project  Start by unplugging it from the electric connection wallet. This is important to prevent you from the possibilities of electric shocks. Statistics show numberless people all over the world dying each day due to their carelessness in handling electrical appliances.

Switching off electric power isn’t enough to let you stay away from these occurrences in any way. To remain at the safest side ever, it is good you consider detaching the plug to cut off the electric power connection. This is the best way you’re sure that there is no chance electricity will harm you while you’re operating things.  To add on this, this will keep your machine out of cases of broken damage since maybe the machine engine will be still be working if the power is left on. So this might lead to breakage of the brush unexpectedly when trying to remove it.  Find the brush  You’re now tasked to find the roller brush location in the vacuum.

Different vacuum models have their roller brushes located at different sites, so you will take time to find where it has been placed. To most vacuums, it is located right at the underside of the vacuum. To do this easily, you can lay the machine down to locate the roller brush. It will also be easy accessing the bottom screws of the device while in this position. Get off the bottom part of your vacuum to look for the brush.

Follow by loosening the screws.  After you identify where the roller brush has been located, follow to unscrew the surrounding screws to get it out. Shark vacuums provide its users a set of screwdrivers to enable them to get out the screws in a more easy way.  The right screwdriver’s head is essential to help you loosen the bottom screws easily. The screws should be placed in a collecting container or box to ensure you don’t lose them.

Lastly, detach it from the vacuum.  This is the last and final thing to do on this project. You will find the roller brush easily out of the vacuum body once you follow these steps. You can be pulling one end of the roller belt as the other end slides out. You would have come to an end to get your roller brush out of the vacuum.  There are other models that you might find their roller brushes stuck in other components. If this is the case with your vacuum, you should try rotating the roller brush in a clockwise direction until you get it out. These are steps you need to follow to help you get your vacuum roller brush out. Give it a try, and you will get it done.

How to Empty Shark Vacuum?

A shark vacuum has a plastic dust bin where it stores dirt and rubbles.  You’ll have to empty it regularly so that it doesn’t lose its suction power. It’s very disappointing when you find that your shark vacuum is not working properly. This can be as a result of a buildup of dirt and debris in it.

It’s always important to empty the dirt when it reaches the mark indicated on the shark vacuum as the maximum level it can withhold.  What makes this important is that it will be able to improve its suction power once the dirt has been emptied.

Sometimes you can even empty it when it’s even halfway to increase its performance. You’ll find that there are times when the shark vacuum produces a bad smell and you have to empty it immediately. It’s always good to wash the dust cap as well as the filters in such a scenario to remove the bad smell from it.

The general process of how to empty shark vacuum is as follows:

  •    First, you’ll have to unplug the shark vacuum from the power supply. This is important to avoid situations whereby it might blow dust into you making you look dirty or in other situations get eye problems.•    You’ll then hold its handle at its top as you try to empty the dirt in your shark vacuum. •    Then, you’ll then press the button on its handle so that it can open and remove the dust cup.•    You’ll then go over to trash can where you’ll hold it over the trash can as you prepare yourself to empty it.•    At the bottom, there is a release button. You’ll then press this button which will make it open on the lower side hence releasing dirt inside into the trash can. You’ll then place back dust cup to its position.

Now let’s take a look on how to empty some of the shark vacuum models:

Ø    Shark navigator lift vacuum

When you want to empty it you’ll first have to slide release tabs on the dust cup so that you separate the dust cup. After that, you’ll hold it over the trash can. You’ll then press the release button at the bottom so that you empty the dirt and debris in it.You can even open the top and turn it upside down to make sure all the debris and dirt have been removed.

Ø    Shark Rotator vacuum

In this type of model, you’ll first have to unplug it from the power source. After this, you’ll separate dust cup from the hand vac. You’ll then place dirt cup over the dust bin after which you’ll press the release button to empty dirt and debris. After that, place back the dirt cup.

Ø    Shark rotator vacuum

In this type of shark vacuum, we’ll first separate dust cup from the main body. This is followed by holding the dirt cup over trash can whereby you’ll press the release button to empty its content. You can even turn it upside down before taking it back to its position after closing it properly.

Conclusion

It’s always important to empty your shark vacuum so that you enhance its suction power. This will make you clean your floor with a lot of ease due to high suction power of the machine.

How to clean shark vacuum hose?

There is a need for regular cleaning of different appliances to enable them to operate all times efficiently. Cleaning our houses can turn to be hectic at times moreso when cleaning end corners that can’t be easily reached. This is the reason vacuum cleaners are equipped with hoses to enable homeowners to carry out cleaning chores to places that are hardly reached.

Throughout the cleaning process, it’s inevitable for the wands and hoses to get dirty. The hoses are also susceptible to clogging in case they are used to vacuum large clumps from hardly reached places due to their flexible design. Since these machines rely on air movement, unclean or clogged hoses can significantly impair their entire performance.

To ensure maximum performance, there is a need for regular cleanup of hoses both outside and inside. Herein you will learn some steps on how to clean your vacuum hose to make it work efficiently for an extended period. Begin by clearing out the hose clog You should start by detaching the vacuum hose and lay it right straight at the linoleum floor or at the tiles. Follow by inserting at one end of the hose a broom handle and get it to reach through the whole hose length. All debris like for instance the socks, furniture pieces of stuff and paper wads collected in the hose should be forced out of the hose.

Next is washing the hose. In a sink, make it trap some hot water inches for this job. Follow by adding two a bleach two tablespoonful and either dish soap or squirt. The vacuum hose should be submerged into this solution. The next thing is swirling it around to enable proper water movement into the inner portion of the vacuum hose. Complete this step by rubbing the outside part of the hose with a clean cleaning cloth. Thoroughly rinse the inner part of the vacuum hose.

Right from the tap, pour water directly into the vacuum hose. To allow water to flush through the entire hose length, lift it from one end and let it get out through the other end. Inspect the inner part of the hose.  Using accordion segments strengthen your vacuum hose as you push it through and get to look through the vacuum hose. Scrub anything remaining in the vacuum hose using a bottle washer.  Complete the process by thoroughly drying it up before using.

To ensure the hose gets dry, hand it over a shower curtain rod and let it stay there for quite some hours to allow the inner folds to dry up thoroughly. To ensure it has fully dried up, visually inspect the inside once you are kind sure it has dried up. To ensure your vacuum hose serves you with its essential purpose for an extended period, ensure you take great care of it. This is a guide for your vacuum to work efficiently for an extended period. There is no time you will regret buying the vacuum since it will work best all times.

How to clean shark vacuum?

It’s always important to clean sharp vacuum regularly for you to increase its lifespan as well as its performance.  You’ll find that shark vacuum comes in different models. This implies that you’ll encounter different designs that will require you to remove the various parts in different ways. Taking a look at its production manual is important since it helps you to dismantle its various parts with a lot of ease. Today I’ll take you through the process of cleaning a shark vacuum. It’s always important to unplug the shark vacuum from the power source to make sure you’re not injured.

The process of how to clean shark vacuum:

A shark vacuum should always look spick and spank on the outside. This can be achieved by wiping it properly with a piece of clothing on it. Shark vacuum has different parts namely:•    Filters•    Brush-rolls•    Dirt cupLet’s take a look at how we clean these parts in detail:

•    Cleaning shark vacuum filters

When it comes to cleaning the filters of the shark vacuum you’ll first remove pre-motor filters. A foam filter and felt filter are the two pre-motor filters that we’ll be cleaning in this context. You’ll wash the filters by your hands using cold water until you’re sure they’re clean. You’ll then leave them out in the sun to dry for a day. You’ll then fix them back onto your shark vacuum. It’s always important to clean the filters every two months so that it will offer optimum performance.You’ll then wash the post-motor filter using cold water as well. This is done using your hands as well after which you’ll leave it to dry in the sunshine for a day as well. This should be done after every eight months unless you’re in a dusty region whereby it’s important to wash it regularly.

•    Cleaning brush rolls for shark vacuum

It’s always important to maintain the brush rolls as they form the critical part of a vacuum. First, you’ll have to separate handle from floor attachment.  You’ll then press buttons on the sides so that you remove brush roll garage so that you can access brush rolls.You’ll then remove rubbles while the brush is intact. You have to remove softer roller so that you can also remove rubbles from it. When it’s very dirty you wash and leave it to the sun to dry.Finally, place back the soft roller and put back the garage cover. Your brush-rolls are now ready for the next task.

•    Cleaning dust cup for your shark vacuum

It’s always good to empty the dust cup when it becomes full. You’ll have to clean the dust cup by washing it with running water both inside and on the outside. You’ll then place it on the sun to dry. Wipe it with a piece of cloth for any water droplet that might have not dried out.  It’s important to clean metal grate using scrubber dishes if your vacuum model has it so that you make sure your vacuum is not clogged and affect its suction.

Conclusion

It’s always important to keep your shark vacuum clean in all parts so it will offer you maximum performance when it comes to cleaning.