GNOME.ORG

24 hours a day, 7 days a week, 365 days per year...

June 22, 2018

Thomson 8-bit computers, a history

In March 1986, my dad was in the market for a Thomson TO7/70. I have the circled classified ads in “Téo” issue 1 to prove that :)


TO7/70 with its chiclet keyboard and optical pen, courtesy of MO5.com

The “Plan Informatique pour Tous” was in full swing, and Thomson were supplying schools with micro-computers. My dad, as a primary school teacher, needed to know how to operate those computers, and eventually teach them to kids.

The first thing he showed us when he got the computer, on the living room TV, was a game called “Panic” or “Panique” where you controlled a missile, protecting a town from flying saucers that flew across the screen from either side, faster and faster as the game went on. I still haven't been able to locate this game again.

A couple of years later, the TO7/70 was replaced by a TO9, with a floppy disk, and my dad used that computer to write an educational software about top-down additions, as part of a training program run by the teachers schools (“Écoles Normales” renamed to “IUFM“ in 1990).

After months of nagging, and some spring cleaning, he found the listings of his educational software, which I've liberated, with his permission. I'm currently still working out how to generate floppy disks that are usable directly in emulators. But here's an early screenshot.


Later on, my dad got an IBM PC compatible, an Olivetti PC/1, on which I'd play a clone of Asteroids for hours, but that's another story. The TO9 got passed down to me, and after spending a full summer doing planning for my hot-dog and chips van business (I was 10 or 11, and I had weird hobbies already), and entering every game from the “102 Programmes pour...” series of books, the TO9 got put to the side at Christmas, replaced by a Sega Master System, using that same handy SCART connector on the Thomson monitor.

But how does this concern you. Well, I've worked with RetroManCave on a Minitel episode not too long ago, and he agreed to do a history of the Thomson micro-computers. I did a fair bit of the research and fact-checking, as well as some needed repairs to the (prototype!) hardware I managed to find for the occasion. The result is this first look at the history of Thomson.


Finally, if you fancy diving into the Thomson computers, there will be an episode coming shortly about the MO5E hardware, and some games worth running on it, on the same YouTube channel.

I'm currently working on bringing the “TeoTO8D emulator to Flathub, for Linux users. When that's ready, grab some games from the DCMOTO archival site, and have some fun!

I'll also be posting some nitty gritty details about Thomson repairs on my Micro Repairs Twitter feed for the more technically enclined among you.

Behind the GESSourceClip rate

Initial Approach

GES has an effects infrastructure for adding and managing GStreamer elements. Since the rate property uses videorate and pitch elements to work, the idea was to use this existing infrastructure but to the hide the effects from the user as they are required only internally.

Step 1: Use effects

All media elements are truly set on a clip only when it is added to a layer, this involves the construction of GESAudioSource and/or GESVideoSource of the clip. An effect can be added only after these sources have been added to the clip. As a result, the rate property was configured to add pitch and/or videorate as effects only after the sources were added.

Step 2: Hide the effects

To hide the effects from the user - accommodate the hidden effects in GESClip by mimicing the behaviour of a normal effect and maintain a reference to the ‘hidden’ rate changing effects to not display them as top effects.

A GESClip is a subclass of GESContainer - which gives it the ability to hold the source track elements and the effects. Many operations in GES call the GES_CONTAINER_CHILDREN (clip) method when required to retrieve and make changes to the children of a clip - effects/sources contained in the clip. Since the rate changing effects were not truly hidden, they are contained in the clip and hence showed up as the container’s children.

Step 3: Start from scratch

Although the above approach of maintaining hidden effects works to hide them from the user, to hide and make GES sometimes ignore and sometimes utilise the effect API was not only difficult but required making a lot of ugly changes to many parts of GES. It became obvious that a rework of the way things worked was required when running tests on the branch resulted in most of the existing tests failing.

Current Implementation

Mathieu suggested that instead of using the effect API, we should dig a little deeper and add the videorate and pitch elements to the sources of the clip ourself. This genius and simple solution eliminated many of the problems faced in the initial approach.

pitch is simply added to the audiosrcbin- a GstBin of GESAudioSource, while videorate was already in place in a GESVideoSource to adjust frames, as a result, rate is now added as a child property of the audio and video source in GES. The parent GESSource handles creating, linking and managing the audiosrcbin and videosrcbin. Rate property added to GESSourceClip - base class for sources of a GESLayer, changes the rate child property of its sources to function.

The pitch element being from the gst-plugins-bad didn’t behave so well and required some fixes for bug 796603 by Matheiu and a followup fix for bug 796613 by myself after which all existing tests of GES passed! (hurray)

While pushing new tests, I realised that since we no longer rely on the effect API, the rate property had to be serialised and deserialised by adding to the xges xml formatter.

Same functionality with ges-launch holds, simply adding rate to command changes speed of a clip.

ges-launch-1.0 +clip ~/path/to/video.mp4 inpoint=10 duration=20 rate=2.0

The above command plays the 20 seconds of the input video from the 10 second mark at a rate of 2.0, that is, for 10 seconds.

The project can saved and loaded back-in using the following commands,

ges-launch-1.0 +clip ~/path/to/video.mp4 inpoint=10 duration=20 rate=2.0 --save project.xges

ges-launch-1.0 --load project.xges

The primary focus of work has been on the getting the GES implementation right. I’m yet to try out a few suggestions I got from GNOME design on the Pitivi UI side of things.

This has been the story so far. You can find my work here and follow issue 2202 for updates. Until next time.

The Everyday Sexism That I See In My Work

My friend, colleague, and boss, Karen Sandler, yesterday tweeted about one of the unfortunately sexist incidents that she's faced in her life. This incident is a culmination of sexist incidents that Karen and I have seen since we started working together. I describe below how these events entice me to be complicit in sexist incidents, which I do my best to actively resist.

Ultimately, this isn't about me, Karen, or about a single situation, but this is a great example of how sexist behaviors manipulate a situation and put successful women leaders in no-win situations. If you read this tweet (and additionally already knew about Software Freedom Conservancy where I work)…

“#EveryDaySexism I'm Exec Director of a charity.  A senior tech exec is making his company's annual donation conditional on his speaking privately to a man who reports to me. I hope shining light on these situations erodes their power to build no-win situations for women leaders.” — Karen Sandler

… you've already guessed that I'm the male employee that this executive meant. When I examine the situation, I can't think of a single reason this donor could want to speak to me that would not be more productive if he instead spoke with Karen. Yet, the executive, who was previously well briefed on the role changes at Conservancy, repeatedly insisted that the donation was gated on a conversation with me.

Those who follow my and Karen's work know that I was Conservancy's first Executive Director. Now, I have a lower-ranking role since Karen came to Conservancy.

Back in 2014, Karen and I collaboratively talked about what role would make sense for her and me — and we made a choice together. We briefly considered a co-Executive Director situation, but that arrangement has been tried elsewhere and is typically not successful in the long term. Karen is much better than me at the key jobs of a successful Executive Director. Karen and I agreed she was better for the job than me. We took it to Conservancy's Board of Directors, and they moved my leadership role at Conservancy to be honorary, and we named Karen the sole Executive Director. Yes, I'm still nebulously a leader in the Free Software community (which I'm of course glad about). But for Conservancy matters, and specifically donor relations and major decisions about the organization, Karen is in charge.

Karen is an impressive leader and there is no one else that I'd want to follow in my software freedom activism work. She's the best Executive Director that Conservancy could possibly have — by far. Everyone in the community who works with us regularly knows this. Yet ever since Karen was named our Executive Director, she faces everyday sexist behavior, including people who seek to conscript me into participation in institutional sexism. As outlined above, I was initially Executive Director of Conservancy, and I was treated very differently than she is treated in similar situations, even though the organization has grown significantly under her leadership. More on that below, but first a few of the other everyday examples of sexism I've witnessed with Karen:

Many times when we're at conferences together, men who meet us assume that Karen works for me until we explain our roles. This happens almost every time both Karen and I are at the same conference, which is at least a few times each year.

Another time: a journalist wrote an article about some of “Bradley's work” at Conservancy. We pointed out to the journalist how strange it was that Karen was not mentioned in the article, and that it made it sound like I was the only person doing this work at our organization. He initially responded that because I was the “primary spokesperson”, it was natural to credit me and not her. Karen in fact had been more recently giving multiple keynotes on the topic, and had more speaking engagements than I did in that year. One of those keynotes was just weeks before the article, and it had been months since I'd given a talk or made any public statements. Fortunately, the journalist was willing to engage and discuss the importance of the issue (which was excellent) and the journalist even did agree it was a mistake, but neverthless couldn't rewrite the article.

Another time: we were leaked (reliable) information about a closed-door meeting where some industry leaders were discussing Conservancy and its work. The person who leaked us the information told us that multiple participants kept talking only about me, not Karen's work. When someone in the meeting said wait, isn't Karen Sandler the Executive Director?, our source (who was giving us a real-time report over IRC) reported that that the (male) meeting coordinator literally said: Oh sure, Karen works there, but Bradley is their guiding light. Karen had been Executive Director for years at that point.

I consistently say in talks, and in public conversations, that Karen is my boss. I literally use the word “boss”, so there is no confusion nor ambiguity. I did it this week at a talk. But instead of taking that as the fact that it is, many people make comments like well, Karen's not really your boss, right; that's just a thing you say?. So, I'm saying unequivocally here (surely not for the last time): I report to Karen at Conservancy. She is in charge of Conservancy. She has the authority to fire me. (I hope she won't, of course :). She takes views and opinions of our entire staff seriously but she sets the agenda and makes the decisions about what work we do and how we do it. (It shows how bad sexism is in our culture that Karen and I often have to explain in intricate detail what it means for someone to be an Executive Director of an organization.)

Interestingly but disturbingly, the actors here are not typically people who are actually sexist. They are rarely doing these actions consciously. Rather these incidents teach how institutional sexism operates in practice. Every time I'm approached (which is often) with some subtle situation where it makes Karen look like she's not really in charge, I'm given the opportunity to pump myself up, make myself look more important, and gain more credibility and power. It is clear to me that this comes at the expense of subtly denigrating Karen and that the enticement is part of an institutionally sexist zero-sum game.

These situations are no-win. I know that in the recent situation, the donation would be assured if I'd just agreed to a call right away without Karen's involvement. I didn't do it, because that approach would make me inherently complicit in institutional sexism. But, avoiding becoming “part of the problem” requires constant vigilance.

These situations are sadly very common, particularly for women who are banging cracks into the glass ceiling. For my part, I'm glad to help where I can tell my side the story, because I think it's essential for men to assist and corroborate the fight against sexism in our industry without mansplaining or white-knighting. I hope other men in technology will join me and refuse to participate and support behavior that seeks to erode women's well-earned power in our community. When you are told that a woman is in charge of a free software project, that a woman is the executive director of the organization, or that a woman is the chair of the board, take the fact at face value, treat that person as the one who is in charge of that endeavor, and don't (inadvertantly nor explicitly) undermine her authority.

June 21, 2018

Welcome Window Integration in Pitivi – Part 2

In my last post (link), I gave an overview of Welcome window integration in Pitivi. I started working on this task from the first coding day of Google Summer of Code 2018, i.e. May 14, 2018 and after one amazing month of coding it finally got merged (commit) on June 19, 2018. Apparently it was a large change consisting of 702 additions and 329 deletions (link) involving 75 code-review discussions and 29 versions. A special thanks to my mentor aleb for giving constructive reviews on my code.

So, finally Pitivi has a Welcome Window!!! and this is how it looks like:

pitivi_greeter_alWelcome window – Adwaita light theme
pitivi_greeter_ad
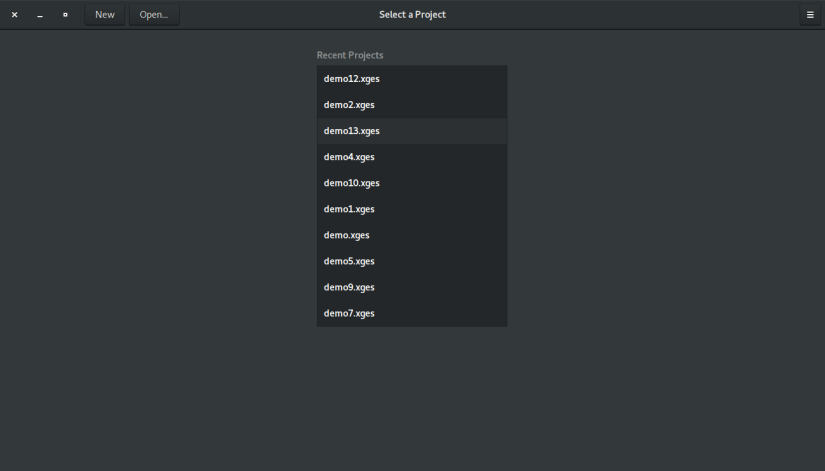
Welcome window – Adwaita dark theme

There are two major changes in the Editor window:

1. We have added a “Close Project” button in the header bar of Editor window that closes the current project and opens Welcome window.

editor-headerbar“Close Project” button (highlighted in right)

2. We have removed “New Project” and “Open Project” options from the menu because these options are already provided in the Welcome window’s headerbar and it can get confusing for the user to have these in multiple places.

In the coming weeks, I will do more additions to the Welcome window such as:

1. Custom project view – displaying meta info regarding a project, such as its directory and last accessed timestamp.

custom_viewInitial design of custom project view

2. Greeter message on Welcome window when user opens Pitivi for the first time or when there are no recent projects.

3. Integrating project thumbnail into project’s custom view.

4. Adding search functionality for easy browsing of projects.

5. Allowing removing items from “Recent Projects” list.

I believe there are more exciting things to come in the upcoming weeks. I will keep posting my progress on this blog. Until next time.

Stay tuned 🙂

Girls’ and Boys’ day in the Munich Red Hat Office

A while ago we opened the Red Hat office in Munich to girls and boys aged 12-16 from schools in the region. This was part of the Girls’ Day and Boys’ Day initiatives backed by a lot of organisations including the German government. The goal is to introduce the girls and boys to careers that are dominated by the opposite gender which has been shown to considerably decrease the gender afinitiy in girls when asked about their favourite career choices.
We also had the chance to participate in Boys’ Day as the Munich office mainly houses non-engineering parts of the company including human resources and marketing.

The day started with Emilie giving a summary about Red Hat as a company and what open source is and means. After that, we split the groups and the boys worked together with the marketing team for the rest of the day. With the girls we spent the day connecting a few LEDs and a button to an arduino like microcontroller and creating basic programs on it. We deliberatly kept the tasks quite simple, focusing on showing the direct link between the program and result. During the time the girls incrementally learned to program the LEDs and finally build a simple traffic light application which turns the light to green when the button is pushed.

Oliver with a group of pupilsOliver with a group of pupils

At the end of the day we gave the full set of electronics to each of the girls. This includes the NodeMCU, breadboard, LEDs and push button. We also included the flash drive with the customised Fedora live image containing the development environment.

Many thanks goes to Miriam, Oliver and Jens who did much of the preparation work, from registering us as an organisation, building the live image to working out the tasks for the day and getting the hardware. Christian Kellner and Helene also helped before and on the day allowing us to host up to 15 girls.

This was the first year that we participated, and the feedback has been positive. We believe it worked out well and would like to participate again next year.

June 20, 2018

Flatpak – a history

I’ve been working on Flatpak for almost 4 years now, and 1.0 is getting closer. I think it might be interesting at this point to take a retrospective look at the history of Flatpak.

Early history

Ancient Egyptian Flatpak

The earliest history goes back to the summer of 2007. I had played a bit with a application image system called Klik, which had some interesting ideas. However, I was not really satisfied with some technical details. One day at the beach I got an interesting ideas for a hack that could improve this.

Fast forward until August 2007 when I released Glick in the wild, based on these ideas. The name is sort of a pun on the old KDE/Gnome first-letter naming scheme, although neither Klik or Glick are really desktop-specific.

Glick was a a single-file-image system. It predates usable kernel container APIs, so it uses fuse and some weird hacks. It doesn’t integrate with the desktop in any way, and applications have to decide what to bundle, falling back to system-libraries for the non-bundled things. This means its not terribly robust., but it is completely stand-alone and need nothing installed on the host system.

Around 2011 the initial support for kernel namespaces had landed and started being useful. Using these I could avoid some of the hacks that my earlier experiment used. So, I got interested in bundling again and released Glick 2 based on this.

Glick 2 requires some software to be installed on the host, which allows it to integrate better with the system. For example, you can “install” bundles by putting the file in a known location, and doing this allows some level of desktop integration. Glick 2 also uses SHA1 checksums to try to automatically de-duplicate files shared between applicatins. Here we can see an early version of the ideas that make up OSTree.

Bundling using namespaces was lot more robust than the previous hacks, but it still relied on the system for the core libraries that the application doesn’t bundle. So an app would sometimes work on one distro, but not another.

Around this time I posted a blog  about how I thought application bundling combined with read-only OS images can make a really good model for an OS. This idea is very similar to what Project Atomic / SilverBlue  are doing now.

Containers, Portals and Runtimes

A few years later, around 2013 the kernel support for containers was starting to shape up, and Docker hit the market. I did a lot of work on the early docker, like porting it away from aufs in order to run on RHEL.

Around this time I also attended the Gnome Developer Experience hackfest  in Brussels where one of the topics was Application deployment and sandboxing. From the discussions there (and my previous experiences) a lot of the core ideas of Flatpak, like runtimes, sandboxing and portals originated.

In 2014 the first version (then called xdg-app) was released. The current Flatpak is a lot more polished, but the initial version of xdg-app is still very much recognizable today.

xdg-app used OSTree to download, store and de-duplicate applications. It uses kernel namespaces (via a helper called xdg-app-helper) to do unprivileged containers. It has a split between applications and runtimes which allow applications to be portable between distros in a very robust fashion, while still limiting the duplication between applications and allowing security updates. There is also integration with the desktop (icons, desktop files, mimetypes, etc), and some very early portal code can be seen.

The great renaming

Modern Flatpak

The name xdg-app was just something I picked for the first commit without much consideration, and it was not very good. However, names are hard, and we spent a lot of time trying to come up with another, eventually settling on “Flatpak” (with the above logo). The 0.6.0 release in may 2016 was the first with the new name.

The 0.6 release was also the first that split out the unprivileged container launcher (xdg-app-helper) into its own project, now known as BubbleWrap , hosted by Project Atomic.

Soon thereafter we had the first release of xdg-desktop-portal which is the host-side implementation of the portal idea, allowing sandboxed applications to safely break out of the sandbox in a controlled fashion.

Version 0.8.0, released december 2016 was the first long-term stable release, which was included in Debian Stretch and RHEL 7. Since then we have had another stable release series called 0.10.x.

We want apps!

Flatpak was always a decentralized system, in that anyone can host their own applications and be on equal terms with everyone else. However, while this is an important feature, it leads to a poor initial experience, both for users (hard to find apps) or developers (need to maintain their own repository).

To solve this we started the Flathub project, which is a single repository where you can find most apps. In the last year it has gone from a minimal viable product building its first app to something with more than 300 apps and a diverse group of developers.

Onwards and upwards!

Future Flatpak

No software is ever finished, or bug-free, but we have had a list of core things that we wanted to have before calling Flatpak 1.0, and that list is now empty. So, I’m planning to release a release-candidate (called 0.99.1) later this week.

Then 1.0 will be released later this summer.

Flatpak in detail, part 2

The first post in this series looked at runtimes and extensions. Here, we’ll look at how flatpak keeps the applications and runtimes on your system organized, with installations, repositories, branches, commits and deployments.

Installations and repositories

An installation is a place on your filesystem where flatpak can install apps and runtimes. By default, flatpak has a system-wide installation in /var/lib/flatpak, and a user installation in $HOME/.local/share/flatpak.

It is possible to define additional system-wide installations by placing a key file in /etc/flatpak/installations.d. For example, this can be used to keep apps on a portable drive.

Part of the data that flatpak keeps for each installation is a list of remotes. A remote is a reference to an ostree repository that is available somewhere on the network.

Each installation also has its own local ostree repository (for example, the system-wide installation has its repo in /var/lib/flatpak/repo). You can explore the contents of these repositories using the ostree utility;

$ ostree --repo=$HOME/.local/share/flatpak/repo/ refs
gnome-nightly:appstream/x86_64
flathub:runtime/org.freedesktop.Platform.Locale/x86_64/1.6
flathub:app/de.wolfvollprecht.UberWriter/x86_64/stable
...

Branches and versions

Similar to git, ostree organizes the data in a repository in commits, which are grouped in branches. Commits are identified by a hash and branches are identified by a name.

While ostree does not care about the format of a branch name, flatpak uses branch names of the form $KIND/$ID/$ARCH/$BRANCH to uniquely identify branches.

Here are some examples:

app/org.inkscape.Inkscape/x86_64/stable
runtime/org.gnome.Platform/x86_64/master

Most of the  time, it is clear from the context if an app or runtime is being named, and only one architecture is relevant. For this case, flatpak allows a shorthand notation for branch names omitting the $KIND and $ARCH parts: $ID//$BRANCH.

In this notation, the above examples shrink to:

org.inkscape.Inkscape//stable
org.gnome.Platform//master

Deployments

Installing an app or runtime really consists of two steps: first, flatpak caches that data in the local repo of the installation, and then it deploys it, which means it creates a check-out of the branch from the local repo. The check-outs are organized in a folder structure that reflects the branch name organization.

For example, Inkscape will be checked-out in $HOME/.local/share/flatpak/app/org.inkscape.Inkscape/x86_64/stable/$COMMIT, where $COMMIT is the hash of the commit that is being deployed.

It is possible to have multiple commits from the same branch deployed, but one of them is considered active and will be used by default. Flatpak maintains symlink in the check-out directory that points at the active commit.

It is also possible to have multiple branches of an app or runtime deployed at the same time; the directory structure of checkouts is designed to allow that. One of the branches is considered current. Flatpak maintains a symlink at the toplevel of the checkout that points at the current checkout.

Flatpak can run an app from any deployed commit, regardless whether it is active or current or not. To run a particular commit, you can use the –commit option of flatpak run.

The relevance of being active and current is that flatpak exports some data (in particular, desktop files) from the active commit of the current branch, by symlinking it into ~/.local/share/flatpak/exports,  where for example gnome-shell will find it and allow you to run the app from the overview.

Note: Even though it is perfectly ok to have multiple versions of the same app installed, running more than one at the same time will typically not work, since the different versions will claim the app ID as their unique bus name on the session bus. A way around this limitation is to explicitly give one of the versions a different ID, for example, by appending a “.nightly” suffix.

Application data

One last aspect of filesystem organization to mention here is that every app that is run with flatpak gets a some filesystem space to use for permanent storage. This space is in $HOME/.var/app/$ID, and it has subdirectories called cache, config and data. At runtime, flatpak sets the XDG_CACHE_DIR, XDG_CONFIG_HOME and XDG_DATA_HOME environment variables to point at these directores.

For example, the persistent data from the inkscape flatpak can be found in $HOME/.var/app/org.inkscape.Inkscape.

Summary

Flatpak installations may look a bit intimidating with their deep diretory tree, but they have a well-defined structure and this post hopefully helps to explain the various components.

June 19, 2018

Bustle 0.7.1: jumping the ticket barrier

Bustle 0.7.1 is out now and supports monitoring the system bus, without requiring any prior system configuration. It also lets you monitor any other bus by providing its address, which I’ve already used to spy on ibus traffic.

Screenshot: Bustle monitoring IBus messages.

Bustle used to try to intercept all messages by adding one match rule per message type, with the eavesdrop=true flag set. This is how dbus-monitor also worked when Bustle was created. This works okay on the session bus, but for obvious reasons, a regular user being able to snoop on all messages on the system bus would be undesirable; even if you were root, you had to edit the policy to allow you to do this. So, the Bustle UI didn’t have any facility for monitoring the system bus; instead, the web page had some poorly-specified instructions suggesting you remove all restrictive policies from the system bus, reboot, do your monitoring, then reimpose the security policies. Not very stetic!

D-Bus 1.5.61 added a BecomeMonitor method explicitly designed for debugging tools: if the bus considers you privileged enough, it will send you a copy of every future message that passes through the bus until you disconnect. Privileged enough is technically implementation defined; the reference implementation is that if you are root, or have the same UID as the bus itself, you can become a monitor.

Three panels: woman smiling while looking at computer screen; mouse pointer pointing at 'Become a fan' button from an old version of Facebook; woman has been replaced by a desk fan.

Bustle, which runs as a regular user, needs to outsource the task of monitoring the system bus to some other privileged process. The normal way to do this kind of thing – as used by tools like sysprof – is to have a system service which runs as root and uses polkit to determine whether to allow the request. The D-Bus daemon itself is not about to talk to polkit (itself a D-Bus service), though, and when distributed with Flatpak it’s not possible for Bustle to install its own system service.

I decided to cheat and assume that pkexec – the polkit equivalent of sudo – and dbus-monitor are both installed on the host system. A few years ago, dbus-monitor grew the ability to dump out raw D-Bus messages in pcap format, which by pure coincidence is the on-disk format Bustle uses. So Bustle builds a command line as follows:

  • If running inside a Flatpak, append flatpak-spawn --host
  • If trying to monitor the system bus, pkexec
  • dbus-monitor --pcap [--session | --system | --address ADDRESS]

It launches this subprocess, then reads the stream of messages from its stdout. In the system bus case, polkit will prompt the user to authenticate and approve the action:

Screenshot: Authentication is needed to run /usr/bin/dbus-monitor as the super user.

Assuming you authenticate successfully, the messages will flow:

Screenshot: Bustle recording messages on the system bus.

There are a few more fiddly details:

  • If the dbus-monitor subprocess quits unexpectedly, we want to show an error; but if the user hits cancel on the polkit authentication dialog, we don’t. pkexec signals this with exit code 126. Now you know why I care about flatpak-spawn propagating exit codes correctly: without that, Bustle can’t readily distinguish these two cases.
  • Bustle’s old internal monitor code did an initial state dump of names and their owners when it connected to the bus. dbus-monitor doesn’t do this yet. For now, Bustle waits until it knows the monitor is running, then makes its own connection to the same bus and performs the same state dump, which will be captured by the monitor and end up in the same stream. This means that Bustle in Flatpak still needs access to the session and system buses.
  • Once started, dbus-monitor only stops when the bus exits, it tries and fails to write to its stdout pipe, or it is killed by a signal. But sending SIGKILL from the unprivileged Bustle process to the privileged dbus-monitor process has no effect. Weirdly, if I run pkexec dbus-monitor --system in a terminal, I can hit Ctrl+C and kill it just fine. (Is this something to do with controlling terminals? Please tell me if you know how I could make this work.) So instead we just close the pipe that dbus-monitor is writing to, and assume that at some point in the future it will try and fail to log a new message to it.2
  • Why bother with the pcap framing when Bustle immediately takes it back apart? It means messages are timestamped in the dbus-monitor process, so they’re marginally more likely to be accurate than they would be if the Bustle UI process (which might be doing some rendering) was adding the timestamps.

On the one hand, I’m pleased with this technique, because it allows me to implement a feature I’ve wanted Bustle to have since I started it in 2008(!). On the other hand, this isn’t going to cut it in the general case of a Flatpaked development tool like sysprof, which needs a system helper but can’t reasonably assume that it’s already installed on the host system. Of course there’s nothing to stop you doing something like flatpak-spawn --host pkexec flatpak run --command=my-system-helper com.example.MyApp ... I suppose…

  1. or version 0.18 of the spec if you’re into that
  2. I’ve realised while writing this post that I can bring “some point in the future” forward by just connecting to the bus again.

June 18, 2018

2018-06-18 Monday.

  • Presents at breakfast - seems having spent a year telling people I'm actually 41 (by mistake) I now am (I think); early onset senelity apparently.
  • Mail chew; plugged away at OpenSSL's BIO / handshaking pieces around outbound connections. Birthday tea - steak & baked alaska.

June 17, 2018

Refactor: Backend and UI

Fractal is currently structured into two parts: The API part (fractal-matrix-api) and GTK part (fractal-gtk). The first one mostly just does the https calls to the Matrix server, the GTK part does everything else. This post will not talk about the API part since that will remain more or less the same (at least for now).

Why do this split?

Our goal is to create two separate Apps for two different use cases: Banquets and Barbecues. For this split to happen we first need to make some changes to Fractal’s architecture.

I think to keep Fractal maintainable in the future we need to simplify especially the AppOp struct, since it has been growing at an alarming pace (Don’t get me wrong I’m really happy that Fractal improves so quickly). AppOp is the struct which contains all widget references and most methods. Basically, it contains everything important.

Also, a lot of Matrix related code is intertwined with GTK code, and therefore many tasks are handled in the main thread.

New architecture

The communication between fractal-matrix-api and the Fractal backend will stay the same. Therefore, the backend-loop will live in the backend, but instead of making UI changes directly, it will just store the new data, and then signal the main GTK application that it has to update the related UI component. The backend will expose a set of methods to give the main application access to the data and to change them.

The main application will create all UI components and keep them up-to-date. At last we have the UI components which are “custom widgets”, such as the sidebar. A custom widgets has two public methods, one to create a new component, and another one to update its content.

When the main application receives a UI update event, containing only information about which UI component should be updated, but no other data, the application uses the interface offered by the backend to get all needed information to call the update method of each custom widget. The update method then decides then which GTK widgets have to be destroyed, and which can be reused to display the new data.

How to get started?

The first thing we can do is switch form Mutex to RwLock, this will already solve many UI freezes since we don’t need to look the data anymore to read it.

Then we can start moving the current code form AppOp, where possible, to a custom widget (the Rust structs we are using right now). Each widget should have a create and an update method, for creating the new component and for keeping it updated without the need of destroying it first. (Address.rs is a widget example created this way). Most custom widgets already have the create method called widget() (if I remember it correctly) but they are missing the update method.

Nothing is set in stone

We didn’t decide anything yet. I wrote this blog post to start the discussion about how to tackle the refactor and split, so input/comments/feedback are very welcome!

2018-06-17 Sunday.

  • Woken unfeasibly early by small girls' six-in-two-beds experiment breaking down. To church to play bass & violin rather tiredly. Home for lunch joined by Margarit & Marius.
  • Packed up tent, dried blankets etc. straightened tent-pegs in the vice with E. Tea, bed.

June 15, 2018

Introducing a media viewer for Fractal

Fractal is a Matrix client for GNOME and is written in Rust. Matrix is an open network for secure, decentralized communication.

These past two weeks, I have made a lot of progress on my GSoC project, I have:

I will talk more about the image viewer in this post.

The initial issue

The initial issue was about improving how images were handled within Fractal: Fractal was using the `xdg-open` command in order to ask you which application you would like to use to open an image. So it looked like this:

Screenshot_from_2017-12-14_02-10-55

Further more, because the media are downloaded into the folder `~/.cache/fractal` under their hash name before calling `xdg-open`, there are two major problems:

  • The names given to the pictures have no sens at all (in “Select an application to open […]”)
  • If you use “Eye of GNOME” to open this image, you will end up navigating among all the images contained into the Fractal’s cache folder where there are avatars and thumbnails from the current and other rooms which is absolutely not what we would want to have

So many solutions has been mentioned over the past months, I had tried to implement a simple dialog that was showing the image with three simple action: display the image in its real size, make the image fit inside the dialog and download the image. My prototype can be seen on this branch.

Finally, Tobias made a design that has been discussed during the Hackfest:

The media viewer wouldn’t be a separate dialog but it would be integrated within the main application window, just like the room directory. There would be a zoom entry that would enable the user to scale the image up and down, a button to enter in full screen mode and an overflow menu that would show other operations such as downloading the image.

How I have implemented it

I first implemented the design of the media viewer with Glade and then integrated it within the two GtkStacks of the main window. There is a stack named `headerbar_stack` for the different header bars used by Fractal and a `main_content_stack` for the different window contents. The elements of the stacks to show are determined depending on the internal state of the application, so I created a new `MediaViewer` state that would show the header bar and the viewer that I implemented with Glade. When the user clicks on an image in a room, the program enters in this state and when they clicks on the back button of the media viewer, it goes back to the chat view. You can view these changes in this commit.

Next I implemented the ability to display the clicked image in the media viewer. I’ve used the Image custom widget but there was a big issue: the Imagewidget needed to be passed a maximum size for the GtkDrawingArea but (for an reason I couldn’t understand) the allocated size (width, height) of the GtkViewport in which the Image widget would be placed into was always of (1, 1), so it wasn’t usable to build the Image widget. So I had to make the size argument optional and then it worked fine.

Next I implemented the ability to navigate in the pictures available in a room. For this, I created a new MediaViewer struct that holds two field:

  • media_urls that is a Vec<String> that holds the URLs of the media (for now just the pictures) currently loaded in the room.
  • current_url_index that is a usize that allows us to know the position of the URL (within media_urls) of the media currently viewed.

Then in order to go to the previous/next media, we decrease/increase by one the value of current_url_index and then we load the image with the URL media_urls[current_url_index]. You can view the commit here.

The image was displayed but it wasn’t centered, it was at the top-left corner of the GtkViewport. For some reasons (probably related to the allocated size issue), I couldn’t use methods such as set_halign in order to center the Imagewidget. So I had to implement a work around in which I would set up a custom origin when drawing the image on the GtkDrawingAreain order to have it centered.

Implementing the ability to zoom in and out on the image took me quite much time. I first implemented the ability to enter an arbitrary zoom level to view the image and then Implemented the behavior of the “zoom out” and “zoom in” buttons so that they would request predefined zoom levels. See this commit for more details about it.

The title bar of the media viewer must be changed according to the media’s file name. This was rather easy to implement: I just needed to add a field media_names (a Vec<String>)in theMediaViewerstruct, it was easy to fill as media names are store in the body field of the media’s message, finally we set the title bar’s text with media_names[current_media_index](the name of the index was changed from “current_url_index” to “current_media_index” in this commit). You can see the full details here.

Finally, I implemented the full screen mode of the viewer: when the user clicks on the full screen button in the header bar, it enters in the full screen mode and in order to exit this mode, the viewer can press escape. It has been implemented in this commit.

Here is the final result of the image viewer I’ve made:

Capture du 2018-06-15 16-15-41

What can still be improved

There are however some things that are yet to be improved:

  • The buttons to zoom in and out are always sensitive: one of them should be insensitive when we are at the maximum/minimum zoom level.
  • The zoom percentage input entry is a little bit messy.
  • The image is not resized when entering in full screen mode.
  • You cannot go further back (with the previous button) in the media history than the loaded messages of the current room.
  • You cannot zoom more than 100% of the image size
  • When the image is larger than the viewport, the horizontal scroll isn’t always available.

I will open an issue and solve some of these problems before moving to the next task.

June 14, 2018

Be a redshirt this GUADEC

If you’re planning to volunteer at GUADEC this year and be part of the selfless redshirt team (we’ve got 100% survival rate so far!), please register before the end of this week so that we have a better idea of which t-shirt sizes to order. If you can’t register soon, you can still volunteer even if you register on site!

by Olav Vitters, CC-BY-SA 4.0

In fact, you should register even if you’d like to skip volunteering this year to help us estimate attendee numbers! Ismael needs to make enough sangria for everyone.

June 13, 2018

Keeping those headers aligned

One dead give-away of a GNOME/Gtk programmer is how they format their headers. For the better part of two decades, many of us have been trying to keep things aligned. Whether this is cargo-culted or of real benefit depends on the reader. Generally, I find them easier to filter through.

Unfortunately, none of indent, clang-format, nor uncrustify have managed to exactly represent our style which makes automated code formatting tools rather problematic. Especially in an automated fashion.

For example, notice how the types and trailing asterisks, stay aligned, in multiple directions.

FOO_EXPORT
void   foo_do_something_async  (Foo                  *self,
                                const gchar * const  *params,
                                GCancellable         *cancellable,
                                GAsyncReadyCallback   callback,
                                gpointer              user_data);
FOO_EXPORT
Bar   *foo_do_something_finish (Foo                  *self,
                                GAsyncResult         *result,
                                GError              **error);

Keeping that sort of code aligned is quite a pain. Even for vim users who can fairly easily repeat commands. Worse, it can explode patches into unreadable messiness.

Anyway, I added a new command in Builder last night that will format these in this style so long as you don’t do anything to trip it up. Just select a block of function declarations, and run format-decls from the command bar.

It doesn’t yet handle vtable entries, but that shouldn’t be too painful. Also, it doesn’t handle miscellaneous other C code in-between declarations (except G_GNUC_* macros, __attribute_() etc.

Easy MSI installer creator

Shipping programs on Windows platforms becomes a lot simpler (especially in corporate environments) if you can create an MSI installer. The only Free software solution for that is the WiX installer toolkit. The fairly big downside to this is that it very much tied to how Visual Studio does things with GUIDs and all that. The installer's contents and behavior is defined with an XML file whose format is both verbose and confusing.

Most Unix developers, once faced with this, will almost immediately blurt out something like "Why can't I just do DESTDIR=c:\some\path ninja install and have it make an installer out of the result?" So I created a script that does exactly that.

The basic usage is simple. First you do a staged install into some directory and create a JSON file describing the installation that would look like this:

{
    "update_guid": "YOUR-GUID-HERE",
    "version": "1.0.0",
    "product_name": "Product name here",
    "manufacturer": "Your organization's name here",
    "name": "Name of product here",
    "name_base": "myprog",
    "comments": "A comment describing the program",
    "installdir": "MyProg",
    "license_file": "License.rtf",
    "parts": [
        {"id": "MainProgram",
         "title": "Program name",
         "description": "The MyProg program",
         "absent": "disallow",
         "staged_dir": "staging"
        }
    ]
}

Running the script would then create a standalone MSI installer with the contents of the staging directory.

Multiple components in one installer

Some programs ship with multiple parts that the user can choose whether to install each part. This is supported by the script. First you must split the files in multiple staging directories, one per component and then add entries to the parts array. See the repository for an example.

Flatpak in detail

At this point, Flatpak is a mature system for deploying and running desktop applications. It has accumulated quite some sophistication over time, which can make it appear more complicated than it is.

In this post, I’ll try to look in depth at some of the core concepts behind Flatpak, namely runtimes and extensions.

In the beginning: bundles

At its very core, the idea behind Flatpak is to bundle applications with their dependencies, and ship them as a self-contained unit.  There are good reasons that bundling is attractive for application developers:

  • There is a much bigger chance that the app will run on an arbitrary end-user system, which may have different versions of libraries, different themes, or a different kernel
  • You are not relying on all the different update mechanisms and policies of Linux distributions
  • Distribution updates to your dependencies will not break your app behind your back
  • You can test the same code that your users run

Best of both worlds: runtimes

In the age-old debate beween bundlers and packagers, there are good arguments on both sides. The usual arguments against bundling are:

  • Code duplication. If a library gets hit by a security issue you have to fix it in all the apps that bundle it
  • Wastefulness. if every app ships an entire library stack, this blows up the required bandwidth for downloads and the required disk space for installing them

With this in mind, Flatpak early on introduced the concept of runtimes. The idea behind runtimes is that many desktop applications use a deep library stack, but it is often a similar set of libraries. Therefore, it makes sense to take these common library stacks and distribute them separately as “GNOME runtime” or “KDE runtime”, and have apps declare in their metadata which runtime they need.

It then becomes the responsibility of the flatpak tooling to assemble  the applications filesystem tree with the runtimes filesystem tree when it creates the sandbox environment that the app runs in.

To avoid conflicts, Flatpak requires that the applications filesystem tree is rooted in /app, while runtimes have a traditional /usr tree.

Splitting off runtimes preserves most of the benefits that I outlined for bundles, while greatly reducing code duplication and letting us update libraries independently of applications.

Of course, it also brings back some of the risks of modularity: updating the libraries independently carries, once again, the risk of breaking the applications that use the runtime. So the team maintaining a runtime has to be very careful to avoid introducing problematic changes or incompatibilities.

Going further: extensions

As I said, shipping runtimes separately saves a lot of bandwidth, since the runtime has to be downloaded only once for all the applications that share it. But a runtime is still a pretty massive download, and contains a lot of things that may not be useful most of the time or are just optional.

A good examples for this are translations. It is not uncommon for desktop apps to be translated in 50 locales. But the average user will only ever use a single one of these. In traditional packaging, this is sometimes addressed by breaking translations out as “lang packs” that can be installed separately.

Another example is debug information. You don’t need symbols and other debug information unless you encounter a crash and want to submit a meaningful stacktrace. In traditional packaging, this is addressed by splitting off “debuginfo” packages that can be installed when needed.

Flatpak provides a mechanism  to address these use cases.  Runtimes (and applications too) can declare extension points, which are designated locations in their filesystem tree where additional runtimes can be mounted. These additional runtimes are called extensions. When constructing a sandbox for running an app, flatpak tooling will look for matching extensions and mount them at the right place.

Flatpak is not a generic solution, but tailored towards the use case of desktop applications, and it tries to do the the right thing out of the box: flatpak-builder automatically breaks out .Locale and .Debug extensions when building apps or runtimes, and when installing things, flatpak installs the matching .Locale extension. But it goes beyond that and only installs the subset of it that is relevant for the current locale, thereby recreating the space-saving effect of lang packs.

Extensions: infinite variations

The extension mechanism is flexible enough to cover not just locales and debuginfo, but all sorts of other optional components that applications might need. To give just some examples:

  • OpenGL drivers that match the GPU
  • Other hardware-specific APIs like vaaapi
  • Media codecs
  • Widget themes

All of these can be provided as extensions. Flatpak has the smarts built-in to know whether a given OpenGL driver extension matches the hardware or whether a given theme extension matches the current desktop theme, and it will automatically install and use matching extensions.

At last: the host OS

The examples in the previous paragraph are realized as extensions because the shared objects or theme components need to match the runtime they are used with.

But some things just don’t change very much over time, and don’t need exact matching against the runtime to be used by applications. Examples in this category are fonts, icons or certificates.

Flatpak makes these components from the host OS available in the sandbox, by mounting them below /run/host/ in the sandbox, and appending /run/host/share to the XDG_DATA_DIRS environment variable.

Summary

Flatpak does a lot of hard work behind the scenes to ensure that the apps it runs find an environment that looks similar to a traditional Linux desktop, by combining the application, its runtime, optional extensions and host components.

The Flatpak documentation provides more information about working with Flatpak as an application developer.

libinput and its device quirks files

This post does not describe a configuration system. If that's all you care about, read this post here and go be angry at someone else. Anyway, with that out of the way let's get started.

For a long time, libinput has supported model quirks (first added in Apr 2015). These model quirks are bitflags applied to some devices so we can enable special behaviours in the code. Model flags can be very specific ("this is a Lenovo x230 Touchpad") or generic ("This is a trackball") and it just depends on what the specific behaviour is that we need. The x230 touchpad for example has a custom pointer acceleration but trackballs are marked so they get some config options mice don't have/need.

In addition to model tags we also have custom attributes. These are free-form and provide information that we cannot get from the kernel. These too can be specific ("this model needs a pressure threshold of N") or generic ("bluetooth keyboards are an external keyboards").

Overall, it's a good system. Most users never have to care that we even have this. The whole point is that any device-specific quirks need to be merged only once for each model, then everyone with the same device gets to benefit on the next update.

Originally quirks were hardcoded but this required rebuilding libinput for any changes. So we moved this to utilise the udev hwdb. For the trivial work of fetching udev properties we got a lot of flexibility in how we can match against devices. For example, an entry may look like this:


libinput:name:*AlpsPS/2 ALPS GlidePoint:dmi:*svnDellInc.:pnLatitudeE6220:*
LIBINPUT_ATTR_PRESSURE_RANGE=100:90
The above uses a name match and the dmi modalias match to apply a property for the touchpad on the Dell Latitude E6330. The exact match format is defined by a bunch of udev rules that ship as part of libinput.

Using the udev hwdb maked the quirk storage a plaintext file that can be updated independently of libinput, including local overrides for testing things before merging them upstream. Having said that, it's definitely not public API and can change even between stable branch updates as properties are renamed or rescoped to fit the behaviour more accurately. For example, a model-specific tag may be renamed to a behaviour-specific tag as we find more devices affected by the same issue.

The main issue with the quirks now is that we keep accumulating more and more of them and I'm starting to hit limits with the udev hwdb match behaviour. The hwdb is great for single matches but not so great for cascading matches where one match may overwrite another match. The hwdb match system is largely implementation-defined so it's not always predictable which match rule wins out in the end.

Second, debugging the udev hwdb is not at all trivial. It's a bit like git - once you're used to it it's just fine but until then the air turns yellow with all the swearing being excreted by the unsuspecting user.

So long story short, libinput 1.12 will replace the hwdb model quirks database with a set of .ini files. The model quirks will be installed in /usr/share/libinput/ or whatever prefix your distribution prefers instead. It's a bunch of files with fairly simplistic instructions, each [section] has a set of MatchFoo=Bar directives and the ModelFoo=bar or AttrFoo=bar tags. See this file for an example. If all MatchFoo directives apply to a device, the Model and Attr tags are applied. Matching works in inter- and intra-file sequential order so the last section in a file overrides the first section of that file and the highest-sorting file overrides the lowest-sorting file. Otherwise the tags are accumulated, so if two files match on the same device with different tags, both tags are applied. So far, so unexciting.

Sometimes it's necessary to install a temporary local quirk until upstream libinput is updated or the distribution updates its package. For this, the /etc/libinput/local-overrides.quirks file is read in as well (if it exists). Note though that the config files are considered internal API, so any local overrides may stop working on the next libinput update. Should've upstreamed that quirk, eh?

These files give us the same functionality as the hwdb - we can drop in extra files without recompiling. They're more human-readable than a hwdb match and it's a lot easier to add extra match conditions to it. And we can extend the file format at will. But the biggest advantage is that we can quite easily write debugging tools to figure out why something works or doesn't work. The libinput list-quirks tool shows what tags apply to a device and using the --verbose flag shows you all the files and sections and how they apply or don't apply to your device.

As usual, the libinput documentation has details.

June 12, 2018

Fingerprint reader support, the second coming

Fingerprint readers are more and more common on Windows laptops, and hardware makers would really like to not have to make a separate SKU without the fingerprint reader just for Linux, if that fingerprint reader is unsupported there.

The original makers of those fingerprint readers just need to send patches to the libfprint Bugzilla, I hear you say, and the problem's solved!

But it turns out it's pretty difficult to write those new drivers, and those patches, without an insight on how the internals of libfprint work, and what all those internal, undocumented APIs mean.

Most of the drivers already present in libfprint are the results of reverse engineering, which means that none of them is a best-of-breed example of a driver, with all the unknown values and magic numbers.

Let's try to fix all this!

Step 1: fail faster

When you're writing a driver, the last thing you want is to have to wait for your compilation to fail. We ported libfprint to meson and shaved off a significant amount of time from a successful compilation. We also reduced the number of places where new drivers need to be declared to be added to the compilation.

Step 2: make it clearer

While doxygen is nice because it requires very little scaffolding to generate API documentation, the output is also not up to the level we expect. We ported the documentation to gtk-doc, which has a more readable page layout, easy support for cross-references, and gives us more control over how introductory paragraphs are laid out. See the before and after for yourselves.

Step 3: fail elsewhere

You created your patch locally, tested it out, and it's ready to go! But you don't know about git-bz, and you ended up attaching a patch file which you uploaded. Except you uploaded the wrong patch. Or the patch with the right name but from the wrong directory. Or you know git-bz but used the wrong commit id and uploaded another unrelated patch. This is all a bit too much.

We migrated our bugs and repository for both libfprint and fprintd to Freedesktop.org's GitLab. Merge Requests are automatically built, discussions are easier to follow!

Step 4: show it to me

Now that we have spiffy documentation, unified bug, patches and sources under one roof, we need to modernise our website. We used GitLab's CI/CD integration to generate our website from sources, including creating API documentation and listing supported devices from git master, to reduce the need to search the sources for that information.

Step 5: simplify

This process has started, but isn't finished yet. We're slowly splitting up the internal API between "internal internal" (what the library uses to work internally) and "internal for drivers" which we eventually hope to document to make writing drivers easier. This is partially done, but will need a lot more work in the coming months.

TL;DR: We migrated libfprint to meson, gtk-doc, GitLab, added a CI, and are writing docs for driver authors, everything's on the website!

Contributing to Boxes

I have to admit that Boxes is a bit late for the Flatpak party, but that’s not a problem. The technical difficulties of getting a virtualization hypervisor to run inside the flatpak sandbox are mostly overcomed. This way, contributing to Boxes has never been easier.

In the following sections I will describe the step-by-step process of making your first code contribution to GNOME Boxes.

Get GNOME Builder

Builder makes it very easy to download and build GNOME applications with just a couple of clicks. It will also make your life easier while writing the code.

Download Builder

Download and build Boxes

GNOME Builder: cloning a project and building it

That’s it! Now that you have the project built and can run it, we can start looking into fixing bugs.

Finding an issue to hack

You can have an overview of the ongoing work in the project by browsing our kanban board. We also have issues tagged as Newcomers if you are making your first contribution and want to start hacking on something easy.

Create a GitLab account and fork the project

Visit gitlab.gnome.org and create an account. GitLab will pop up a banner asking you to add your SSH keys to your profile, or you can go directly to edit your profile.

After your profile has been properly setup, it is time to fork the project!

Go to the Boxes project page and click the Fork button. This will create your own copy of the git repository under your personal namespace in GitLab.

Finally, get your fork URL and add to your local git repository as a remote:

git remote add fork $project_url

Making changes and submitting your code

After building Boxes and finding an issue to work, it is time to dive into the codebase. Edit the files and press the GNOME Builder “play” button to see your changes take effect.

Since the migration to GitLab, we have adopted the merge request workflow.

You need to:

1. Create a git branch and commit your changes

git checkout -b $descriptive-branch-name

Do your work, and commit your changes. Take a look at our commit message guidelines.

2. Push your changes for the world to see!

git push fork

A message with a link to create a merge request will be printed in your terminal. Click it, describe your changes, and Submit!

3. Follow up on the feedback

Me and other developers will review your work and recommend changes if necessary. We will iterate over and over until your contributions are ready to be merged.

4. Celebrate your first contribution!

Further reading

The steps described above are based on the GNOME Newcomers initiative. We have a detailed step-by-step process of making contributions and you should definitely check it out. It has pointers about documentation, tips about finding the right approach to dive into the code base, and examples.

Let’s do it!

June 10, 2018

Tagcloud

The way we organize content on computers hasn’t really evolved since the arrival of navigational file managers in late 1980s. We have been organizing files into directories for decades. Perhaps the biggest change anyone has managed since then is that we now call directories “folders” instead, and that we obscure the full directory tree now pointing users instead towards certain entry points such as the “Music”, “Downloads” and “Videos” folders inside their home directory.

It’s 2018 already. There must be a better way to find content than to grope around in a partially obscured tree of files and folders?

GNOME has been innovating in this area for a while, and one of the results is the Tracker search and indexing tool which creates a database of all the content it finds on the user’s computer and allows you to run arbitrary queries over it. In principle this is quite cool as you can, for example, search for all photos taken within a given time period, all songs by a specific artist, all videos above a certain resolution ordered by title, or whatever else you can think of (where the necessary metadata is available). However the caveat is for this to be at all useful you currently have to enjoy writing SPARQL queries on the commandline:  Tracker itself is a “plumbing” component, the only interface it provides is the tracker commandline tool.

There is ongoing work on content-specific user interfaces that can work with Tracker to access local content, so for photos for example you can use GNOME Photos to view and organize your whole photo collection. However, there isn’t a content-agnostic tool available that might let you view and organize all the content on your computer… other than Nautilus which is limited to files and folders.

I’m interested in organizing content using tags, which are nothing but freeform textual category labels. On the web, tags are a very common way of categorizing content. (The name hashtags is probably more widely understood than tags among web users, but hashtag has connotations to social media and sharing which don’t necessarily apply when talking about desktop content so I will call them tags here.) Despite the popularity on the web, desktop support is low: Tagspaces seems to be the only option and the free edition is very limited in what it can do. Within GNOME, we have had support for storing tags in the Tracker database for many years but I don’t know of any applications that allow viewing or editing file tags.

Around the time of GUADEC 2017 I read Alexandru’s blog post about tags in Nautilus, in which he announced that Nautilus wasn’t going to get support for organizing files using tags because it would conflict to much with the existing organization principle in Nautilus of putting files into folders. I agree with that logic there, but it leaves open a question: when will GNOME get an interface that allows me to organize files using tags?

As it happened I had a bit of free time after GUADEC 2017 was finished and I started sketching out an application designed specifically for organizing content using tags.

The result so far looks like this:

This is really just a prototype, there are lots more features I’d like to add or improve too if I get the time, but it does support the basic use case of “add tags to my files” at this point and so I’ve started a stable release branch. The app is named Tagcloud and you can get it as a Flatpak .bundle of the 0.2.1 release from here. Note that it won’t autoupdate as this isn’t a proper Flatpak repo, just a bundle file.

Tagcloud is written using Python and PyGObject, and of course GTK+. I encountered several G-I bindings issues during development which mean that Tagcloud currently requires very new versions of GLib and GTK+ but the good news is that by using the Flatpak bundle you don’t need to care about any of that. Tagcloud uses Tracker internally and I’ve been thinking a lot about how to make Tracker work better for application developers; these thoughts are quite lengthy and not really complete yet so I will save them for a separate blog post.

One of the key principles of Tagcloud is that it should recognize any type of content, so for example you can group together photos, documents and videos related to a specific project. In future I would also like to see GNOME’s content-specific applications such as Photos and Documents recognize tags; this shouldn’t require too much plumbing work since everything seems to be tending towards using Tracker as a backend, but it would of course affect the user interfaces of those apps.

I didn’t yet mentioned in this blog that a couple of months ago I quit my job at Codethink and right now I’m training to be a language teacher. So I imagine that I will have very little time available to work on Tagcloud for a while, but please do send issue reports and patches if you like to https://gitlab.com/samthursfield/tagcloud. I will be at GUADEC 2018 and hopefully we can have lots of exciting discussions about applying tags to things. And for the future … while I would like Tagcloud to become a fully fledged application, I will also be happy if it serves simply as a prototype and as a way of driving improvements in Tracker which will then benefit all of GNOME’s content apps.

June 09, 2018

Battery on my new Librem 13

Last month, I finally bought a new laptop. My Lenovo X1 Carbon (1st gen.) still performed well, even at six years old (2012). I think that's partially because I'm running Linux, which has less bloat. CPU loads were usually fine, unless I was really pushing things. The real problem was the battery. After six years of use, the battery held a charge for less than three hours. Not bad, but annoying when I want to work all day.

Sure, I could buy a new X1 Carbon battery for less than $100, but I was also worried about the laptop failing unexpectedly, and just when I needed it. I do a fair amount of work from home (especially writing) and it would suck to have my laptop die when I was trying to get something done. So I finally decided to buy a new system.

After waffling between "do I buy a new laptop?" and "maybe I should just get a desktop," I decided on a new laptop, but with an extra monitor and keyboard that were more comfortable. And soon after that, I decided on the Librem 13, by Purism. (In case you're curious, I'm also running an ASUS VE248H 24" Full HD 1920x1080 2ms HDMI-DVI-VGA Back-lit LED Monitor, and a Perixx PERIBOARD-512 Ergonomic Split Keyboard. I bought those elsewhere.)

I don't often travel with a laptop, but when I do, I prefer to use my primary system so I don't have to keep things synced. And I wanted it to run Linux. Purism is aimed at the Linux market, and I wanted to support that. Go Purism!

My remaining question was "how to manage the battery?" I know laptop batteries don't last forever. But how should I run my laptop so the battery lasts the longest? I remembered that it's not a problem with modern batteries to leave them plugged in all the time, but then there's the heat issue. Heat will kill a laptop battery. An article on How-To Geek answered Should I Leave My Laptop Plugged In All The Time? with a kind of non-answer. There is no straight answer. From the article:
Ultimately, it’s not clear which is worse for a battery. Leaving the battery at 100% capacity will decrease its lifespan, but running it through repeated discharge and recharge cycles will also decrease its lifespan. Basically, whatever you do, your battery will wear down and lose capacity. That’s just how batteries work. The real question is what makes it die more slowly.

Laptop manufacturers are all over the place on this. Apple used to advise against leaving MacBooks plugged in all the time, but their battery advice page no longer has this piece of advice on it. Some PC manufacturers say leaving a laptop plugged in all the time is fine, while others recommend against it with no apparent reason.
I found an interesting question on the Purism discussion board providing advice on battery use. User "Uncle_Vova" recommends "never discharge it completely" and "never keep it at high states of charge (say, above 60%) at high temperatures (above 50°C)." Later in the discussion, user "mrtsolar" also advises "Keep charge between 20-80% when possible."

That pretty much matches what I had found elsewhere: all laptop batteries degrade over time, eventually all batteries will hold less charge and not last as long between charging. But there are some things you can do to extend the life of a laptop battery: don't always keep it plugged in, don't let it go all the way to zero, let its charge stay within a range, avoid heat, take the battery out (if you can) if you're going to leave it plugged in all the time (like at the office, especially if it's in a "dock").

I suppose I could have looked into a power/charging threshold. Doing this is very dependent on the system firmware. I learned via an Ask Ubuntu forum there was a feature to do this on my Lenovo laptop, but I never tried it. I just plugged the laptop into a power strip, and I turned the strip off and on when needed. That usually kept the laptop battery between 15% and 99% charged, depending on when I remembered to turn off/on the power strip.

Being lazy, I wanted a way to automate that when using my new Librem laptop. Again, I could look into a power/charging threshold for the Librem. But for less than $20, I picked up a power strip that had a timer (Century 8 Outlet Surge Protector with Mechanical Timer). Four outlets on the strip are always on, and four are connected to a built-in timer. That allows me to plug in my monitor and LED desk light to an always-on outlet, and my laptop to a timed outlet. I still turn the power strip off when I'm not using the computer, but that's a habit I've had for ages, so that's not a big deal.

The power needs for a laptop aren't that big, so I'm not worried about over-taxing the power strip. This thing is built to run high-load devices like an aquarium water pump and light, or a heat lamp for a terrarium. The Librem runs a pretty light load in comparison: about 60-80W when charging the battery, according to user "Derriell" on the Purism forum.

I'm still tweaking the duty cycle. My goal is to exercise the battery somewhere between 20% and 80%. The Librem 13 will run on battery for roughly seven to nine hours, and it takes upwards of four hours to fully recharge, so right now I have the power strip timer set at five hours "off" and three hours "on." So if I only have the power strip turned on when I'm using the computer, the laptop is running from battery for five hours, then it charges for three hours, then it's back to battery. I have to keep the total (eight hours) evenly divisible by twenty-four hours.

Maybe I'm overthinking it, but this seems a good solution to me. How do you manage the battery on your laptop? If there's a more elegant way, let me know in the comments.

A new completion engine for Builder

Since my initial announcement of Builder at GUADEC in 2014, I’ve had a vision in the back of my mind about how I’d like completion to work in Builder. However, there have been more important issues to solve and I’m just one person. So it was largely put on the back burner because after a few upstream patches, the GtkSourceView design was good enough.

However, as we start to integrate more external tooling into Builder, the demands and design of what those completion layers expect of the application have changed. And some of that is in conflict with the API/ABI we have in the long-term stable versions of GtkSourceView.

So over the past couple of weeks, I’ve built a new completion engine for Builder that takes these new realities into account.

A screenshot of Builder's new completion engine showing results from clang in a C source file.

It has a number of properties I wanted for Builder such as:

Reduced Memory and CPU Usage

Some tooling wants to give you a large set of proposals for completion and then expects the IDE to filter in the UI process. Notably, this is how Clang works. That means that a typical Gtk application written in C could easily have 25,000 potential completion proposals.

In the past we mitigated this through a number of performance tricks, but it still required creating thousands of GObjects, linked lists, queues, and such. That is an expensive thing to do on a key-press, especially when communicating with a sub-process used for crash-isolation.

So the new completion provider API takes advantage of GListModel which is an interface that focuses on how to have a collection of GObjects which don’t need to be “inflated” until they’ve been requested. In doing so, we can get our GVariant IPC message from the gnome-builder-clang sub-process as a single allocation. Then, as results are requested by the completion display, a GObject is inflated on demand to reference an element of that larger GVariant.

In doing so, we provide a rough upper bound on how many objects need to be created at any time to display the results to the user. We can also still sort and filter the result set without having to create a GObject to represent the proposal. That’s a huge win on memory allocator churn.

Consistent and Convenient Refiltering

Now that we have external tooling that expects UI-side refiltering of proposals, we need to make that easier for tooling to do without having to re-query. So the fuzzy search and highlighting tools have been moved into IdeCompletion for easy access by completion providers.

As additional text is provided for completion, the providers are notified to perform filters on their result set. Since the results are GListModel-based, everything updates in the UI out-of-band nicely with a minimal number of gsignal emissions. Compare this to GtkTreeModel which has to emit signals for every row insertion, change, or deletion!

Alternative Styling

When working with completions for programming languages, we’re often dealing with 3 potential groups of content. The return value, the name and possible parameters, and miscellaneous data. To get the styling we want for all of this, I chose to forgo the use of GtkTreeView and use widgets directly. That means that we can use CSS like we do everywhere else. But also, it means that some additional engineering is required.

We only want to create widgets for the visible rows, because otherwise we’re wasting memory and time crunching CSS for things that won’t be seen. We also want to avoid creating new widgets every time the visible range of proposals is changed.

The result is IdeCompletionListBox which is a GtkBox containing GtkListBoxRow and some GtkSizeGroups to give things a columnar effect. Because the number of created widgets is small things stay fast and snappy while giving us the desired effect. Notably, it implements GtkScrollable so if you place it in a GtkScrolledWindow you still get the expected behavior.

Further more, we can adjust the window sizing and placement to be more natural for code-related proposals.

Dynamic Priority Control

We want the ability to change the priority of some completion providers based on the context of the completion. The new design allows for providers to increase their priority when they know they have something of high-importance given some piece of contextual knowledge.

Long term, we also want to provide an API for providers to register a small number of suggested completions that will be raised to the top-level, regardless of what provider gave them. This is necessary instead of having global “scoring” since that would require both O(n) scans of the data set as well as coming up with a strategy to score disparate systems (and search engines prove that rarely works well).

More to do

There are still a couple things that I think we should address that may influence the API design more. For example:

  • How should we handle string interpolation? A simplified API for completions when working inside of strings might be useful. Think strftime(), printf(), etc as potential examples here.
  • The upcoming Gtk+ 3.24 release will give us access to the move_to_rect() API. Combined with some Wayland xdg_popup improvements, this could allow us to make our display widget more flexible.
  • Parameter completion is still a bit of an annoying process. We could probably come up with a strategy to make the display look a lot better here.
  • Give some tweaks and knobs for how much and what to complete (just function name vs parameters and types).

Conclusions

Rarely do I write any code that doesn’t have bugs. Now that this is landing in Builder Nightly soon, I could use some more testing and bug filing from the community at large.

I’m very happy with the improvements over the past couple of months. Between getting Clang out of process and this to allow us to make clang completion fast, I think we’re in a much better place.

We can’t get this design into older GtkSourceView releases, but we can probably look at some form of integration into what will eventually integrate with Gtk4. I would be very happy if it influenced new API releases of the library so that we don’t need to carry the implementation downstream.

Adding self registering keys to lua-factory

For the past few weeks I’ve been hacking away at GNOME Games and Grilo. Here’s what I’ve done so far.

May 14th - June 3rd

My first task was to fetch metadata using thegamesdb and use it to get developer and publisher of a game to GNOME Games. For this, I had to add the appropriate system keys to Grilo, the only problem being the keys in question were too app-specific to be added as system keys and there was no provision of self registering keys in lua based sources.

The struggle

The solution was pretty simple, I began implementing self registering keys to Grilo for lua sources to use all the while fixing any bugs I encountered on the way.

Bastien Nocera, gave me a very bright idea to register new keys while setting their value to GRL_DATA itself. I completed this by implementing two function in Grilo.

  • grl_data_set_for_id ()
  • grl_data_add_for_id ()

How do they work?

void grl_data_set_for_id (GrlData *data, const gchar *key_name, const GValue *value);

The key_name to be registered, value to be set and data object are first passed as parameter to the function.

  registry = grl_registry_get_default ();
  key_id = grl_registry_lookup_metadata_key (registry, key_name);

The key_name is then looked up in the registry for any matching GrlKeyID.

  if (key_id != GRL_METADATA_KEY_INVALID) {
    grl_data_set (data, key_id, value);
  }

If found, the data is set normally using grl_data_set ().

else {
    switch (G_VALUE_TYPE (value)) {
    case G_TYPE_INT:
      spec = g_param_spec_int (key_name,
                               key_name,
                               key_name,
                               0, G_MAXINT,
                               0,
                               G_PARAM_STATIC_STRINGS | G_PARAM_READWRITE);

      key_id = grl_registry_register_metadata_key (registry, spec, GRL_METADATA_KEY_INVALID, NULL);
      grl_data_set (data, key_id, value);
      break;

    case G_TYPE_INT64:
      spec = g_param_spec_int64 (key_name,
                                 key_name,
                                 key_name,
                                 -1, G_MAXINT64,
                                 -1,
                                 G_PARAM_STATIC_STRINGS | G_PARAM_READWRITE);

      key_id = grl_registry_register_metadata_key (registry, spec, GRL_METADATA_KEY_INVALID, NULL);
      grl_data_set (data, key_id, value);
      break;

    case G_TYPE_STRING:
      spec = g_param_spec_string (key_name,
                                  key_name,
                                  key_name,
                                  NULL,
                                  G_PARAM_STATIC_STRINGS | G_PARAM_READWRITE);

      key_id = grl_registry_register_metadata_key (registry, spec, GRL_METADATA_KEY_INVALID, NULL);
      grl_data_set (data, key_id, value);
      break;

    case G_TYPE_BOOLEAN:
      spec = g_param_spec_boolean (key_name,
                                   key_name,
                                   key_name,
                                   FALSE,
                                   G_PARAM_STATIC_STRINGS | G_PARAM_READWRITE);

      key_id = grl_registry_register_metadata_key (registry, spec, GRL_METADATA_KEY_INVALID, NULL);
      grl_data_set (data, key_id, value);
      break;

    case G_TYPE_FLOAT:
      spec = g_param_spec_float (key_name,
                                 key_name,
                                 key_name,
                                 0, G_MAXFLOAT,
                                 0,
                                 G_PARAM_STATIC_STRINGS | G_PARAM_READWRITE);

      key_id = grl_registry_register_metadata_key (registry, spec, GRL_METADATA_KEY_INVALID, NULL);
      grl_data_set (data, key_id, value);
      break;

    default:
      if (type == G_TYPE_DATE_TIME) {
        spec = g_param_spec_boxed (key_name,
                                   key_name,
                                   key_name,
                                   G_TYPE_DATE_TIME,
                                   G_PARAM_STATIC_STRINGS | G_PARAM_READWRITE);

        key_id = grl_registry_register_metadata_key (registry, spec, GRL_METADATA_KEY_INVALID, NULL);
        grl_data_set (data, key_id, value);
      }
    }
  }
}

If not found, the appropriate g_param_spec is defined for that particular G_TYPE, the key is then registered using grl_registry_regsiter_metadata_key () and value is set using grl_data_set (). This function sets the first value associated with key_name in data. If key_name already has a first value, old value is replaced by the new one.

void grl_data_set_for_id (GrlData *data, const gchar *key_name, const GValue *value);

This function also works similarly to the same as above one, with only a few minor differences. The value associated with key_name to data is appended instead of set. This key_name is used to create a new GParamSpec instance, which is further used to create and register a key using grl_registry_register_metadata_key(). The value is added using grl_data_add* instead of grl_data_set ().

After implementing these, I was just a step away from allowing lua sources to have self registering keys. The only work left was to modify lua plugins to use the above functions when metadata is added to GrlMedia.

Now, adding self registering keys was as easy as typing

    if game.Developer then
      media.developer = game.Developer.xml
    end

Lastly, I added a test case to grilo-plugins to verify these changes. With this, allowing self registering keys to Grilo was over.

Adding Developer & Publisher to Games

GNOME Games currently has a very basic UI. I added Developer & Publisher to Game object which will further be used for segregating games into different views, such as a Developer view allowing users to select games from a particular developer and similarly a Publisher view. I’ve already started working on this and will be posting more on this soon.

I hope to see you all at GUADEC this year. Cheers!

June 08, 2018

Monday Markdown

Monday Markdown #1:

Rewriting the Development Experience for GNOME Javscript

Greetings World 😊

A lot has happened over the past few weeks!

I’ve spent the first portion of the coding period focused on improving the documentation browser for GNOME Javascript. In 2015/16 ptomato began porting GIR sources (the source of most GJS documentation) to [DevDocs.io], an open-source documentation browser, using g-ir-doc-tool in gobject-introspection. He did excellent work and produced a functioning product that now lives at [devdocs.baznga.org]. My goals were to take the current product and incorporate GNOME theming, fix issues with incorrect documentation, rebase the project on upstream, and reorient some of the project’s features to better serve an object oriented and GNOME model.

The first task I began was rebasing the project on upstream. Our fork was approx. 500 commits behind upstream, commits which included critical back-end fixes and front-end compatibility work. The merge introduced several bugs that took a few days to iron out. One CoffeeScript file ended up with a subtle arrow function syntax error that changed execution and broke some documentation loading, the Ruby on Rails routing was broken, etc.

After the project was rebased, I began the GNOME-ification process!

I began to introduce a GNOME-inspired theme (both from gnome.org and the GNOME HIG), working off this mockup:

Mockup of GNOME DevDocs Theme

I first began removing some absolute positioning from upstream’s front-end. Absolute positioning was used for numerous core elements instead of using modern solutions such as display: flex. This hindered easy design iteration as any minute change was liked to break another element. The numerous changes which I intended to implement in the new theme also functioned better in a responsive, flex layout.

First Iteration

Here you can see several improvements. Primarily, dropdowns have been eliminated when unnecessary, the header had been redesigned in a GNOME fashion, search has become a drop-down, and “enabled” vs. “disabled” has become “favorited” vs. “all”. The primary goal of the former changes was to make the site feel “GNOME-y”, the latter change was to make all the documentation accessible. For our purposes it made more sense to make everything visible than to disable some documentations and then force users to enable them to search, view, and utilize them.

Second Iteration

Here you can see that index pages for sources are now sorted by type instead of a simple alphabetical listing.

Third Iteration

In the third iteration there are many subtle CSS fixes, search has been made permanent instead of a dropdown (some user testing indicated the dropdown was confusing/less helpful). Here you can also see that we’ve removed “duplicate” entries and removed the namespace prefixes. Both of these changes make the site more usable and object-oriented friendly.

  • Duplicate entries occured where the “type” was merely an index of the functions and classed for a specific strings. See below for an illustration.

Problem with duplicate entries

Under the hood, at this point we made several more improvements. The repository utilized the stable branch (currently gnome-3-28) of gobject-introspection along with patches to properly format documentation for DevDocs. In gobject-introspection I also fixed long-standing bugs that made methods that were not introspectable and thus not in GJS show in class documentation. The docker instance was also upgraded and version-fixed so it would not break do to dependency errors in the future.

I think that’s it for this Monday Markdown, I’ll see you next week.

Evan // rockon999 // ewlsh

find me on matrix under rockon999.

When is an exit code not an exit code?

TL;DR: I found an interesting bug in flatpak-spawn which taught me that there is a difference between the exit code you pass to exit(), the exit status reported by waitpid(), and the shell variable $?.

One of the goals of Flatpak is to isolate applications from the host system; they can normally only directly run external programs supplied by the Flatpak platform they are built against, rather than whatever executables happen to be installed on the host. But some developer tools do need to be able to run commands on the host system. One example is GNOME Builder, which allows you to compile software on the host; another is flatpak-builder which uses this to build flatpak:s from within a flatpak. (For my part, I’m occasionally working on making Bustle run pkexec dbus-monitor --system on the host, to allow reading all messages on the system bus (a privileged operation) from an unprivileged, sandboxed application. More on this in a future blog post.)

Flatpak’s session helper provides a D-Bus API to do this: a HostCommand method that launches a given command outside the sandbox and returns its process ID; and a HostCommandExited signal which is emitted when the process exists, with its exit status as a uint32. Apps can use this D-Bus API directly, but recent versions of the common runtimes include a wrapper command which is much easier to adapt existing code to use: just replace cat /etc/passwd with flatpak-spawn --host cat /etc/passwd.

In theory, flatpak-spawn --host propagates the exit status from the command it runs, but I found that in practice, it did not. For example, false is a program which does nothing, unsuccessfully:

$ false; echo exit status: $?
1

But when run via flatpak-spawn --host, its exit status is 0:

$ flatpak run --env='PS1=sandbox$ ' \
> --talk-name=org.freedesktop.Flatpak \
> --command=bash org.freedesktop.Sdk//1.6
sandbox$ flatpak-spawn --host false; echo exit status: $?
0

If you care whether the command you launched succeeded, this is problematic! The first clue to what’s going on is in the output of flatpak-spawn --verbose:

sandbox$ flatpak-spawn --verbose --host false; echo exit status: $?
F: child_pid: 18066
F: child exited 18066: 256
exit status: 0

Here’s the code, from the HostCommandExited signal handler:

g_variant_get (parameters, "(uu)", &client_pid, &exit_status);
g_debug ("child exited %d: %d", client_pid, exit_status);

if (child_pid == client_pid)
  exit (exit_status);

So exit_status is 256, even though false actually returns 1. If you read man 3 exit, you will learn:

void exit(int status);

The exit() function causes normal process termination and the value of status & 0377 is returned to the parent (see wait(2)).

256 == 0x0100 and 0377 == 0x00ff; so exit_status & 0377 == 0. Now we know why flatpak-spawn returns 0, but why is exit_status equal to 256 rather than 1 in the first place?

It comes from a g_child_watch_add_full() callback. The g_child_watch_add_full() docs tell us:

In many programs, you will want to call g_spawn_check_exit_status() in the callback to determine whether or not the child exited successfully.

Following the link, we learn:

On Unix, [the exit status] is guaranteed to be in the same format waitpid() returns.

And reading the waitpid() documentation, we finally learn that the exit status is an opaque integer which must be inspected with a set of macros. On Linux, the layout is, roughly:

  • When a process calls exit(x), the exit status is ((x & 0xff) << 8); the low byte is 0. This explains why the exit_status for false is 256.
  • When a process is killed by signal y, the exit status is stored in the low byte, with its high bit (0x80) set if the process dumped core. So a process which segfaults and dumps core will have exit status 11 | 0x80 == 11 + 128 == 139

What’s funny about this is that, if the subprocess segfaults and dumps core, when testing from the shell flatpak-spawn --host appears to work.

host$ /home/wjt/segfault; echo exit status: $?
Segmentation fault (core dumped)
exit status: 139
sandbox$ flatpak-spawn --verbose --host /home/wjt/segfault; echo exit status: $?
F: child_pid: 20256
F: child exited 20256: 139
exit status: 139

But there’s a difference between this and a process which actually exits 139:

sandbox$ flatpak-spawn --verbose --host /bin/sh -c 'exit 139'; echo exit status: $?
F: child_pid: 20481
F: child exited 20481: 35584
exit status: 0

I always thought these two were the same. Actually, mapping the signal that killed a process to $? = 128 + signum is just shell convention.

To fix flatpak-spawn, we need to inspect the exit status and recover the exit code or signal. For normal termination, we can pass the exit code to exit(). For signals, the options are:

  • Reset all signal() handlers to SIG_DFL, then send the signal to ourselves and hope we die
  • Follow the shell convention and exit(128 + signal number)

I think the former sounds scary and unreliable, so I implemented the latter. Imperfect, but it’ll do.

GSoC 2018: Filter Infrastructure

Introduction

This summer I’m working on librsvg, a GNOME library for rendering SVG files, particularly on porting the SVG filter effects from C to Rust. That involves separating the code for different filters from one huge C file into individual files for each filter, and then porting the filter rendering infrastructure and the individual filters.

Thankfully, in the large C file the code for different filters was divided by comment blocks, so several vim macros later I was done with the not so exciting splitting part.

Representing Filters in Rust

SVG filter effects are applied to an existing SVG element to produce a modified graphical result. Each filter consists of a number of filter primitives. The primitives take raster images (bitmaps) as an input (this can be, for example, the rasterized element where the filter was applied, the background snapshot of the canvas at the time the filter was invoked, or an output of another filter primitive), do something with it (like move the pixels to a different position, apply Gaussian blur, or blend two input images together) and produce raster images as an output.

Each filter primitive has a number of properties. The common properties include the bounds of the region where the filter primitive is doing its processing, the name assigned to the primitive’s result, and the input that the primitive operates on. I collected the common properties into the following types:

struct Primitive {
    x: Cell<Option<RsvgLength>>,
    y: Cell<Option<RsvgLength>>,
    width: Cell<Option<RsvgLength>>,
    height: Cell<Option<RsvgLength>>,
    result: RefCell<Option<String>>,
}

struct PrimitiveWithInput {
    base: Primitive,
    in_: RefCell<Option<Input>>,
}

Each filter primitive struct is meant to contain one of these two common types along with any extra properties as needed. The common types provide functions for parsing their respective properties so that code need not to be duplicated in each filter.

Note that these properties are just “descriptions” of the final values to be used during rendering. For example, an RsvgLength can be equal to 2 or 50%, and the actual length in pixels is evaluated during rendering and depends on various rendering state such as the coordinate system in use and the size of the enclosing element.

The filter primitive processing behavior is nicely described as a trait:

trait Filter {
    fn render(&self, ctx: &FilterContext)
        -> Result<FilterResult, FilterError>;
}

Here FilterContext contains various filter state such as the rasterized bitmap representation of the SVG element the filter is being applied to and results of previously rendered primitives, and allows retrieving the necessary input bitmaps. Successful rendering results in a FilterResult which has the name assigned to the primitive and the output image, and errors (like non-existent input filter primitive) end up in FilterError.

When a filter is invoked, it goes through its child nodes (filter primitives) in order, render()s them and stores the results in the FilterContext.

Pixel Iteration

Since many filter primitives operate on a per-pixel basis, it’s important to have a convenient way of transforming the pixel values.

Librsvg uses image surfaces from Cairo, a 2D graphics library, for storing bitmaps. An image surface stores its pixel values in RGBA format in a large contiguous array row by row with optional strides between the rows. The plain way of accessing the values is image[y * stride + x * 4 + ch] where ch is 0, 1, 2 and 3 for R, G, B and A respectively. However, writing this out is rather tedious and error-prone.

As the first step, I added a pixel value struct:

struct Pixel {
    pub r: u8,
    pub g: u8,
    pub b: u8,
    pub a: u8,
}

and extended cairo-rs‘s image surface data accessor with the following methods:

fn get_pixel(
    &self,
    stride: usize,
    x: usize,
    y: usize,
) -> Pixel;

fn set_pixel(
    &mut self,
    stride: usize,
    pixel: Pixel,
    x: usize,
    y: usize,
);

using the known trick of declaring a trait containing the new methods and implementing it for the target type. Unfortunately, stride has to be passed through manually because the (foreign) data accessor type doesn’t offer a public way of retrieving it. Adding methods to cairo-rs directly would allow to get rid of this extra argument.

Next, since the pattern of iterating over pixels of an image surface within the given bounds comes up rather frequently in filter primitives, I added a Pixels iterator inspired by the image crate. It allows writing code like this:

for (x, y, pixel) in Pixels::new(&image, bounds) {
    /* ... */
}

instead of the repetitive plain version:

for y in bounds.y0..bounds.y1 {
    for x in bounds.x0..bounds.x1 {
        let pixel = image.get_pixel(stride, x, y);
        /* ... */
    }
}

Filters with multiple input images can process pixels simultaneously in the following fashion using the standard Rust iterator combinators:

for (x, y, p, p2) in Pixels::new(&image, bounds)
    .map(|(x, y, p)| {
        (x, y, p, image2.get_pixel(stride, x, y))
    })
{
    let out_pixel = /* ... */;
    out_image.set_pixel(stride, out_pixel, x, y);
}

Benchmarking

Rust is known for its zero-cost abstractions, however it’s still important to keep track of performance because it’s very well possible to write code in such a way that’s hard to optimize away. Fortunately, a benchmarking facility is provided on nightly Rust out of the box: the test feature with the Bencher type.

Benchmark sources are usually placed in the benches/ subdirectory of the crate and look like this:

#![feature(test)]
extern crate rsvg_internals;

#[cfg(test)]
mod tests {
    use super::*;
    use test::Bencher;

    #[bench]
    fn my_benchmark_1(b: &mut Bencher) {
        /* initialization */

        b.iter(|| {
            /* code to be benchmarked */
        });
    }

    #[bench]
    fn my_benchmark_2(b: &mut Bencher) {
        /* ... */
    }

    /* ... */
}

After ensuring the crate’s crate-type includes "lib", you can run benchmarks with cargo +nightly bench.

I created three benchmarks, one for the straightforward iteration:

b.iter(|| {
    let mut r = 0;
    let mut g = 0;
    let mut b = 0;
    let mut a = 0;

    for y in BOUNDS.y0..BOUNDS.y1 {
        for x in BOUNDS.x0..BOUNDS.x1 {
            let base = y * stride + x * 4;

            r += image[base + 0] as usize;
            g += image[base + 1] as usize;
            b += image[base + 2] as usize;
            a += image[base + 3] as usize;
        }
    }

    (r, g, b, a)
})

One for iteration using get_pixel():

b.iter(|| {
    let mut r = 0;
    let mut g = 0;
    let mut b = 0;
    let mut a = 0;

    for y in BOUNDS.y0..BOUNDS.y1 {
        for x in BOUNDS.x0..BOUNDS.x1 {
            let pixel = image.get_pixel(stride, x, y);

            r += pixel.r as usize;
            g += pixel.g as usize;
            b += pixel.b as usize;
            a += pixel.a as usize;
        }
    }

    (r, g, b, a)
})

And one for the Pixels iterator:

b.iter(|| {
    let mut r = 0;
    let mut g = 0;
    let mut b = 0;
    let mut a = 0;

    for (_x, _y, pixel) in Pixels::new(&image, BOUNDS) {
        r += pixel.r as usize;
        g += pixel.g as usize;
        b += pixel.b as usize;
        a += pixel.a as usize;
    }

    (r, g, b, a)
})

Here are the results I’ve got:

test tests::bench_pixels                   ... bench:     991,137 ns/iter (+/- 62,654)
test tests::bench_straightforward          ... bench:     992,124 ns/iter (+/- 7,119)
test tests::bench_straightforward_getpixel ... bench:   1,034,037 ns/iter (+/- 11,121)

Looks like the abstractions didn’t introduce any overhead indeed!

Implementing a Filter Primitive

Let’s look at how to write a simple filter primitive in Rust. As an example I’ll show the offset filter primitive which moves its input on the canvas by a specified number of pixels.

Offset has an input and two additional properties for the offset amounts:

struct Offset {
    base: PrimitiveWithInput,
    dx: Cell<RsvgLength>,
    dy: Cell<RsvgLength>,
}

Since each filter primitive is an SVG node, it needs to implement NodeTrait which contains a function for parsing the node’s properties:

impl NodeTrait for Offset {
    fn set_atts(
        &self,
        node: &RsvgNode,
        handle: *const RsvgHandle,
        pbag: &PropertyBag,
    ) -> NodeResult {
        // Parse the common properties.
        self.base.set_atts(node, handle, pbag)?;

        // Parse offset-specific properties.
        for (_key, attr, value) in pbag.iter() {
            match attr {
                Attribute::Dx => self.dx.set(parse(
                    "dx",
                    value,
                    LengthDir::Horizontal,
                    None,
                )?),
                Attribute::Dy => self.dy.set(parse(
                    "dy",
                    value,
                    LengthDir::Vertical,
                    None,
                )?),
                _ => (),
            }
        }

        Ok(())
    }
}

Finally, we need to implement the Filter trait. Note that render() accepts an additional &RsvgNode argument, which refers to the filter primitive node. It’s different from &self in that it contains various common SVG node state.

impl Filter for Offset {
    fn render(
        &self,
        node: &RsvgNode,
        ctx: &FilterContext,
    ) -> Result<FilterResult, FilterError> {
        // Compute the processing region bounds.
        let bounds = self.base.get_bounds(ctx);

        // Compute the final property values.
        let cascaded = node.get_cascaded_values();
        let values = cascaded.get();

        let dx = self
            .dx
            .get()
            .normalize(&values, ctx.drawing_context());
        let dy = self
            .dy
            .get()
            .normalize(&values, ctx.drawing_context());

        // The final offsets depend on the currently active
        // affine transformation.
        let paffine = ctx.paffine();
        let ox = (paffine.xx * dx + paffine.xy * dy) as i32;
        let oy = (paffine.yx * dx + paffine.yy * dy) as i32;

        // Retrieve the input surface.
        let input_surface =
            get_surface(self.base.get_input(ctx))?;

        // input_bounds contains all pixels within bounds,
        // for which (x + ox) and (y + oy) also lie
        // within bounds.
        let input_bounds = IRect {
            x0: clamp(bounds.x0 - ox, bounds.x0, bounds.x1),
            y0: clamp(bounds.y0 - oy, bounds.y0, bounds.y1),
            x1: clamp(bounds.x1 - ox, bounds.x0, bounds.x1),
            y1: clamp(bounds.y1 - oy, bounds.y0, bounds.y1),
        };

        // Create an output surface.
        let mut output_surface =
            ImageSurface::create(
                cairo::Format::ARgb32,
                input_surface.get_width(),
                input_surface.get_height(),
            ).map_err(FilterError::OutputSurfaceCreation)?;

        let output_stride =
            output_surface.get_stride() as usize;

        // An extra scope is needed because output_data
        // borrows output_surface, but we need to move
        // out of it to return it.
        {
            let mut output_data =
                output_surface.get_data().unwrap();

            for (x, y, pixel) in
                Pixels::new(&input_surface, input_bounds)
            {
                let output_x = (x as i32 + ox) as usize;
                let output_y = (y as i32 + oy) as usize;
                output_data.set_pixel(
                    output_stride,
                    pixel,
                    output_x,
                    output_y,
                );
            }
        }

        // Return the result of the processing.
        Ok(FilterResult {
            name: self.base.result.borrow().clone(),
            output: FilterOutput {
                surface: output_surface,
                bounds,
            },
        })
    }
}

Conclusion

The project is coming along very nicely with a few simple filters already working in Rust and a couple of filter tests getting output closer to the reference images.

I’ll be attending this year’s GUADEC, so I hope to see you there in July!

June 07, 2018

3rd Party Software in Fedora Workstation

So you have probably noticed by now that we started offering some 3rd party software in the latest Fedora Workstation namely Google Chrome, Steam, NVidia driver and PyCharm. This has come about due to a long discussion in the Fedora community on how we position Fedora Workstation and how we can improve our user experience. The principles we base of this policy you can read up on in this policy document. To sum it up though the idea is that while the Fedora operating system you install will continue as it has been for the last decade to be based on only free software (with an exception for firmware) you will be able to more easily find and install the plethora of applications out there through our software store application, GNOME Software. We also expect that as the world of Linux software moves towards containers in general and Flatpaks specifically we will have an increasing number of these 3rd party applications available in Fedora.

So the question I know some of you will have is, what do one actually have to do in order to get a 3rd party application listed in Fedora Workstation? Well wonder no longer as we put up a few documents now outlining the steps you will need to take. Compared to traditional linux packaging the major difference in the requirements around improved metadata for your application, so we are covering that aspect in special detail. These documents cover both RPMS and Flatpaks.

First of all you can get a general overview from our 3rd Party guidelines document. This document also explains how you submit a request to the Fedora Workstation Working group for your application to be added.

Then if you want to dig into the details of what metadata you need to create for your application there is the in-depth metadata tutorial here and finally once you are ready to set up your repository there is a tutorial explaining how you ensure your repository is able to provide the metadata you created above.

We expect to add more and more applications to Fedora Workstation over time here, and I would especially recommend that you look into Flatpaking your 3rd party application as it will decouple your application from the host operating system and thus decrease the workload on you maintaining your application for use in Fedora Workstation (and elsewhere).

Observations on trackpoint input data

This time we talk trackpoints. Or pointing sticks, or whatever else you want to call that thing between the GHB keys. If you don't have one and you've never seen one, prepare to be amazed. [1]

Trackpoints are tiny joysticks that react to pressure [2], convert that pressure into relative x/y events and pass that on to whoever is interested in it. The harder you push, the higher the deltas. This is where the simple and obvious stops and it gets difficult. But then again, if it was that easy I wouldn't write this post, you wouldn't have anything to read, so somehow everyone wins. Whoop-dee-doo.

All the data and measurements below refer to my trackpoint, a Lenovo T440s. It may not apply to any other trackpoints, including those on on different laptop models or even on the same laptop model with different firmware versions. I've written the below with a lot of cringing and handwringing. I want to write data that is irrefutable, but the universe is against me and what the universe wants, the universe gets. Approximately every second sentence below has a footnote of "actual results may vary". Feel free to re-create the data on your device though.

Measuring trackpoint range is highly subjective, so you'll have to trust me when I describe how specific speeds/pressure ranges feel. There are three ranges of pressure on my trackpoint (sort-of):

  • Pressure range one: When resting the finger on the trackpoint I don't really need to apply noticable pressure to make the trackpoint send events. Just moving the finger on the trackpoint makes it send events, albeit sporadically.
  • Pressure range two: Going beyond range one requires applying real pressure and feels to me like we're getting into RSI territory. Not a problem for short periods, but definitely not something I'd want all the time. It's the pressure I'd use to cross the screen.
  • Pressure range three: I have to push hard. I definitely wouldn't want to do this during everyday interaction and it just feels wrong anyway. This pressure range is for testing maximum deltas, not one you would want to use otherwise.
The first/second range are easier delineated than the second/third range because going from almost no pressure to some real pressure is easy. Going from some pressure to too much pressure is more blurry, there is some overlap between second and third range. Either way, keep these ranges in mind though as I'll be using them in the explanations below.

Ok, so with the physical conditions explained, let's look at what we have to worry about in software:

  • It is impossible to provide a constant input to a trackpoint if you're a puny human. Without a robotic setup you just cannot apply constant pressure so any measurements have some error. You also get to enjoy a feedback loop - pressure influences pointer motion but that pointer motion influences how much pressure you inadvertently apply. This makes any comparison filled with errors. I don't know if I'm applying the same pressure on the two devices I'm testing, I don't know if a user I'm asking to test something uses constant/the same/the right pressure.
  • Not all trackpoints are created equal. Some trackpoints (mostly in Lenovos), have configurable sensibility - 256 levels of it. [3] So one trackpoint measured does not equal another trackpoint unless you keep track of the firmware-set sensibility. Those trackpoints also have other toggles. More importantly and AFAIK, this type of trackpoint also has a built-in acceleration curve. [4] Other trackpoints (ALPS) just have a fixed sensibility, I have no idea whether those have a built-in acceleration curve or merely have a linear-ish pressure->delta mappings.

    Due to some design choices we did years ago, systemd increases the sensitivity on some devices (the POINTINGSTICK_SENSITIVITY property). So even on a vanilla install, you can't actually rely on the trackpoint being set to the manufacturer default. This was in an attempt to make trackpoints behave more consistently, systemd had the hwdb and it seemed like the right place to put device-specific quirks. In hindsight, it was the wrong design choice.
  • Deltas are ... unreliable. At high sensitivity and high pressures you might get a sequence of [7, 7, 14, 8, 3, 7]. At lower pressure you get the deltas at seemingly random intervals. This could be because it's hard to keep exact constant pressure, it could be a hardware issue.
  • evdev has been the default driver for almost a decade and before that it was the mouse driver for a long time. So the kernel will "Divide 4 since trackpoint's speed is too fast" [sic] for some trackpoints. Or by 8. Or not at all. In other words, the kernel adjusts for what the default user space is and userspace is based on what the kernel provides. On the newest ALPS trackpoints the kernel has stopped doing any in-kernel scaling (good!) but that means that the deltas are out by a factor of 8 now.
  • Trackpoints don't always have the same pressure ranges for x/y. AFAICT the y range is usually a bit less than the x range on many or most trackpoints. A bit weird because the finger position would suggest that strong vertical pressure is easier to apply than sideways pressure.
  • (Some? All?) Trackpoints have built-in calibration procedures to find and set their own center-point. Without that you'll get the trackpoint eventually being ever so slightly off center over time, causing a mouse pointer that just wanders off the screen, possibly into the woods, without the obligatory red cape and basket full of whatever grandma eats when she's sick.

    So the calibration is required but can be triggered accidentally by the user: If you push with the same pressure into the same direction for 2-5 seconds (depending on $THINGS) you trigger the calibration procedure and the current position becomes the new center point. When you release, the cursor wanders off for a few seconds until the calibration sets things straight again. If you ever see the cursor buzz off in a fixed direction or walking backwards for a centimetre or two you've triggered that calibration. The only way to avoid this is to make sure the pointer acceleration mechanism allows you to reach any target within 2 seconds and/or never forces you to apply constant pressure for more than 2 seconds. Now there's a challenge...

Ok. If you've been paying attention instead of hoping for a TLDR that's more elusive than Godot, we're now aware of the various drawbacks of collecting data from a trackpoint. Let's go and look at data. Sensitivity is set to the kernel default of 128 in sysfs, the default reporting rate is 100Hz. All observations are YMMV and whatnot, especially the latter.

Trackpoint deltas are in integers but the dynamic range of delta values is tiny. You mostly get 1 or 2 and it requires quite a fair bit of pressure to get up to 5 or more. At low pressure you get deltas of 1, but less frequently. Visualised, the relationship between deltas and the interval between deltas is like this:

At low pressure, we get deltas of 1 but high intervals. As the pressure increases, the interval between events shrinks until at some point the interval between events matches the reporting rate (100Hz/10ms). Increasing the pressure further now increases the deltas while the intervals remain at the reporting rate. For example, here's an event sequence at low pressure:

E: 63796.187226 0000 0000 0000 # ------------ SYN_REPORT (0) ---------- +20ms
E: 63796.227912 0002 0001 0001 # EV_REL / REL_Y 1
E: 63796.227912 0000 0000 0000 # ------------ SYN_REPORT (0) ---------- +40ms
E: 63796.277549 0002 0000 -001 # EV_REL / REL_X -1
E: 63796.277549 0000 0000 0000 # ------------ SYN_REPORT (0) ---------- +50ms
E: 63796.436793 0002 0000 -001 # EV_REL / REL_X -1
E: 63796.436793 0000 0000 0000 # ------------ SYN_REPORT (0) ---------- +159ms
E: 63796.546114 0002 0001 0001 # EV_REL / REL_Y 1
E: 63796.546114 0000 0000 0000 # ------------ SYN_REPORT (0) ---------- +110ms
E: 63796.606765 0002 0000 -001 # EV_REL / REL_X -1
E: 63796.606765 0000 0000 0000 # ------------ SYN_REPORT (0) ---------- +60ms
E: 63796.786510 0002 0000 -001 # EV_REL / REL_X -1
E: 63796.786510 0000 0000 0000 # ------------ SYN_REPORT (0) ---------- +180ms
E: 63796.885943 0002 0001 0001 # EV_REL / REL_Y 1
E: 63796.885943 0000 0000 0000 # ------------ SYN_REPORT (0) ---------- +99ms
E: 63796.956703 0002 0000 -001 # EV_REL / REL_X -1
E: 63796.956703 0000 0000 0000 # ------------ SYN_REPORT (0) ---------- +71ms
This was me pressing lightly but with perceived constant pressure and the time stamps between events go from 20m to 180ms. Remember what I said above about unreliable deltas? Yeah, that.

Here's an event sequence from a trackpoint at a pressure that triggers almost constant reporting:


E: 72743.926045 0002 0000 -001 # EV_REL / REL_X -1
E: 72743.926045 0002 0001 -001 # EV_REL / REL_Y -1
E: 72743.926045 0000 0000 0000 # ------------ SYN_REPORT (0) ---------- +10ms
E: 72743.939414 0002 0000 -001 # EV_REL / REL_X -1
E: 72743.939414 0002 0001 -001 # EV_REL / REL_Y -1
E: 72743.939414 0000 0000 0000 # ------------ SYN_REPORT (0) ---------- +13ms
E: 72743.949159 0002 0000 -002 # EV_REL / REL_X -2
E: 72743.949159 0002 0001 -002 # EV_REL / REL_Y -2
E: 72743.949159 0000 0000 0000 # ------------ SYN_REPORT (0) ---------- +10ms
E: 72743.956340 0002 0000 -001 # EV_REL / REL_X -1
E: 72743.956340 0002 0001 -001 # EV_REL / REL_Y -1
E: 72743.956340 0000 0000 0000 # ------------ SYN_REPORT (0) ---------- +7ms
E: 72743.978602 0002 0000 -001 # EV_REL / REL_X -1
E: 72743.978602 0002 0001 -001 # EV_REL / REL_Y -1
E: 72743.978602 0000 0000 0000 # ------------ SYN_REPORT (0) ---------- +22ms
E: 72743.989368 0002 0000 -001 # EV_REL / REL_X -1
E: 72743.989368 0002 0001 -001 # EV_REL / REL_Y -1
E: 72743.989368 0000 0000 0000 # ------------ SYN_REPORT (0) ---------- +11ms
E: 72743.999342 0002 0000 -001 # EV_REL / REL_X -1
E: 72743.999342 0002 0001 -001 # EV_REL / REL_Y -1
E: 72743.999342 0000 0000 0000 # ------------ SYN_REPORT (0) ---------- +10ms
E: 72744.009154 0002 0000 -001 # EV_REL / REL_X -1
E: 72744.009154 0002 0001 -001 # EV_REL / REL_Y -1
E: 72744.009154 0000 0000 0000 # ------------ SYN_REPORT (0) ---------- +10ms
E: 72744.018965 0002 0000 -002 # EV_REL / REL_X -2
E: 72744.018965 0002 0001 -003 # EV_REL / REL_Y -3
E: 72744.018965 0000 0000 0000 # ------------ SYN_REPORT (0) ---------- +9ms
Note how there is an events in there with 22ms? Maintaining constant pressure is hard. You can re-create the above recordings by running evemu-record.

Pressing hard I get deltas up to maybe 5. That's staying within the second pressure range outlined above, I can force higher deltas but what's the point. So the dynamic range for deltas alone is terrible - we have a grand total of 5 values across the comfortable range.

Changing the sensitivity setting higher than the default will send higher deltas, including deltas greater than 1 before reaching the report rate. Setting it to lower than the default (does anyone do that?) sends smaller deltas. But doing so means changing the hardware properties, similar to how some gaming mice can switch dpi on the fly.

I leave you with a fun thought exercise in correlation vs. causation: your trackpoint uses PS/2, your touchpad probably uses PS/2. Your trackpoint has a reporting rate of 100Hz but when you touch the touchpad half the bandwidth is used by the touchpad. So your trackpoint sends half the events when you have the palm resting on the touchpad. From my observations, the deltas don't double in size. In other words, your trackpoint just slows down to roughly half the speed. I can reduce the reporting rate to approximately a third by putting two or more fingers onto the touchpad. Trackpoints haven't changed that much over the years but touchpads have. So the takeway is: 10 years ago touchpads were smaller and trackpoints were faster. Simply because you could use them without touching the touchpad. Mind blown (if true, measuring these things is hard...)

Well, that was fun, wasn't it. I'm glad you stayed that long, because I did and it'd feel lonely otherwise. In the next post I'll outline the pointer acceleration curves for trackpoints and what we're going to to about that. Besides despairing, that is.

[1] I doubt you will be, but it always pays to be prepared.
[2] In this post I'm using "pressure" here as side-ways pressure, not downwards pressure. Some trackpoints can handle downwards pressure and modify the acceleration based on it (or expect userland to do so).
[3] Not that this number is always correct, the Lenovo CompactKeyboard USB with Trackpoint has a default sensibility of 5 - any laptop trackpoint would be unusable at that low value (their default is 128).
[4] I honestly don't know this for sure but ages ago I found a hw spec document that actually detailed the process. Search for ""TrackPoint System Version 4.0 Engineering Specification", page 43 "2.6.2 DIGITAL TRANSFER FUNCTION"

June 06, 2018

Using clang-format only on newly written code

At Undo, the company where I work, we have a quite big C codebase with a not very consistent style.
To improve things, we decided to use the clang-format tool (part of the LLVM projects) to enforce a consistent style for new and refactored code.
We don’t want to change all the existing code to avoid a massive and confusing change, and we don’t want spurious unrelated changes when somebody modifies a file.

To achieve this, I wrote a couple of scripts which, using clang-format and clang-format-diff, only modify the formatting of the code you are about to commit.

The most interesting part is, I think, the pre-commit hook which suggests fixes before your code is committed:

git pre-commit hook to apply clang-format

This code is now available in the clang-format-hooks repository on GitHub.

Updating Wacom Firmware In Linux

I’ve been working with Wacom engineers for a few months now, adding support for the custom update protocol used in various tablet devices they build. The new wacomhid plugin will be included in the soon-to-be released fwupd 1.0.8 and will allow you safely update the bluetooth, touch and main firmware of devices that support the HID protocol. Wacom is planning to release a new device that will be released with LVFS support out-of-the-box.

My retail device now has a 0.05″ SWI debugging header installed…

In other news, we now build both flatpak and snap versions of the standalone fwupdtool tool that can be used to update all kinds of hardware on distributions that won’t (or can’t) easily update the system version of fwupd. This lets you easily, for example, install the Logitech unifying security updates when running older versions of RHEL using flatpak and update the Dell Thunderbolt controller on Ubuntu 16.04 using snapd. Neither bundle installs the daemon or fwupdmgr by design, and both require running as root (and outside the sandbox) for obvious reasons. I’ll upload the flatpak to flathub when fwupd and all the deps have had stable releases. Until then, my flatpak bundle is available here.

Working with the Wacom engineers has been a pleasure, and the hardware is designed really well. The next graphics tablet you buy can now be 100% supported in Linux. More announcements soon.

June 05, 2018

Nautilus File Operations

The first thing I was to start working on under my mentor’s guidance, Carlos Soriano, was the implementation of unit tests.

While unit tests are meant to be fairly short and simple, tackling individual instances of a functionality or component, Nautilus would not really allow us to do that. Due to Nautilus’ nature and its tight relation to I/O operations, unit testing for us meant cherry-picking the simpler functions which we use and testing these. However, for the larger, more important components, we’d rely on integration tests, which represented one of the following items on our list.

We started working on nautilus file operations first, which involves functionalities such as copy/paste, move, trashing, deleting. Before this, although I had contributed one unit test before, I decided I would start small. So, while going through our file-operations code, I found a function which tests if a directory contains any children files. As I needed to get a better hold of the libraries we would work with (the glib testing framework, in particular), I decided to write an unit test for this function. Fortunately, its implementation was straight-forward, more or less, so testing it did not prove too difficult (designing some tests and the edge cases). The merge request I opened on it was accepted, after a few changes, and is now in our master version (as you can see here).

Next, I wanted to go with something bigger, something which we outlined when talking about what we wanted to test exactly, so copy/paste it was! As per my previous experience, I tried creating a couple of small file hierarchies and copy/paste-ing these expecting everything to go smooth. Boy, was I wrong. What followed was my mentor explaining me why it did not work as I would suspect it to and how to work on it. Turns out, pretty much all of these operations are asynchronous, so before writing any actual tests, we need to create a synchronous version, one which can be used by the “async” one, just that it would be on a different thread.

Moving forward with the implementation of the asynchronous alternative for the copy operation, I started designing the tests, only to bump into another issue. Whenever we would copy file X to directory Y, we had the option of renaming it so, naturally, I designed cases for both alternatives. The bigger issue here was if we tried to copy directory X containing file Y into directory Z. Copying X into Z, while changing its name to “T”, would result in Y containing a directory named T (which is fine) aaaaand a file named Z (which wasn’t really fine). This was a flaw in our code, so after a quick discussion on it with my mentor, we concluded that its fine to split tests into two here as well: one where we don’t change any name (so the result would be Z/X/Y) and one where do change the target name (resulting in Z/T/T), only we would comment the second one and flag the issue in order to be worked on afterwards. I opened an issue on it and moved on with the implementation of the test.

Unfortunately, my finals session started so I had less time to work on my project. My mentor was awesome about it and said I should focus on my exams and it would be fine to contribute when I have the time for it. While it’s not final yet, this would be a sneak-peek at the copying test right now which I aim to finish alongside the move one (which I started writing while trying to figure out the new name issue regarding copying I’ve just mentioned above).

I honestly can’t wait to be done with finals in order to work on these. Contributing to to Nautilus, being an active member of its community feels way more rewarding than studying algorithms in uni. 🙂

23rd of April

On the 23rd of this year’s April, the accepted GSoC projects were announced. It was a super stressful day for me and I barely slept on the previous night as I was eagerly waiting for the list to be posted.

I kept checking the official site and my email but nothing would show up! I wanted to know as soon as possible, be it 6 AM! Of course, I still had to wait most of the day for it as I’m on EET and (presumably) the GSoC organisation is not on the same page here.

An university organization which I am part of had a meeting that day which I attended. While different ideas were being tossed around and discussed, I decided to refresh the Google Summer of Code homepage to see if anything’s up, albeit no email had been delivered.

Lo and behold (not as surprising as it was for me considering I am writing this) my project had been accepted and I was about to start my bonding period as an official member and contributor under the GNOME community!

I doubt I’ll soon (if ever) forget the feelings I went through as I saw my name listed there. At first, I could not find myself. The GNOME projects list kept going and going, I even went past my fellow Nautilus GSOC’er project and would not see my name. Eventually, I saw it, “Tests, profiling and debug framework for Nautilus” with  my name on top of it. It just felt both rewarding (as I had been contributing to Nautilus for a while up to that point) and relaxing, knowing I would get to contribute to something I use on my day-to-day work and alongside the people I got to learn so much from, all whilst being a part a of a huge project, whose name is familiar to millions of users.

What followed was 2 weeks of bonding and interacting with the community (which I had already grown fairly familiar to), learning the workflow and getting to know the project and organization even better. Luckily for me, contributing for about 5-6 months helped me with these, so the bonding period felt comfortable.


June 04, 2018

Security vulnerability in Epiphany Technology Preview

If you use Epiphany Technology Preview, please update immediately and ensure you have revision 3.29.2-26 or newer. We discovered and resolved a vulnerability that allowed websites to access internal Epiphany features and thereby exfiltrate passwords from the password manager. We apologize for this oversight.

The unstable Epiphany 3.29.2 release is the only affected release. Epiphany 3.29.1 is not affected. Stable releases, including Epiphany 3.28, are also not affected.

There is no reason to believe that the issue was discovered or exploited by any attackers, but you might wish to change your passwords if you are concerned.

June 02, 2018

Input Event Handling in Nautilus

Designed by Smashicons from Flaticon

Gestures like these is now how almost all input is handled in Nautilus. The exception is the stuff that has no event controller counterpart in GTK+ 3.

This summer I’m working on porting Nautilus to GTK+ 4 as part of Google Summer of Code, and I’ve spent the entirety of the time on getting rid of deprecated 3.x API and obsolete ways of handling events. Despite slightly hack-ish ways of working around deprecations, it’s been smooth sailing so far – No Regressions™! Almost ready to switch!

™ - one reported and fixed
† - “switch” here means staring at an endless stream of compiler errors

The hacks mostly pertain to replacing gtk_style_context_get_background_color():

Going back to event handling, the next immediate goal is to dismantle the old icon view we use, since it holds non-widget objects, which largely requires emulating GTK+ for event handling. The reason for that is simply that Nautilus predates GtkIconView and was never ported to using that (possibly for performance reasons). I’ve got code that uses gestures for button presses locally already, but will look for something better than adding a small GdkEvent clone that allows setting fields, which is required mostly for synthesizing “enter” and “leave” events for the children.

It’s a bit unfortunate that there only exists a subset of event controllers in GTK+ 3, but at the same time it’s a great opportunity to make the code GTK+ 4-compliant (still hoping to see the key event controllers soon). Where impossible to use one, I switched to handling ::event (bar some instances of ::key-press-event, where that prevented accelerator handlers from being run).

All in all, the pain has been minimal and I’m looking forward to getting back with a fresh perspective on things after the university exam period ends.

Edit: clarified the bit about the canvas view not holding widgets.

Welcome Window Integration in Pitivi – Part 1

I will be working on Pitivi as my Google Summer of Code 2018 project under GNOME. One of the major task in my project is to integrate the current Welcome dialog box of Pitivi into it’s main window and display projects in a more informative, discoverable, and user friendly layout.

Currently when Pitivi starts, a Welcome dialog appears that displays the recent projects and some buttons for creating a new project, browsing projects, etc. This dialog box needs to be integrated into the main window.

Pitivi's Current Welcome Dialog
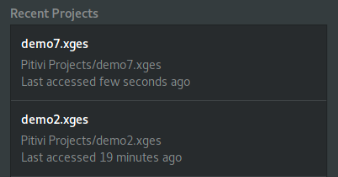
Pitivi’s current welcome dialog

Some GNOME apps that already have their Welcome screen integrated into their main window are Builder, Boxes, Notes, ToDo, etc.

builderIntegrated welcome window in GNOME Builder app
ToDo
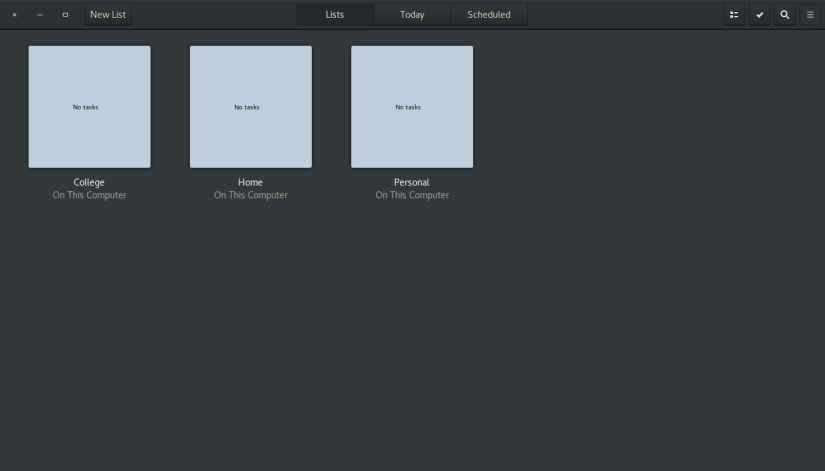
Integrated welcome window in GNOME ToDo app

The integration of Welcome dialog into Pitivi’s main window will provide us with more space that will be used for –

  • displaying relevant meta information regarding a project like its directory, last access timestamp, thumbnail, etc. in a nice custom layout rather than just displaying the title of the project (which we currently do in Pitivi’s Welcome dialog)
  • displaying projects categorically as “Starred” and “Recent”
  • providing a search interface to allow for easy browsing of projects
  • better positioning of the buttons based on their actions. Rather than stacking all
    the buttons vertically (which we currently do in Pitivi’s Welcome dialog), we will
    place Important buttons like  “New Project”, “Open Project”, etc. in the Header Bar, and Other buttons like “Help”, “Keyboard Shortcuts”, etc. inside a menu in the Header Bar

As of now, I have integrated the welcome dialog into Pitivi’s main window. Now, we have two main screens in Pitivi – Greeter Perspective (the welcome screen) and Editor Perspective (the video editing screen). The main window manages these perspectives and handles the switch between them.

pitivi_new_1Integrated welcome/greeter window in Pitivi. Notice that the important action buttons like “New” and “Open” are shown prominently in the header bar.
pitivi_new_2Integrated welcome/greeter window in Pitivi. Notice that other (not so important) action buttons like “Keyboard Shortcuts”, “User Manual”, etc. are shown inside a menu in the header bar.

Currently, I have a merge request pending for this change !33. I will keep posting my progress on this blog and on the issue 1302. Until next time.

Stay tuned 🙂

Bringing slow motion to Pitivi

GSoC again :)

Last year, I worked on the project ‘Pitivi: Color correction interface using three chromatic wheels’ as part of my Google Summer of Code. This year again, I’m working on Pitivi under the GNOME organisation. Mathieu Duponchellle and Thibault Saunier are mentoring my project this time.

For the past couple of weeks, I’ve been hacking on GStreamer Editing Services (GES), Pitivi’s backend, to add the ‘rate’ property to a clip. This is the first step towards my project ‘Slow-motion Video’ which has two objectives:

  • Add the clip speed feature to Pitivi
  • Allow parts of a single clip to have variable speeds.

A closer look

The newly introduced ‘rate’ property to a clip uses two GStreamer effects - videorate and pitch to modify the rate of video and audio respectively. GES already facilitates adding and maintaining effects. These effects while relying upon the existing framework to work are kept hidden from the user as internal effects.

A GESClip is a subclass of GESTimelineElement, it therefore has the following relevant properties:

GstClockTime start position (in time) of the object
GstClockTime inpoint position in the media from which the object should be used
GstClockTime duration duration of the object to be used
GstClockTime maxduration The maximum duration the object can have

On changing the rate, the duration and max-duration change as a result.

  duration = input_duration/rate
  maxduration = (asset_duration - inpoint)/rate + inpoint

where, input_duration is the duration of the asset being used and asset_duration is the entire duration of the asset.

After having made the above change to GES, I made a simple UI in Pitivi to test out the rate feature. Speed property is now part of clip properties. Here’s what it looks like

Yuna Proj

I also enabled the ‘rate’ property of GESClip to work with ges-launch - a command line tool which can be used to create multimedia timeline and render/play it.

ges-launch-1.0 +clip ~/path/to/video.mp4 inpoint=10 
duration=20 rate=2.0

The above command plays the 20 seconds of the input video from the 10 second mark at a rate of 2.0, that is, for 10 seconds.

The complex part is to ensure that the entire infrastructure remains stable on this addition and this is what I am currently up to. I’m constantly pushing fixes to ensure that all existing features and operations in GES and Pitivi work with the rate property. Hopefully, by the next time I blog I can upload a clean demo video showcasing the rate feature in Pitivi :)

You can find my work on the issue 2202. Feel free to ping me on #pitivi channel on freenode. Until next time.

May 31, 2018

Improving the performance of the room directory

The current state of the room directory

For now, when we are searching for rooms with the “Default Servers” option, we are requesting 10 rooms from the homeserver for each protocol (by “protocol”, I mean non-Matrix protocols that are bridged to the user’s home servers, like IRC, Gitter, Slack, etc…) that is bridged to the homeserver. This can be quite slow. For instance, we are fetching about 100 rooms from the homeserver “matrix.org” even if we would need to show to the user only 20 of them. This is really bad regarding the performance of the application, furthermore because we have to download/generate the avatar of each room loaded.

Further more, we are building the initial list of the rooms by merging the lists of rooms of the different protocol. So you can already say “What if one room (that wasn’t fetched because we already had 10 rooms from this protocol) of a protocol A have more members than one of the rooms (that *are* listed in the directory) of a protocol B?” and that’s a big problem, because we will miss certain rooms that are actually more “popular” than the ones listed with this method. A similar problem is when we fetch more rooms from the homeserver: we can’t just append the freshly fetched rooms without risking to mess up with the ordering of the rooms as some of them may turns out to have more members than some of the rooms already in the list.

That’s why we have to find a solution to these issues.

A first (easy) solution

The first and easy solution would be to bring back the combo selector we had for selecting which protocol we want to search rooms for, by adding another radio button in the server chooser popover with this selector. However, it would be less good for the user experience as the reason of removing the combo selector was because the user would want to only search for rooms (and not for a room on a certain protocol) whether they are on the homeserver or accessible through a bridge. (And another reason would be that I would have spent time to implement this feature for nothing :P)

Another (less easy) solution

Another solution would be to implement a data structure that would abstract the choice of which requests should be done to fetch a room so that we would only need to use a method on it to get the next room and this room would be the most popular among all the other rooms for all the protocols.

This data structure (let’s call it the “​RoomPool”) would be based on a `HashMap<Protocol, VecDeque<Room>>` type. When initializing the RoomPool, we would fetch one (or more?) room for each protocol and store them in the queues.

Each time we would want to get a room from the RoomPool, we would peek in each queue to know which protocol have the most popular room and then pop this room. If one of the queue is empty, we would make a request to the homeserver in order to fetch 5 (or more?) rooms for this protocol and then append them to this queue.

It seems as if it is a rather simple algorithm to solve this issue. There are parameters that could be tuned in order to optimize it: how many rooms do we fetch for each protocol when initializing the RoomPool? Or when we fetch again rooms for an emptied queue. Do we fetch new rooms right away when the last room of a queue has been removed or do we wait the next time we try to peek on the queue?

Please, tell me what do you think about this solution, what cold be improved, etc…

[UPDATE] I forgot to talk about it: the API used by Fractal to discover which other protocols are supported by the HS is Riot.im/Synapse specific so we should simply ignore all of this multi-protocol thing if it isn’t supported by the homeserver.

May 30, 2018

A second round of updates from the GNOME Sysadmin Team

I haven’t been blogging so much in the past months as I actually promised myself I would have but given the fact a lot has been done on the GNOME Infrastructure lately it’s time for me to announce all the updates we did since my latest blog post. So here we come with all the items we’ve been looking at recently: Our main LDAP istance was moved from a very ancient machine (which unfortunately died with a broken disk a few weeks ago) to a newer box that currently contains several other admin tools like Mango and Daily Reports.

Some updates from the GNOME Sysadmin Team

It’s been more than a month now since I started looking into the many outstanding items we had waiting on our To Do list here at the GNOME Infrastructure. A lot has been done and a lot has yet to come during the next months, but I would like to share with you some of the things I managed to look at during these weeks. As you may understand many Sysadmin’s tasks are not perceived at all by users especially the ones related to the so-called “Puppet-ization” which refers to the process of creating / modifying / improving our internal Puppet repository.

May 29, 2018

GUADEC under the sea

I’m planning to do a day trip to go scuba diving at GUADEC this year. If you’d like to join me, drop me an email or find me on IRC. There’s a few of us interested in going, so the more, the better! This is not an official GUADEC event. For the official schedule, see this page on the website.

Alcazaba of Almeria, CC0, by skeeze

CC0, by skeeze

By the way the page for finding room buddies at Residencia Civitas for GUADEC is now up on the wiki. You should go book your accommodation!

Feeds