Showing posts with label Project. Show all posts

Tuesday, May 7, 2013

When do you take off the painters tape?


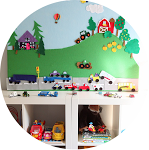
Earlier today, I finished painting the living room bookshelves.*  The prep was a bit slow, but painting (with a 4" roller and a brush) was a breeze.

I protected the walls by inserting heavy card stock in the corners (cut up file folders) and green tape along the edges.

Except, I couldn't figure out the best time to take off the painters tape.

- If I left the tape until after the paint dries, when I pull it down, it rips apart and I have skinny little pieces of green that stick to the shelves. I need tweezers to get them off.

- If I removed the tape as soon as I was done painting, I risked bumping my knuckles along the freshly painted shelf.

I couldn't win. I went with removing it as I go, only because if I accidentally splattered on the wall, I could clean up the mess with a wet paper towel (once the paint dries, I am screwed, at least, I think I would be...I am a paint novice)

Oh, and because I did two coats, I had to prep the wall with tape twice, instead of leaving it there until I was completely finished.

Anyways, what do you do?

ps. painting them before they were installed would have made my life easier, but I was putting off buying the paint. I needed to colour match the existing trim, which is oil-based and has yellowed. I had no idea how simple it was to request a custom colour matched can. I removed the painted hinge from my dining room swing door and brought it in to Maple Paints at Bathurst and St Clair. They mixed the ca, then rubbed a little on the hinge to make sure it was correct. It was a little on the pink side. So they mixed a new can, and it was a perfect match. 
pps. Happy dance that it's done! 

*How long should I let them dry before I can bring down the books? 24-hours?

UPDATE: I am going to wait another week, or maybe two, before putting the books up...to be on the safe side! 

Monday, April 29, 2013

Living room shelves: installed and primed


Here they are! The new bookshelves for the living room!

Jim Hale, Kerry's dad, built, primed, delivered and installed them for us*. I will give them a coat or two of white paint in my spare time.

If you are handy, I am positive you could DIY something similar. They are made from 1x8 boards. Notice that we kept the bookcases open at the bottom - we didn't want to interfere or compete with our 90 year baseboards. The shelves are set in about 1 1/2 inches from each side wall, because those baseboards are thick and I didn't want to notch them.

You could always add trim to the bottom and fill in the sides with panels, but to me that was extra work, and wouldn't add anything. I wanted them to be simple, easy, and removable without causing damage. Actually, I should ask how easy it will be to pull them away from the wall if we ever want to re-paint the room. I assume we unscrew the anchors and slide them out. 
 
It will probably take me a month or so before they are painted and complete. I will take a million photos when I add books and style them, so we can all have fun filling them up together!
  
What do you think?!

ps. Just to be super clear, we notched the quarter rounds but did not touch the baseboards.
pps. It took Mr Hale 5 hours to install them. He spent a chunk of time trying to find the studs. He fastened the two units on each side to each other - the two on the left are held together with screws, as are the two on the right. L brackets were used at the top to secure the shelves to the wall, and two L brackets ensure that the shelf over the doorway does not warp.  Note: The shelves are not adjustable. They are about 12 inches apart.
ppps. I know I don't have enough books to fill them, but I love having the space to collect more. I can see them filling up over the next decade. In fact, if this turns out to be our forever house, then one day a lifetime of reading will be piled up on those shelves!
pppps. I was leaning towards natural wood...leaning hard. Every time I look at them I still crave the natural wood. However, once the books go in, the wall will be quite busy and alive with colour...so I thought it was better to paint the shelves out and let them be part of the background. Does this make sense? 
ppppps. My son added his small painting exactly where he thought it should go (to the left of the encaustic) before I could take the photo.     

*Cost: $960 (no blog discounts or blah blah blah...)

Saturday, April 13, 2013

Painting the dining room table black

Guys - when the weather FINALLY clears up (that has to be it for the snow! I don't think it's possible to snow in the second half of April! No, No...winter is over! You hear me winter? YOU are OVER!)

Ok, when the weather flips to spring*...I am going to paint our maroon veneer dining room table SUPER HIGH GLOSS BLACK.

Are you with me?

Any other colours you would consider?

I will probably go to the Home Depot (because they sent me a $50 gift card!) and buy a giant bucket of Tremclad and some sort of poly clear coat, oh and an oil-based primer....and small rollers...and just do it!

See more table & dining room photos here.


 *Weather needs to warm up and dry out, patio furniture needs to be removed from the garage, and we need to shop for supplies. Then we need to haul the table outside.  Someone needs to detach the kids from my legs. Then, watch me paint! 
ps. Thanks Razmataz

pss. this thought brought to you by a very strong espresso!  I will probably reconsider after the caffeine buzz wears off!

ppps. The table is Ethan Allen Ashcroft Dining Table ...except it's not really that colour, or that finish...in my house it looks dark purple/burgundy. 

Monday, March 25, 2013

Next project: bookshelves in the living room


This is the next project we would like to execute: bookshelves in the living room! Two sets of narrow shelves (8" deep) on each side of the french doors, with a long shelf that runs from wall to wall, right over the doorway. Painted white.

Nothing else in the room will change, we are just adding another layer. The art will get hung in the same position, in front of the shelves. The lamp will slide in a bit. 

I don't have enough books to fill these shelves, but, if I keep reading (and buying second-hand) 40-60 books a year, these shelves will be filled with favorites in no time!* 

Are you as excited about this as I am?


*Books are 50% off at Goodwill on Tuesdays...that's 50% off the goodwill price!

Sunday, February 24, 2013

New Shelves in Storage room


We used white melamine boards and the most basic utility brackets to create more storage space in the basement storage room/laundry room. We needed to create a new spot for toilet paper, paper towels, detergent and other cleaning supplies, since toys took over the lower half of the bookshelves. 

I don't think I can squeeze another inch of storage out of this room...we are at full capacity!

The curtain and the large counter are awesome!! Empty boxes, bulk purchases, extra bowls, thrifty purchases and other miscellaneous things often get dumped onto the counter en route to their final destination. That's ok with me! They are never there very long! I sweep them into place whenever I get a chance. It never takes more than five minutes to make this room pristine again!

It may not look like much, but this room is a hard worker!    


Summary & Materials:
14 - 10 x 12 white brackets ($2.28 each)
3 - 96" boards cut down (free) to four boards in the following sizes: 42", 42", 71 3/4", 71 3/4" , ($19.97 each)
2 - boxes of wood screws (on hand)

This project took 1 1/2 hours of my younger brother's time (he volunteered you guys!).

It also took three separate trips to Lowes. The first time to get the wrong brackets and the wrong shelves. The second time to switch to 8x10" brackets, wrong size again! The third time to switch the boards (the two 73" melamine shelves and the one 96" cut down to two 42" boards that we originally bought, were different thicknesses), and to switch to 10x12" brackets.

ps. The shelves at Home Depot cost $28.99, so we decided to use Lowes for this project.
pss. I also work out in there! 

Saturday, February 16, 2013

Measuring Once...Twice...Three times...


This is the next project I would like to complete...plain white melamine shelves, wall mounted, in the storage room. I have my measurements! I know what we need to buy!! Now I need to get to a building store, charge the battery on the cordless, locate the studs, and ...yikes...

Can I DIY this (by myself?)

Will I find the time?

Will they turn out level?

Stay tuned!


ps. I am not crazy about the transition from window to shelf...but I am going to ignore it for now, and work toward emptying a row of bins to unblock the window.

Thursday, November 8, 2012

Kitchen window shelf - DIY

Here is the pine shelf I installed in my south facing kitchen window!

I bought a piece of pine from Home Depot in the summer. Finally cut it to size in September*. Primed, painted and added brackets in October.  Blogging about it now.  Does that timeline sound accurate?  MONTHS, for a piece of white wood and two brackets!

There are better looking brackets out there, and I could caulk the edges (and fill the split seams in the window frame) to improve the look. I suppose.

At first I wanted to fill the shelf with vintage mugs that could be used as planters for fresh herbs, but the mugs felt too cluttered.  I had three white ceramic pots from IKEA under the kitchen sink. BINGO! 

I could only find potted basil at the grocery store. I will see about rosemary and thyme eventually. There's no rush! What's a few more months?   

*Jammed in there, the shelf actually holds up without the brackets.  

ps. Check out that view, eh? 

BEFORE
 

Monday, July 23, 2012

DIY Audio Rack


As in, 'Do-It-For-Us'

We finally paid someone to help us make a new audio rack for the basement. This design was not my first, or even fiftieth choice...but it is much nicer than most of the options presented (called a 'flexi-rack').  Apparently, incredibly ugly stereo racks have a function...they control vibrations and help make the sound pure* (I am totally making this up because I only half listened when it was explained). Decent looking audio racks are RIDICULOUSLY EXPENSIVE...as in over $5,000.  The problem, I think, - now, this is my own biased opinion...is that stereo geeks think audio racks ARE nice...you know? "Nothing to improve upon here!" "Why mess with a good thing?!!" 

Anyways, definitely an upgrade...and definitely nicer than I thought when my husband first described it to me!

We had Kerry, from First Time Fancy's dad, cut out the MDF shelves, drill three holes in each, and paint the shelves glossy black.  We sourced the metal rods, washers, nuts, end caps, feet and rubber washers ourselves, and we assembled it with my three-year-old's help. (My son styled it up too!)

Cost breakdown, approximately $540
$240 for mdf and labor
$100 for painting (labor)
$200 for parts

Here is a before shot...I will show you the after when he has put everything in place!


*This is important to you if you are an audio nerd ...and my husband is the king of audio nerds.  

ps. I should link to my  husband's inevitable post on some audio forum or another...or even better...get him to guest post when he has his system set up! Maybe we can call learn a thing or two!!! 
pss...remember this sketch?  This almost started an all-out-war (not really, but it was sparky!)

Monday, April 23, 2012

Storage room counter installed


The countertop is done!

The junk in this room used to be piled in a jumbled mess.  We cleared it out and hired Kerry's dad to install a maple plywood countertop (cost: $700 for materials and labour).  Then I hung up a canvas curtain to hide the junk (cost $23 for canvas and $4 for velcro).

As an added bonus, we 'borrowed' my parents elliptical machine.  (I've used it at least 10 times in the last three weeks - love having it here!). 

There is one last round of organization that needs to take place. The area above the washer dryer will be fitted with shelves and bars to hold cleaning supplies and hang clothing.  (We are doing this ourselves).


I'd love to hear what you think!?


ps. From time-to-time, I've regretted that we didn't divide this room into two: one for storage, and one for pretty laundry.  Now, the room FINALLY feels 'on purpose'...


Before:


Friday, March 9, 2012

Storage Room Upgrade!


We have emptied the storage room in anticipation of one of the greatest things that will ever happen to us:* SIXTEEN FEET OF COUNTER SPACE!

We are going to install a basic plywood counter top above the washer and dryer that will continue across to the far wall (where the ladder is).  We intend to hang a curtain under the counter to hide away sixteen feet of clutter!**   

I can't wait to have the counter built, so I can jam all the ugly underneath it! Can you picture it?  Soooo good, right?

Mr Hale***, Kerry's Dad (First Time Fancy), is going to work his magic next week (I hope!)!  Boy he sure does have his hands full! 

*I am not exaggerating!!
**Except we have 40 feet of clutter!!! 
***You may recall Mr Hale also built us a 10-foot-long outdoor table

Tuesday, August 9, 2011

Triangles

This DIY makes me very very happy! 

Although after I printed the pillows, I realized upside down triangles may have more graphic punch ...  What do you think? Better than my first attempt at colour, no?  Should I attack more pillows? Maybe add a third or fourth colour into the mix?  I have five or six more plain white sunbrella pillows packed up snuggly in the garage, but its sorta a pain to take in 15-16 pillows every time the forecast indicates rain...

ummm....its blue and 'orange'!  But its an orange I mixed myself so it is definitely on the yellow side...but closer to tangerine like the poufs!

Sunday, August 7, 2011

New floating shelves in the basement for paperbacks

Finally! Finally! My parents came up yesterday and put up some shelves in the basement for us!  My husband ran out to Home Depot this morning and picked up a few more brackets and boards...et Voila!

BEFORE:
AFTER:

I adore the shelves, but I want to fire the stylist!  I have great difficulty styling anything...I guess I can't expect to get it right on the first (or fifth) attempt...The left side makes me happy, but the right side is unbalanced...I think the black lantern is too heavy....I know its just a basement, and its just a place to store our paperbacks (I do read them again),  but I won't be satisfied until it looks perfect! 

What do you think? 
We also hung this reclaimed wood mirror (a present from an mbanx xmas party many many many years ago!)
ps....what is up with the sunshine/thunderstorms today? Every 10 minutes the weather flip flops...so weird!
pss...THANKS AGAIN MOM AND DAD! 
psss...I am SOOO excited to hear what you guys think!!!Unless, of course, you think its a hot mess...then I might not want to know :)

UPDATE: Globe lamp replaced the black lamp...and some fussing with books...

Wednesday, July 20, 2011

10 foot table

Earlier today, Kerry's Dad (Kerry of First Time Fancy fame), built us this beautiful cedar table and benches!
Unfortunately, the pea gravel patio is not level...it's about 2 inches out...I hope they can top up the stone.!!
What do you think?  WE LOVE IT!  Thanks Kerry's Dad!  We highly recommend using Kerry's Dad for any carpentry project you are planning!  We would jump at the chance to hire him again!!!

ps. I want to paint the bentwoods glossy black (next summer), what colour would be your first choice?