PHP image manipulation
Overview
Cloudinary is a cloud-based service that provides an end-to-end image management solution including uploads, storage, administration, image manipulation, and delivery.
After uploading images to Cloudinary, they can be made available to users of your web and mobile applications via dynamic URLs. With these simple URLs, you can tell Cloudinary to transform and manipulate your images. Cloudinary optimizes your images and automatically routes them through a fast CDN applying advanced caching techniques for optimal user experience.
Cloudinary can create transformed versions of your images either eagerly while uploading or on-the-fly when their url is first accessed. Transformed images are stored persistently in the cloud for future delivery through worldwide CDN edges. All image manipulations are performed automatically in the cloud. You don't need to install any image processing software such as ImageMagick, imagick or GD. Cloudinary will take care of all your PHP image manipulation needs.
Cloudinary also supports retrieving and manipulating your users' Facebook and Twitter social profile pictures.
In addition to images, Cloudinary can be used to manage non-image files. These can be uploaded to Cloudinary and delivered to your users as-is.
Cloudinary's PHP library simplifies the generation of image manipulation URLs. The library includes view helper methods for embedding images and transformed images in your web views.
For a full list of supported transformations and their usage, refer to Image transformation reference.
Display images
You can add images to your PHP view using Cloudinary's cl_image_tag helper method. This method generates the full image resource URL based on the given transformation parameters and adds the image to your HTML code:
For example, displaying the uploaded image with the sample public ID, while providing an alternate text:
<?php echo cl_image_tag("sample.jpg", array( "alt" => "Sample Image" )); ?>

If cloud_name is configured to be demo, this code is equivalent to:
<img src='http://res.cloudinary.com/demo/image/upload/sample.jpg' alt='Sample Image'/>
You can use cl_image_tag to show transformed versions of your uploaded images by adding transformation instructions. For example, displaying the 'sample' image resized to fill a 100x150 area:
<?php echo cl_image_tag("sample.jpg",
                        array("width" => 100, "height" => 150, "crop" => "fill")); ?>

This is equivalent to:
<img src='http://res.cloudinary.com/demo/image/upload/c_fill,h_150,w_100/sample.jpg'
     height='150' width='100'/>
Below you will find many additional examples of image manipulations for your PHP applications. For a full list of supported image manipulations, see Image transformations.
Image versions
By default, Cloudinary assigns a unique public ID to each uploaded image. Alternatively, you can define your own public ID. If you upload an image with a public ID that already exists, the file will be overridden. Still, the CDN may already contain a previously cached copy of the older image.
To force the CDN to display the latest uploaded image, you should add a version component to Cloudinary's URLs. The version value is returned by Cloudinary as part of the response of the upload API call, and is unique per upload. Adding the version component to URLs can be done by setting the version parameter, for example:
<?php echo cl_image_tag("sample.jpg", array("version" => 1315746344)); ?>
Direct URL building
cl_image_tag generates an HTML image tag. In certain occasions, you might want to generate a transformation URL directly, without the containing image tag. You can do that by using the cloudinary_url PHP command. Here are few examples:
<?php echo cloudinary_url("sample.jpg",
                          array("width" => 100, "height" => 150, "crop" => "fill")); ?>

<?// Output: "http://res.cloudinary.com/demo/image/upload/c_fill,h_150,w_100/sample.jpg" ?>
cloudinary_url("sample_spreadsheet.xls", array("resource_type" => "raw"));

// Output: "http://res.cloudinary.com/demo/raw/upload/sample_spreadsheet.xls"
Secure HTTPS URLs
Cloudinary supports delivering images using HTTPS URLs. These images are delivered through a CDN as well. When using cl_image_tag in your PHP view, this is done automatically for you, based on the request protocol of the page containing the image tag.
You can force cl_image_tag to always use HTTPS URLs by setting the secure parameter to TRUE, either globally or locally in each call to cl_image_tag or cloudinary_url. For example:
<?php echo cl_image_tag("sample.jpg", array("secure" => TRUE,
                        "width" => 100, "height" => 150, "crop" => "fill")); ?>

<?// Output: <img width="100" height="150"
src="https://res.cloudinary.com/demo/image/upload/c_fill,h_150,w_100/sample.jpg"/>?>
cloudinary_url("sample.jpg",
               array("secure" => TRUE, "width" => 100, "height" => 150, "crop" => "fill"));

// Output: "https://res.cloudinary.com/demo/image/upload/c_fill,h_150,w_100/sample.jpg"
Multiple CDN sub-domains
Browsers limit the number of download requests they perform concurrently from each unique domain. The lower concurrency means that downloading many images from a single web page might be somewhat slow. To overcome this limitation, Cloudinary supports downloading images from multiple sub-domains. This can results in a much improved web browsing speed.
You can enable downloads from multiple sub-domains by setting cdn_subdomain to TRUE either globally or in each call to cl_image_tag:
<?php echo cl_image_tag("sample.jpg", array("cdn_subdomain" => TRUE)); ?>

<?// Output: <img src="http://a4.res.cloudinary.com/demo/image/upload/sample.jpg" /> ?>
\Cloudinary::config(array( "cdn_subdomain" => TRUE ));
See this blog post for more details: Reduce site load time with multiple CDN sub-domains.
Error handling
Did you get a broken or an empty image when accessing a Cloudinary transformation URL? it might be a simple matter of using a wrong syntax. To understand more, check your X-Cld-Error HTTP response header. This is where Cloudinary reports the errors it encounters.
For example, trying to access the following URL:
http://res.cloudinary.com/demo/image/upload/w_abc/sample.jpg

X-Cld-Error: Invalid width - abc
To view the X-Cld-Error header on the Chrome browser, select Developers Tools from the View menu. Then select the Network tab, refresh your page, click on the image name with the 400 status code and look for X-Cld-Error under Response Headers.
Resize, crop and thumbnails
Cloudinary makes it very simple to manipulate images. To show a transformed version of an uploaded image, simply provide transformation instructions as part of Cloudinary's image urls.
For example, displaying the 'sample' image transformed to fill a 100x150 area:
<?php echo cl_image_tag("sample.jpg",
                        array("width" => 100, "height" => 150, "crop" => "fill")); ?>
Note that you must provide the crop parameter , for the resize or crop transformation to take effect. Without it, the image will be downloaded at its original dimensions and the browser will end up stretching or shrinking it on the client's side.
If you want to transform an uploaded image to a certain dimension and display it within your page in a different dimension, you can use the optional html_width and html_height parameters. Here's an example of the Cloudinary code and its equivalent image tag:
<?php echo cl_image_tag("sample.jpg",
          array("width" => 100, "height" => 150, "crop" => "fill",
                "html_width" => 50, "html_height" => 75)); ?>
This is equivalent to:
<img src='http://res.cloudinary.com/demo/image/upload/c_fill,h_150,w_100/sample.jpg'
     height='75' width='50'/>
Scale mode
You can scale an image to an exact width and height by setting the crop parameter to scale:
<?php echo cl_image_tag("sample.jpg",
                        array("width" => 100, "height" => 150, "crop" => "scale")); ?>

Fit mode
Cloudinary's fit cropping mode (set crop to fit) transforms the image to fit in a given rectangle while retaining its original proportions.
<?php echo cl_image_tag("sample.jpg",
                        array("width" => 100, "height" => 150, "crop" => "fit")); ?>

Fill mode
Transform an image to fill specific dimensions completely while retaining its original proportions by setting crop to fill. Only part of the original image might be visible if the required proportions are different than the original ones.
<?php echo cl_image_tag("sample.jpg",
                        array("width" => 100, "height" => 150, "crop" => "fill")); ?>
By default, fill keeps the center of the image centered while cropping the image to fill the given dimensions. You can control this behavior by specifying the gravity parameter. In the following example, gravity is set to South East.
<?php echo cl_image_tag("sample.jpg",
                        array("width" => 100, "height" => 150, "crop" => "fill",
                              "gravity" => "south_east")); ?>

Limit mode
The limit cropping mode is used to create an image that does not exceed the given width or height. If the original image is smaller than the given limits, the generated image will be identical to the original one. If the original is bigger than the given limits, it will be resized while retaining original proportions (similar to the 'fit' mode in this case).
<?php echo cl_image_tag("sample.jpg",
                        array("width" => 100, "height" => 150, "crop" => "limit")); ?>

Pad mode
Cloudinary's pad cropping mode will resize the image to fill the given dimensions while retaining original proportions. You can specify 'gravity' to select which portion of the original image will be used to fill the rectangle.
<?php echo cl_image_tag("sample.jpg",
                        array("width" => 100, "height" => 150, "crop" => "pad")); ?>

Crop mode
The crop mode allows custom coordinates cropping based on a given gravity parameter or a combination of x, y, width and height parameters.
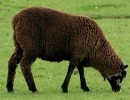
<?php echo cl_image_tag("brown_sheep.jpg",
             array("width" => 300, "height" => 200,
                   "x" => 355, "y" => 410, "crop" => "crop")); ?>

See Crop Modes documentation for more details.
Percentage based resizing
You can change the dimensions of an image using relative percentage instead of absolute pixels. Simply use a decimal value to define the required size. You can provide only width or height instead of both and Cloudinary will maintain the aspect ratio.
For example, resizing the 'sample' image to 20% of its original size is done by setting the width parameter to 0.2:
<?php echo cl_image_tag("sample.jpg", array("crop" => "scale", "width" => 0.2)); ?>

Increasing the image size is also possible. Setting 'width' to 1.5 will scale up the image by 150%:
<?php echo cl_image_tag("sample.jpg", array("crop" => "scale", "width" => 1.5)); ?>
Format conversion
To convert an uploaded image to a different image format, simply change its extension. For example, to convert an uploaded JPG file to GIF, add .gif suffix to the public ID of your image:
<?php echo cl_image_tag("sample.gif"); ?>
You can also set the first parameter to be your image's public ID and specify the required image type by setting the format to the required format:
<?php echo cl_image_tag("sample", array("format" => "png")); ?>
When delivering JPG photos, you might want to control the image quality (compression level). A lower quality means a much smaller file that can be viewed faster by your users. You can set the quality parameter to a value between 1 to 100.
<?php echo cl_image_tag("sample.jpg", array("quality" => 50)); ?>
Cloudinary supports generating thumbnails from PDF documents. You can use the page parameter to generate a thumbnail of a specific page.
<?php echo cl_image_tag("multi_page_pdf.jpg", array("width" => 100, "height" => 140,
             "crop" => "fill", "page" => 2)); ?>

The supported image formats are: jpg, png, gif, bmp, tiff, ico, pdf, eps, psd, webp, svg, wdp
Face detection
Cloudinary can detect one or more faces in a picture. This allows it to smartly crop photos or to manipulate images based on the automatically detected faces in them.
You can transform an image to fill given dimensions while keeping the photographed subject's face visible, by setting the gravity parameter to face together with the fill crop mode:
<?php echo cl_image_tag("face_top.jpg", array("width" => 90, "height" => 90,
             "crop" => "fill", "gravity" => "face")); ?>

Creating a thumbnail centered on a detected face is done by specifying the thumb crop mode and selecting the face gravity:
<?php echo cl_image_tag("face_top.jpg", array("width" => 90, "height" => 90,
             "crop" => "thumb", "gravity" => "face")); ?>

You can also crop a certain region of an image based on face detection by selecting the crop mode and specifying the face gravity:
<?php echo cl_image_tag("face_top.jpg", array("width" => 50, "height" => 50,
             "crop" => "crop", "gravity" => "face")); ?>

In order to create a thumbanil covering multiple faces detected in a photo, set the gravity parameter to faces.
<?php echo cl_image_tag("couple.jpg", array("width" => 115, "height" => 136,
             "crop" => "thumb", "gravity" => "faces")); ?>

You can even tell Cloudinary to automatically pixelate or blur all detected faces using the pixelate_faces and blur_faces effects. For example:
<?php echo cl_image_tag("couple.jpg", array("effect" => "pixelate_faces", "width" => 150,
             "height" => 150, "crop" => "thumb", "gravity" => "faces")); ?>

Facebook and Twitter profile pictures
The facebook_profile_image_tag, twitter_profile_image_tag and twitter_name_profile_image_tag view helper methods can be used to embed the social profile pictures of your users inside your web or mobile apps.
See Facebook profile pictures and Twitter profile pictures for more details.
You can manipulate the fetched profile pictures with any of Cloudinary's transformations so they perfectly match your graphic design. For example:
<?php facebook_profile_image_tag("billclinton.jpg", array("width" => 90, "height" => 98,
                           "crop" => "fill", "gravity" => "face")); ?>

<?php twitter_name_profile_image_tag("billclinton.jpg"); ?>

Social pictures were automatically fetched from the social network by Cloudinary, dynamically transformed and delivered cached through a CDN. Social profile pictures delivered by Cloudinary are refreshed once a week. This way, when your users switch their profile photos, the latest ones will be used. See Update and delete images for more details about image refreshing.
Displaying and transforming Google+ and Gravatar images is also supported.
Alter shape
Cloudinary supports various shape and content image manipulation features.
You can tell Cloudinary to round your images corners by setting the radius parameter. For example, using a radius of 20 pixels:
<?php echo cl_image_tag("sample.png", array("width" => 150, "height" => 100,
             "crop" => "fill", "radius" => 20)); ?>

Setting the radius parameter to max makes an image circular (or elliptic):
<?php echo cl_image_tag("face_left.jpg", array("width" => 150, "height" => 150,
             "crop" => "thumb", "gravity" => "face", "radius" => "max")); ?>

You can rotate an image arbitrarily using the angle parameter. For example, rotating by 25 degrees:
<?php echo cl_image_tag("sample.jpg", array("angle" => 25)); ?>

Photos taken by digital cameras or smartphones usually include additional metadata (Exif, IPTC) that stores the orientation of the photo (e.g., portrait or landscape). Cloudinary can automatically rotate an image based on its orientation metadata by setting the angle to exif:
<?php echo cl_image_tag("sample.jpg", array("angle" => "exif")); ?>
See this blog post for more details about Automatic and custom image rotation.
Add a border around an image by setting the border to either a hash of width in pixels and color (RGB of name) or a string of the following format '4px_solid_rgb:553311'. For example:
<?php echo cl_image_tag("sample.jpg",
                        array("border" => array("width" => 4, "color" => '#553311' ))); ?>

See this blog post for more details about Adding borders to images.
You can make an image semi-transparent by setting the opacity parameter to a value smaller than 100. For example, reducing opacity to 20%:
<?php echo cl_image_tag("mountain.jpg", array("opacity" => 20)); ?>

See this blog post for additional details about Image opacity manipulation.
Chained transformations
Cloudinary supports powerful transformations. You can even combine multiple transformations together as part of a single transformation request, e.g. crop an image and add a border. In certain cases you may want to perform additional transformations on the result of a single transformation request. In order to do that, you can use Cloudinary's chained transformations.
To support chained transformations, Cloudinary's transformation URLs allows you to include multiple transformation components separated by '/'. Each transformation component is executed on the result of the previous one. Applying multiple transformations is done by specifying the transformation parameter.
The following example first crops the original image to a specific set of custom coordinates and then transforms the result so it fills a 130x100 rectangle:
<?php echo cl_image_tag("brown_sheep.jpg",
             array(
               "transformation" =>
                 array( "width" => 300, "height" => 200,
                        "x" => 355, "y" => 410, "crop" => "crop" ),
               "width" => 130, "height" => 100, "crop" => "fill"
             )); ?>
You can chain more than two transformations together. In this case, the transformation parameter can be set to an array of transformation hashes. The following example applies 4 chained transformations: custom cropping to 300x200, fill to 130x100, rotate by 20 degrees and scale to 50%.
<?php echo cl_image_tag("brown_sheep.jpg",
             array(
               "transformation" => array(
                 array( "width" => 300, "height" => 200,
                        "x" => 355, "y" => 410, "crop" => "crop" ),
                 array( "width" => 130, "height" => 100, "crop" => "fill" ),
                 array( "angle" => 20 ),
                 array( "width" => 0.5, "crop" => "scale" )
               )
             )); ?>

Named transformations
Cloudinary's URLs include your full transformation instructions. If you use Cloudinary to apply complex transformations on your images, you may end up with somewhat long URLs.
To shorten your urls, You can give any dynamic transformation a short name. You can name single transformations and also complex chained transformation. Named transformations can be created either in the Transformations web interface of our Management Console or using the Admin API.
Using named transformations also hides the exact manipulations you apply to your images, from your more advanced users.
Cloudinary's transformation parameter can be set to a name of a single transformation and will also accept an array of transformation names to chain together. For example, if you created a transformation named 'jpg_with_quality_30', you can apply it like this:
<?php echo cl_image_tag("sample.jpg", array("transformation" => 'jpg_with_quality_30')); ?>

Using a named transformation means that your image URLs will include this transformation's name. If you wish to modify this transformation, we recommended that you assign a different name to it, otherwise your image URLs won't change and older, cached copies of your transformed images might be returned by the CDN.
Cloudinary's web interface and Admin API can be used to delete and re-create a named transformation. This is currently limited to transformations with up to 100 derived images associations.
Filters and effects
Cloudinary supports applying various filters and effects on your pictures. A full list of filters and effects is available here. You may also want to look at the following blog posts:
- Cloud-based API for applying effects on images.
- Automatic cloud-based image improvements and effects.
- Automatic image sharpening and blurring in the cloud.
Applying an effect can be done by setting the effect parameter with the name of the required filter or effect. For example, applying the sepia effect:
<?php echo cl_image_tag("sample.jpg", array("effect" => "sepia")); ?>

Some effects can be controlled using a level attribute. The following example increases the image's saturation by 70% using the 'saturation:70' effect parameter:
<?php echo cl_image_tag("sample.jpg", array("effect" => "saturation:70")); ?>

Some effects accept a negative level value. The following example reduces the image's brightness level by 30%, using an alternative interface - passing an array of the effect name and level value:
<?php echo cl_image_tag("sample.jpg", array("effect" => array("brightness", -30))); ?>

Using chained transformations you can apply multiple effects to reach more complex results. The following example reduces the image's green level by 50%, increases brightness by 50% and applies a gradient fade effect:
<?php echo cl_image_tag("sample.jpg", array("transformation" => array(
              array( "effect" => "green:-50" ),
              array( "effect" => "brightness:50" ),
              array( "effect" => "gradient_fade" )
             ))); ?>

Don't forget to browse through our always growing list of filters and effects.
Overlays, underlays and watermarks
Cloudinary supports generating new images by layer multiple images one on top of the other.
See this blog post for some examples: Adding watermarks, credits, badges and text overlays to images.
Add an overlay to an image by setting the overlay parameter to the public ID of a previously uploaded image. All additional transformation parameters will be applied to the overlay images instead of the original one.
The following example adds the image with the public ID of 'cloudinary_icon' as an overlay to the image with the public ID of 'mountain'. The overlay is scaled to a width of 100 pixels before being appended.
<?php echo cl_image_tag("mountain.jpg",
                        array("overlay" => "cloudinary_icon", "width" => 100)); ?>

You can resize and position the overlay using the gravity, x and y parameters. You can also apply effects to the overlay and reduce its opacity to generate a watermark:
<?php echo cl_image_tag("mountain.jpg", array("overlay" => "cloudinary_icon",
             "width" => 80, "gravity" => "south_east", "x" => 5, "y" => 5,
             "opacity" => 50, "effect" => "brightness:200")); ?>

In case you want to place an image underneath another image, you can use the underlay parameter. It is identical to overlay but positions the layer below the main image.
<?php echo cl_image_tag("smartphone.png", array("underlay" => "site_bg.jpg",
              "width" => 80, "height" => 80, "effect" => "brightness:100",
              "transformation" =>
                array( "crop" => "fill", "height" => 80, "width" => 80 )
             )); ?>

Text layers
You can use any image as an overlay or underlay of another image. This includes uploaded images, social profile pictures and also text layers. In order to append text layers, first you need to define your custom text style using our API. See Text creation for more details.
Appending a text overlay is done by setting the overlay parameter to 'text:STYLE-NAME:YOUR-TEXT'. Notice that the actual text should be URL encoded. The following example adds the "Hello World" text using the previously created 'bold_dark' font style:
<?php echo cl_image_tag("face_center.png", array("overlay" => "text:bold_dark:Hello+World",
             "gravity" => "south_east", "x" => 8, "y" => 8)); ?>

You can customize the size and position of the text overlay as well as chaining additional layers:
<?php echo cl_image_tag("face_center.png",
             array(
              "transformation" => array(
                array( "overlay" => "text:bold_dark:Chained+Sample",
                  "gravity" => "south", "y" => 5, "width" => 0.9, "flags" => "relative" ),
                array( "overlay" => "sample_watermark", "w" => 50,
                  "gravity" => "north_west", "y" => 5, "x" => 23 )
               )
             )); ?>

Fetch images
Most examples in this page discussed how your can show and manipulate images uploaded to Cloudinary, but Cloudinary can also manipulate images that already exist online, given their public HTTP URLs.
Cloudinary's "fetch" capabilities can automatically fetch images from remote URLs, store them persistently, transform them on-the-fly to match your requirements and deliver them to your users via Cloudinary's CDN. Cloudinary will even automatically refresh these images periodically in case the image in the original URL is modified.
See this blog post for more details: Delivering all your websites’ images through a CDN.
The following example embeds a remote image fetched by Cloudinary:
<?php echo fetch_image_tag("http://upload.wikimedia.org/wikipedia/commons/4/46/Jennifer_Lawrence_at_the_83rd_Academy_Awards.jpg"); ?>
The same remote image is available in the following example after turning it into a 150x150 face detection based thumbnail with rounded corners:
<?php echo fetch_image_tag("http://upload.wikimedia.org/wikipedia/commons/4/46/Jennifer_Lawrence_at_the_83rd_Academy_Awards.jpg",
                array( "width" => 150, "height" => 150, "crop" => "thumb",
                       "gravity" => "face", "radius" => 20)); ?>

You can convert the format of fetched images by setting the fetch_format parameter to your preferred image type. The following example converted a remote PNG image to the JPG format:
<?php echo fetch_image_tag("http://upload.wikimedia.org/wikipedia/commons/e/e4/Globe.png",
                array( "width" => 150, "height" => 150, "crop" => "fill",
                       "fetch_format" => "jpg")); ?>

More options
For a full reference of all supported transformations and their usage, refer to Transformations reference.