
The Firebase Cloud Messaging APNs interface uses the Apple Push Notification service (APNs) to send messages up to 2k in size to your iOS app, including when it is in the background.
To enable sending Push Notifications through APNs, you need:
- an SSL certificate associated with an App ID configured for Push Notifications.
- a provisioning profile for that App ID.
You create both in the Apple Developer Member Center.
Create the SSL Certificate
This section describes how to generate an SSL certificate for an App ID enabled for Push Notifications. Firebase Cloud Messaging will use this certificate to send Push Notifications to the application identified by the App ID.
Generate a Certificate Signing Request File
To authenticate the creation of the SSL certificate, you need a certificate signing request file.
- Open Keychain Access on your Mac (you can get to it by choosing Utilities from the Go menu in the Finder).
- On the Keychain Access app menu, navigate to Keychain Access > Certificate Assistant > Request a Certificate From a Certificate Authority....
- Input your email address and name.
- For Request is select Saved to disk, then click Continue to save the
.certSigningRequestfile to your Mac.

Create an App ID
An App ID is an identifier that uniquely identifies an app. As a convention it is
represented by a reversed domain (e.g. com.google.samples.firebaseexample).
- Navigate to the Apple Developer Member Center and sign in.
- Navigate to Certificates, Identifiers and Profiles.
- In the drop down menu on the top left corner, select iOS Apps, then navigate to Identifiers.
- Click the + button to create a new App ID.

- To create the new App ID:
- Input a Name for your App ID (e.g. Firebase Sample App)
- Choose an App ID Prefix (the default selection should be fine)
- In the App ID Suffix section, select Explicit App ID, then input your
Bundle ID (e.g. com.google.samples.firebaseexample). The value of the Bundle ID
should match the value that you are using in your app's
Info.plistand the value that you are using to get a configuration for FCM.
- In the App Services section, make sure that Push Notifications is checked.

- Click Continue and check that your input is correct:
- The value of Identifier should match the concatenation of the values of the App ID Prefix and of the Bundle ID
- Push Notifications should be Configurable
- Click Submit to create the App ID.
Configure an App ID for Push Notifications
To send Push Notifications to an iOS App, you must configure its App ID to do so.
- In the list of iOS App IDs, select the one you want to use, then click Edit.

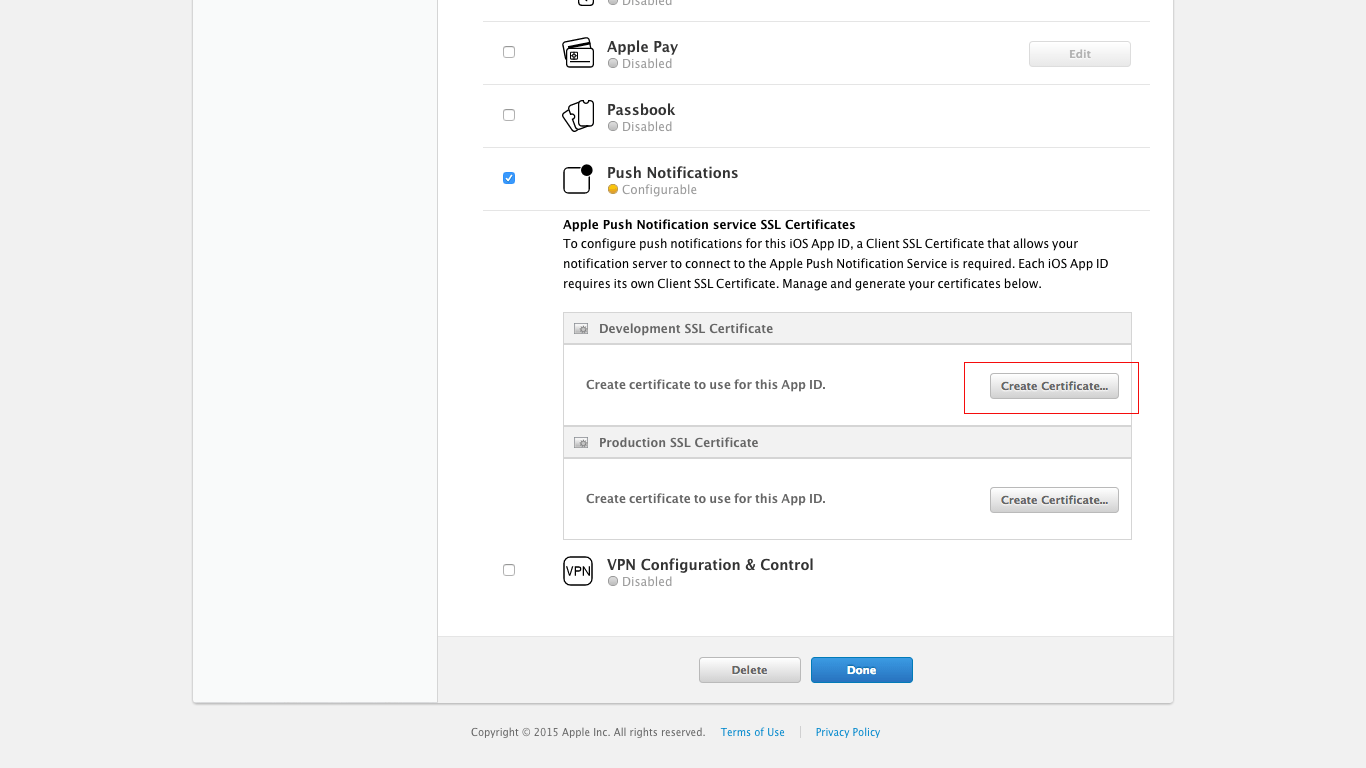
- In the Push Notifications section, you can create a Client SSL certificate
for the development or production environment.
Create one for development clicking Create Certificate... in the
Development SSL Certificate section.
- You should now see a section called About Creating a Certificate Signing Request (CSR) that contains information about creating a CSR. Click Continue.
- You should now be in the Generate section of the flow. Click Choose File...
and select the
.certSigningRequestfile that you created before, then click Generate when it becomes active.
- When the SSL certificate is ready, click Download to save it to your Mac, and click Done to close the certificate creation flow.
- On your Mac, locate the downloaded SSL certificate and double-click it to install it in your keychain.
- On your Mac, open Keychain Access. Under My Certificates, locate the certificate that you have just added; it should be called Apple Development IOS Push Services: your.bundle.id.
- Expand the arrow and then right-click and export the private key as a
.p12file. Enter a password to protect the exported certificate if you want.
The app is now enabled to use the Push Notification development environment. When you are ready to release your application, you need to enable the app to use the Push Notification production environment: repeat these steps, but click Create Certificate under the Production SSL Certificate section instead of Development SSL Certificate.
Create the Provisioning Profile
To test your app while under development, you need a Provisioning Profile for development to authorize your devices to run an app that is not yet published on the App Store.
- Navigate to the Apple Developer Member Center and sign in.
- Navigate to Certificates, Identifiers and Profiles.
- In the drop down menu on the top left corner, select iOS Apps, then navigate to Provisioning Profiles.
- Click the + button to create a new Provisioning Profile.
- Select iOS App Development as provisioning profile type, then click Continue.
- In the drop down menu, select the App ID you want to use, then click Continue.
- Select the iOS Development certificate of the App ID you have chosen in the previous step, then click Continue.
- Select the iOS devices that you want to include in the Provisioning Profile, then click Continue. Make sure to select all the devices you want to use for your testing.
- Input a name for this provisioning profile (e.g. Firebase Sample App Development Profile), then click Generate.
- Click Download to save the Provisioning Profile to your Mac.
- Double-click the Provisioning Profile file to install it.
 Need help? Visit our