Back to top

  • 2016!

    I love the new year! I love the idea of a blank slate, “let’s start fresh!” flush the toilet of the past year mental state. It works with my love of planning and list making. So…here is what my potential 2016 Plan looks like:

    Sew more…or, more accurately, FINISH what I sew.
    Photo Jan 05, 7 18 44 AM

    Seriously, people. I have FOUR dresses just needing to be hemmed. And a jacket. I guess I hate hemming, so I’m going to work on that. Part of this action item is also about stash busting and not just buying, buying, buying more fabric.

    Frame art
    Photo Jan 05, 7 20 01 AM

    It’s so expensive! That’s been my excuse so far and I’ve got some funky sized stuff, so I either need to bite the bullet and pony up, or figure out how to DIY it. I actually have a lot of house things I need to do this year. I need to continue with the repainting of rooms and we also need new carpet for our stairs and second floor in THE WORST way.

    Landspace the Front Yard
    frontyard

    Our house looks like a crappy college rental from the front and it’s super embarrassing. I’ve been focusing in other areas of our giant yard and the poor front yard has been seriously neglected. Last year I hired a landscape designer to come up with a plan, and this year I am going to start implementing it. I see a summer of sore backs ahead…

    Ramp Up My Fitness
    I started experience insomnia after my Monday evening yoga class this summer, which was both really weird and really shitty. The insomnia also put a wrench in my morning workouts and it’s taken a few months iron it all out and get back on track, and I’m still not quite back to normal. So…instead of yoga on a Monday evening I’m going to take pilates on a Saturday morning. I actually just started a class yesterday, so YAY me!. Off to a good start. My abs are so sore right now.

    Food
    IMG_0612

    My food goal for the year was going to be to finally learn how to make my own pasta. I got a Kitchen Aid pasta attachment for Christmas and we made ravioli on New Year’s Eve so…technically I need to new food goal. Jefe bought us a sous vide contraption for Christmas which we used to make ricotta for the ravioli, so…food wise 2015 went out with a BANG! To be honest with you I’ve sort of lost cooking inspiration and desire this past year. I’ve been trying to eat healthier (pasta attachment might not have been the best option) and most of the time I just want something easy.

    I’m feeling super energized and excited for what 2016 has in store for me!

  • Fermenting

    FermentingCrock

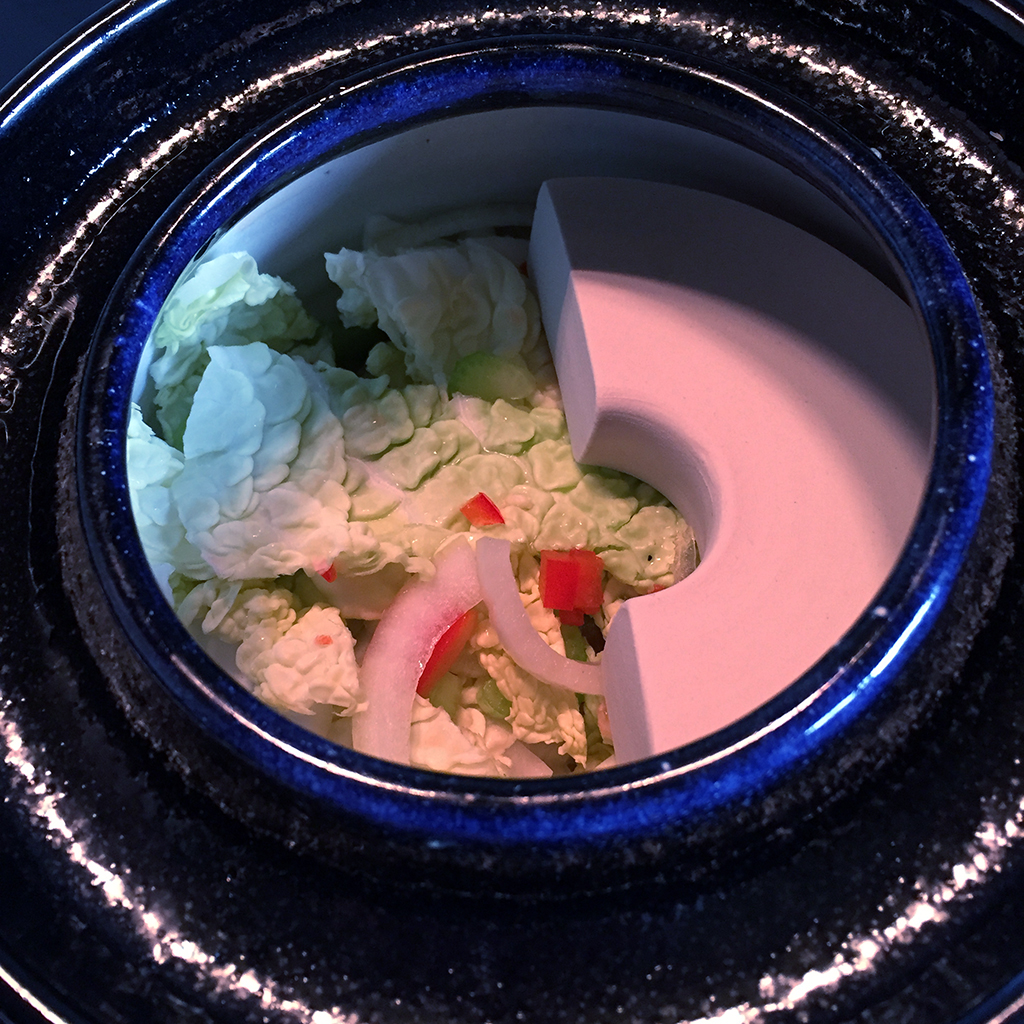
    I made a total impulse-buy this weekend and bought a fermentation crock. I’ve been thinking a lot about kimchi lately because I’ve got a couple of cabbages still hanging around in the garden that I’ve been needing to do something with, but I was mainly suckered into buying it by the very charming and adorable lady who was working at the shop.

    So far it seems pretty easy: chop your vegetables, cover them with the weights that come with the crock and then add a brine. The crock has a lip around the top where you add a little water after you put the lid on which acts as a seal. In three to four weeks I should have some sauerkraut! There’s nothing like being able to leave food out on the counter for days and days and have it actually be good for you. Here a look at the inside:

    FermentingCrock_guts
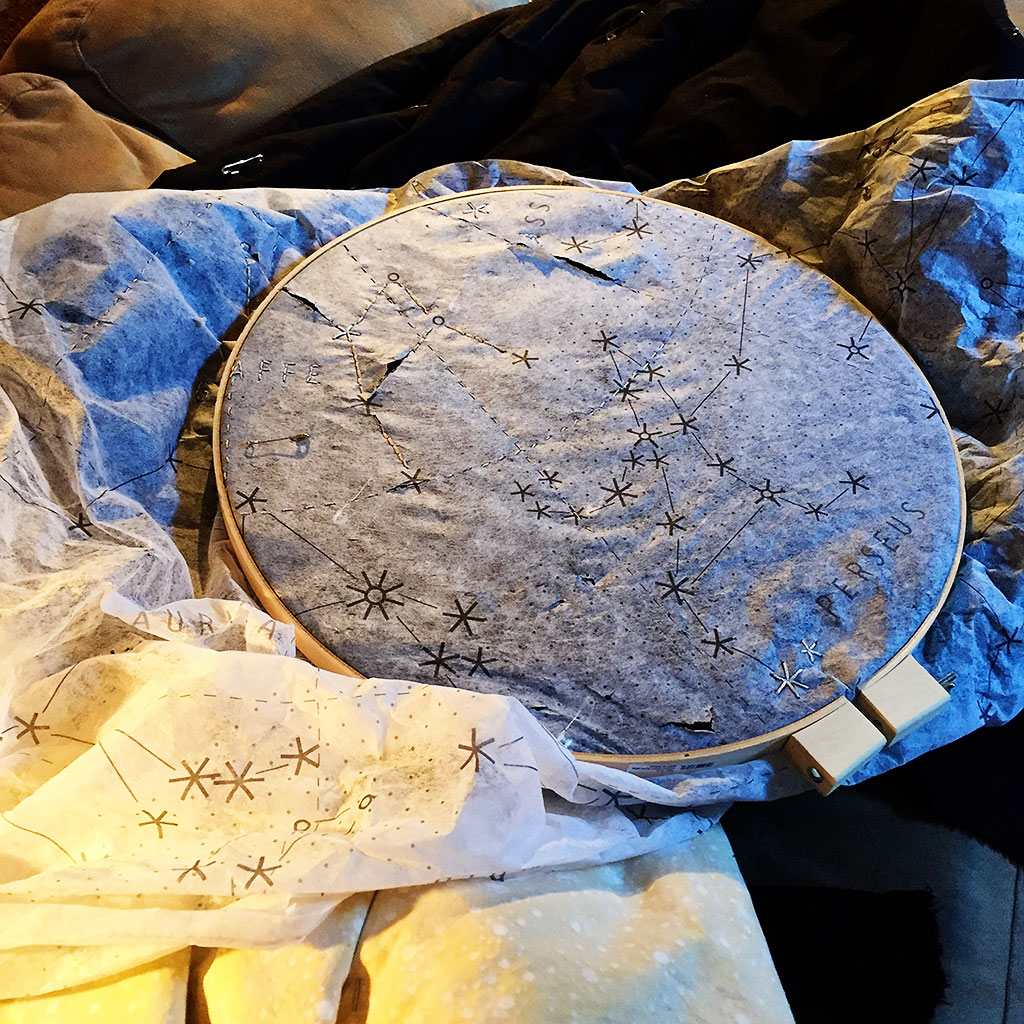
    I’ve been feeling to need to do something mindlessly crafty this winter and decided on this constellation quilt from Haptic Labs. I’ve not gotten very far:

    HapticLabs_ConstellationQuilt
    The top is a black batik that looks like a night sky, and I’m backing it with a cream dot that also sort of echoes the star theme. I have to be extra neat with my stitches because they are going to show on the back, which is sort of a bummer for an impatient person such as myself, but I am finding that I cannot WAIT to rip the pattern off so I can see what it looks like. It’s a good activity for cold, dreary nights.

  • My Garden Year

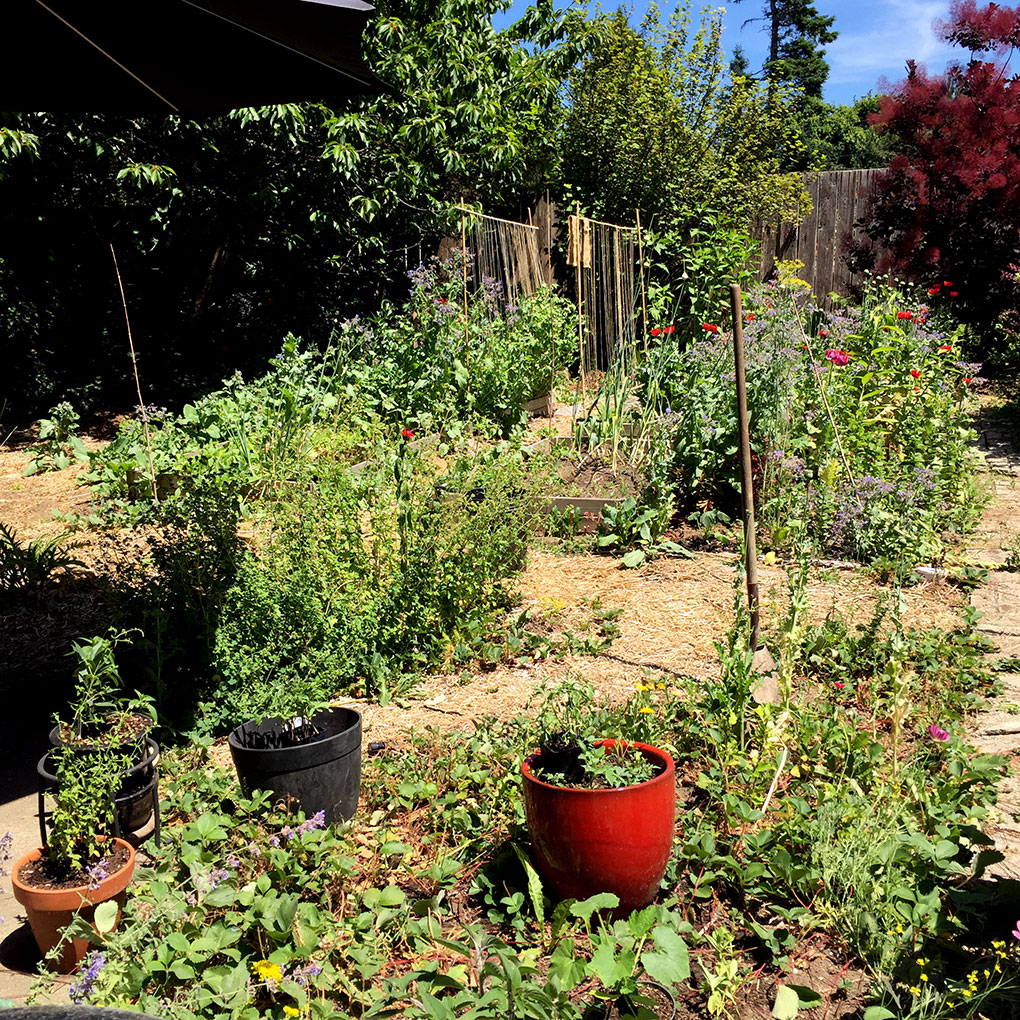
    South garden in June

    South garden in June

    Look at that jungle! I know it’s been almost six months since I blogged, which is totally lame.

    I thought about it a lot! That counts, right?

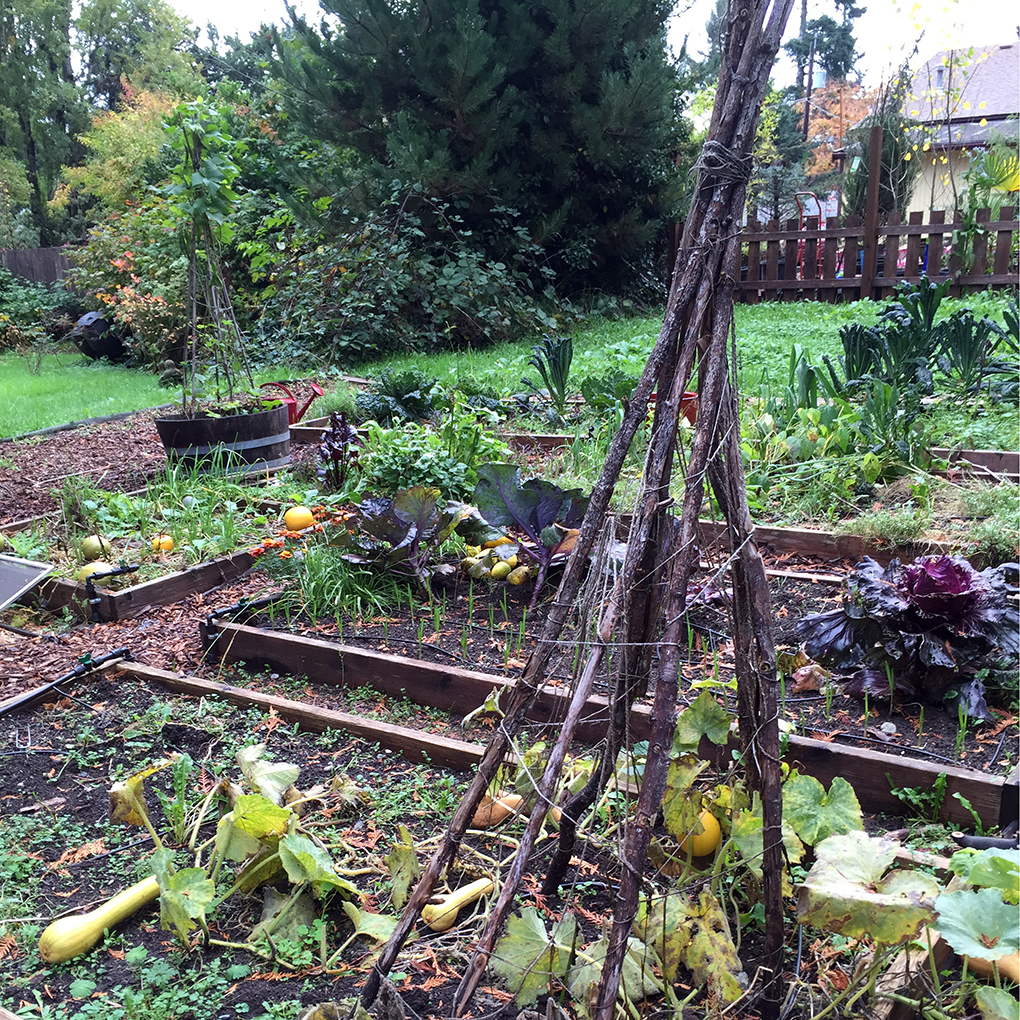
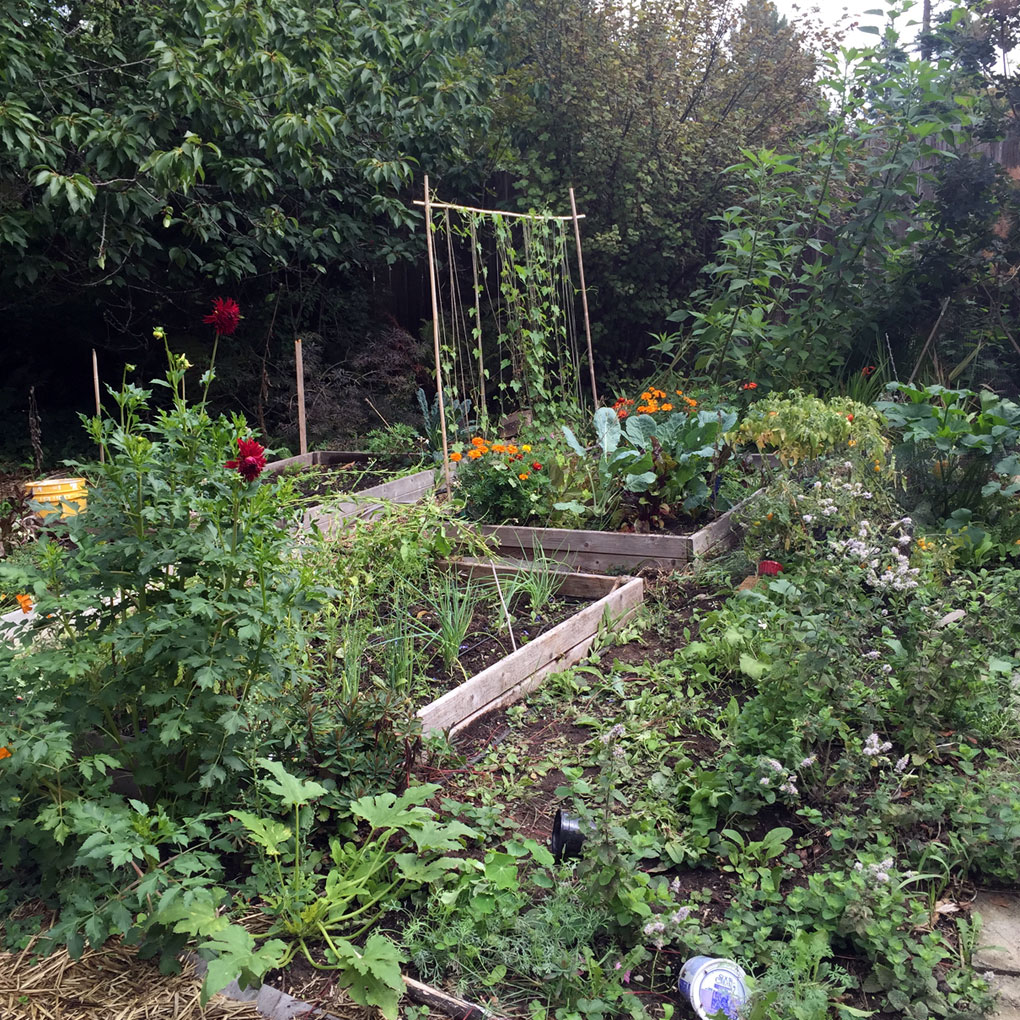
    This year was the BEST garden year ever and it’s pretty much because of all of that drip irrigation I installed AND we had an A-MAZ-ING weather year. It’s like I was back in California. There were hits (cucumbers) and misses (beets) and instead of chronicling it in excruciatingly boring detail, I’ll just post some sort of before and after shots so you can see the transformation. Here’s the above garden in its current state:

    South garden in November

    South garden in November

    North garden in June

    North garden in June

    North garden in November

    North garden in November

    I got my first seed catalog in the mail this past week and I’ve already highlighted the crap out of it. I’m also going try really HARD-ER to blog more. For reals.

  • Housekeeping.

    Hello! I am currently doing a little site-redesign/re-org so things might look a little funky for a few days…

  • A couple of garden projects

    drip irrigation bits

    I am FINALLY installing drip irrigation! Holy cow! It’s taken me long enough. I started this project last year and got ONE BED done and then…well…you know. I have that problem with finishing things I start. So…a few months ago I read a blog post by Garden Betty where she described her set up, which uses the same drip kit that I already had, just configured differently. I liked hers so much that I ordered a few extra bits and elbows and other bits and have been busy assembling said bits. So, good thing I only did one bed, right?

    And since I am sort of on the topic of finishing things…

    Boom. Cold frame. DONE. I got that window from a coworker over a year ago (at least) and it’s just been taking up space in the garage this whole time. It seriously took Jefe and I maybe an hour to build it. I’ve got some veggie starts under lights that are almost ready to transition into their awesome new home!

    I planted sunchoke, or jerusalem artichoke tubers in a spot in the back of the kitchen garden. I’m excited to see what they do this year. Also planted but not shown: potatoes, garbanzo beans, peas and fava beans.

    On a whim I decided to start saving egg cartons and toilet paper rolls because I often see people use them for veggie starts. I tried it in the past and it’s never really worked for me, but this year I COMBINED THE TWO and I feel like magic happened. I feel like a recycling genius. Although, I am positive someone has probably done this a million times before.

    Look at this little pallet house! My next grand project is going to be a pallet planter for some bamboo, so I am all about pallets right now. I saw this at a local garden center and fell in love with it. It’s not practical in any way, shape of form, but it’s just so clever I can’t get over it. I’m hoping to tackle the planter project a couple of weeks so I’ll let you all know how THAT goes!

  • Make Art That Sells-Part B Week 1

    This is my finished piece from the first week of the Make Art That Sells course I am currently enrolled in. The theme was toy trains and winter holidays, and the market we were exploring was the paper market, which would be things like cards and the like.

    I LOVED working on this, especially the train, which surprised me…so I am trying to remember to keep an open mind about subjects that on the surface don’t sound all that appealing. It was also an opportunity to experiment painting a shiny gold effect and overall I am quite pleased with the outcome.

  • Repotting and Preparing

    My poor african violets finally got transferred in to some larger, brand-spankin’ new pots. A local store had pots on sale so I was able to give a bunch of my house plants new digs. I am finding that attractive, AFFORDABLE pots are really hard to come by, which seems strange. I guess next time I am IKEA I need to stock up.

    I am all about weeding right now. This is the “kitchen garden” and the first bed I am going to be planting into is the long skinny one in between the raised beds and the pathway. It’ll be filled with things like spinach, lettuces and peas.

    Here’s the horror that is currently what I am calling “the south garden.” This one used to be beautiful, but I got super lax on mulching, then it got ran over, and now holy cow the weeds. Looking back, I should have planted fruit trees here. We are also sort of, in a fantasy kind of way thinking we could put a tiny house in this space, so…I’m just trying to keep it under control. I am mainly going to be growing potatoes in these beds this year.

    It doesn’t’ look so bad from this angle. Well…minus the hoses and crap lying around. I’m thinking a chicken coop would totally fit in this space. I’m like the only person I know that doesn’t have chickens. Urban Gardener fail!

    I also got my growing closet sorted out and will be starting some celery, celeriac, leeks, onions and cabbages in the next few days.

    And as far as projects go we bought ourselves a fancy compound miter saw for Christmas, and I have a window and extra lumber in the garage that is just screaming COLD FRAME! Yeah!

  • There and back again

    I just got back from spending some quality time with my best friend and her family in Richmond, Virginia. These photos were taken before a gigantic snow storm descended upon us and kept us locked inside the house for four days with two sick children. They are my people, I love them. But I am GLAD to be home!


    I wish I could have spent more time exploring the area. So many beautiful old homes in like, a two block radius.

    In other news, as per usual at this time of year, I am totally obsessed with the garden. I got my tree collards in the mail while I was gone, and I just ordered some jerusalem artichokes, and I’ve pretty much got all of my seeds. I’ll get my potato seed from my local urban farm center next month, and I think I’ll be all set.

    I told myself this week that I would spend an hour each evening after I get home from work (if it’s not raining) preparing the garden beds by weeding. I ALWAYS forget this step when I am planning my weekend garden activities and what usually happens that I get outside and realized that I need to weed, which takes up most of my energy and time, and I poop out before I can get around to the real work. Tonight will be my first test, so I’ll let you know if I actually weeded or if I sat on my butt with a cocktail.

  • Gardening


    This is my super messy garden plan for this year for part of the yard.

    I have gardening on the brain right now. I just watched this awesome show by Alys Fowler I found on YouTube about edible gardening and it’s got me really inspired. Now that the seed catalogs have arrived, I’ve gone through my stash and am starting to figure out what will go where. I am still surprised how hard gardening is. Not only the physical labor, but the timing, the soil, the pests, the weathe, crop rotation…so much goes into it. My grandparents and great grandparents were able to feed their families with produce from their garden and I would totally starve if I had to depend on what I grow. Each year I get a little better, and I am hoping this year will be the best yet!

    I was searching around my computer looking for a planting list from year before last and I found some half-completed graphics I started a few years ago:


    I actually like that succession plan, but I don’t know where that info or idea came from. I wish I would have taken better notes. It’s also a tiny bit confusing. I guess that’s the good thing about giving things time…you can come back to them with fresh eyes.

    I am going to focus on companion planting this year, which I did year before last, but not so much last year and I noticed a difference in the health and beauty of the garden. I also have a lot more space to fill up that I’ve had in previous years which is another challenge.

    The main concept I am having a hard time wrapping my brain around is crop rotation within a growing season. I understand that you don’t want to grow the same thing in the same spot year after year, but I am still new to the idea that lettuces sown in the spring are going to peter out in mid summer, and I need to have something ready to stick in their place, like cucumbers or squash. And whatever that thing I choose in stick in that spot needs to be a companion to the other things that are already there and still growing, like onions. It can get confusing. Add to that the idea of succession planting, which is planting things spaced out over the course of a few months so you don’t end up with a glut of food, but a steady supply. I have NEVER been able to master that. I think I am going to have to bring in the big guns and use a Google Calendar.

    I think I have finally got it figured out. I hope!

  • Hi there. Remember me?

    Hello?

    Holy COW. What the heck have I been up to these last SEVEN months?

    Meh. Not a whole lot. Mostly binge watching shows on Netflix.

    But…it’s a new year and I told myself that I would be BETTER about blogging in 2015. And then I promptly forgot I said that and was sort of like…”Oh yeah…crap. I was gonna blog. Better get on that.”

    So. I’ll just give you a few higlights to sum up the past half a year so we’re all on the same page:

    I’m learning video stuffs at work now, which I am totally loving. Me…IN ACTION:

    Attended the School House Craft conference last fall and got super inspired and met a bunch of great, talented people. It was inspiring and I am really hoping to start my own thing in 2015.

    I’m doing the Make Art that Sells course, which started last fall and starts up again in the spring. I sorta sucked at it (in a good, learning sort of way) and I only managed to finished 2 out of 5 assignments (because I suck)…but I told myself I would TOTALLY DO BETTER NEXT TIME, which starts up again in March. So here’s one of the assignments I managed to actually complete, a children’s book cover:

    And! The seed catalogs are arriving in the mail, which means it’s almost GARDEN TIME!

    I think for now, since I am dipping my toe back into the blogging world, I am going to try to start with one post a week, which will be on Fridays. SO. Have a great weekend! See you next week!

  • June Garden


    May kind of just got swallowed up, didn’t it? Where’d it go?

    I’ve been really enjoying the beautiful weather we have been having this spring. I’ve seen a ton of dragonflies sunning themselves on my pea trellis. I have been a super lazy gardener this year. I had a lot of things eaten by deer (which may have sent me into a mini-meltdown) but I rallied and decided not to worry about it.

    Meh.

    That’s my gardening philosophy this year.

  • Rhubarb Jam Macarons

    Rhubarb Macaron

    I had some friends over on recently for a little get together. One is a current co-worker and the other is a former co-worker. You know when you have an awesome friend at work and they get another job that they totally deserve and leave and it sucks for you? Yeah.

    The premise was that I was going to show them my photos from my trip and we would watch Amelie, and I did manage to show them my pictures, the rest of it was nothing but chatting and gossiping and cackling like hens. Oh! And eating, of course.

    Rhubarb Buttercream
    I served Rhubarb Macarons, and I am happy to report that this batch was much better. Perfect, in fact. I decided to go with the rhubarb buttercream route using the recipe that I found and I LOVE it. It’s actually a French buttercream, which aside from fitting into my theme, is my new FAVORITE.  I love it because  it’s not too sweet and, as I mentioned previously, it uses the yolks of the egg. I feel like this makes the macaron itself more balanced in the sense that I am using the whole egg – the whites for the shells and the yolks for the filling. That just makes me feel good.

    I strained my rhubarb beer jam to remove any excess liquid and folded most of it into the buttercream.  The final result was not overly sweet which let the tartness and flavor of the jam really come through. Especially the beer, which was surprising.

    Rhubarb Jam Macarons
    The best part was the texture of the macarons shells. I think I finally did it. Now that I know what a macaron REALLY should be like in terms of texture, I was so happy to discover that I totally nailed it. They were light, the shell had a nice crisp texture without being too hard, and the inside was soft and chewy. And best of all: NO AIR POCKETS!
    Rhubarb Macaron Filling

    *I checked out a book from the library called The Preservation Kitchen: The Craft of Making and Cooking with Pickles, Preserves, and Aigre-doux
    which I am totally going to get because it’s great, but I found this post by Fancy Toast contains the recipe for the Rhubarb Beer Jam as well as a little more about the book! If you are a pickler or jammer type you would probably enjoy it.

  • Garden 2014

    Oh boy, would ya just look at that mess?

    A few months ago we had to take out three of my garden beds so that a truck could drive over them in order to get to our well house to replace our pump.

    There is no recovering from being run over. What REALLY screwed me is that I got all lazy with not mulching and…well…WEEDS. Jefe’s been wanting to put a yurt or something over on that plot for his man-cave escape and I’ve been all like “No!! That’s my garden!” but now I’m all like “Dude. Yurt On.”

    The issue is that I just cannot bring myself to even BEGIN to think about shoveling and wheel barreling more soil to replace those beds. It was SO hard the first time. Even though Jefe did a good portion of the work. I guess (and this is tough for me to admit) that section of the yard was probably not the best location for the garden. SIGH. Don’t tell anyone I admitted that though, okay? That’s just between us.

    Once I get some new mulch put down it will look a lot better. I decided that I am going to plant the long-term-ish staple-type things like potatoes, onions, garlic, and winter squash over in this section of the yard. I’m also toying around with the idea of growing some stuff in straw bales, tomatoes in particular.

    I read somewhere once that your kitchen garden should be in a location that is close to your kitchen. (!) This is especially true for lazy people such as myself. So…with that in mind, I decided that most of the garden this year will be planted in what started out as my garden before I decided to move the garden.

    Follow that?

    The bonus is that the beds are already filled with soil and there is actually workable dirt in the areas that don’t have raised beds. I can dig a hole and plant something in it. I can’t do that over in the other (south) garden, as there is about a two foot layer of large pebbles/river stone which makes digging completely impossible, hence the raised beds.

    Another thing I decided to do differently this year was not to start all of the vegetables under lights. This is mainly because our trip to Paris would have totally messed with that endeavor AND I lost the use of one of my closets in a spare bedroom. I purchased some starts this past weekend and am kicking the garden off with those.

    I AM going to start some seeds indoors, mainly things that I can’t find at the Farmer’s Market. Like Celeriac.

    In other yard news, I am meeting with a landscape designer today to have a discussion about hot mess that is the front yard.

    I need some professional advice as this part of the yard is highly visible and I feel like I need help in figuring out how to deal with all the issues (like the septic tank!) I’m excited to see what she’ll come up with!

  • Macarons: What I Learned in Class


    While we were in Paris I took a class on a Sunday morning at the Cooking with Class cooking school. The class was awesome. The chef, Constance, was charming and funny and a wonderful teacher.

    I was most interested in seeing the technique in macaron making called the “macaronage”. It is the process of combining the almond meal/powdered sugar/ liquid egg whites with the whipped egg whites. This step has been shrouded in mystery for me as some recipes call for an exact number of strokes and often tell you that you know you are done when the mixture is like “magma”. That is very specific and somewhat vague at the same time. I’ve watched a million YouTube videos and looked at tutorials for this step but there is nothing like seeing it in person.

    It wasn’t actually that big of deal. No secrets or specific strokes. The main thing I got out of it was that I have been over mixing my batter and knocking too much air out of it. It was just one of those things that I had to see for myself.

    I decided that (once I got over my cold) I needed to make a match of shells as soon as possible in order to see if what I learned in class actually made a difference in my home kitchen. I am happy to report that I got an almost 100% shell success rate, which is awesome. I think I need to play around with the cooking time but I am really pleased.

    Three out of a hundred…not bad! These came from the center of the baking sheet and because of the way my oven works, the center doesn’t get as hot as the edges, so the macarons in the middle of the baking sheet tend to stick. During the cooking class, Constance showed us how to make a jam for the macarons. She used frozen blackberries, sugar and dumped in a little powdered pectin. It was the easiest thing the world. We tested for doneness by dropping little blobs on to a plate and checking to see if they were “jammy” and jewel-like. Once it was done, the mixture was dumped out onto a plate, a piece of plastic wrap went on top and into the fridge it went. Easy. Did I mention it was easy?

    I wanted to make a seasonal flavor and decided that I would try rhubarb. I found a recipe for a Rhubarb Beer Jam, got the supplies, and macerated the fruit with the beer and sugar overnight per the recipe’s instructions and was planning on using the same technique that we did in class.

    The too-long-don’t-read version of my jam is this: it didn’t work. I don’t know what the heck I did or didn’t do…perhaps I didn’t cook it long enough? Too much liquid with the beer added? I don’t know. I only know that it did not jam and the rhubarb was starting to scorch. It turned out more like a fruit puree.

    I tried to salvage the mess by mixing a little of the not-jam with some cream cheese. I filled a few shells and let them sit overnight as is required. I sort of knew in my gut that the filling wasn’t going to work, and I now understand why macaron fillings are usually buttercreams or ganaches. The point of letting the macarons sit overnight is so that the shells absorb what little moisture is in the filling, which softens them slightly and allows the flavors to meld. If the filling is too moist, you will end up with soggy macarons. Like these:

    So. How do I make this work? I still have half my batch of shells and about a cup and a half of the not-jam. Here are my options:

    • I found a recipe for a rhubarb buttercream, which uses egg yolks. I have a million of these in the freezer so this looks interesting.
    • Using white chocolate and folding in the rhubarb to make a flavored ganache. I think I would also like to try to find some Rhubarb bitters to add to this as well. The only issue with this filling is that it might be too sweet for my taste.
    • Thickening rhubarb by adding gelatin or agar agar.

    I’m thinking the buttercream. I’ll let you know how it goes. I almost forgot to mention the fact that I created my own colored sanding sugar by adding the gel coloring to some turbinado sugar. It worked like a charm!

  • Bonjour!

    Hello! How have you been? I hope all is well in your land! I am currently hacking my lungs out on the couch with a cold I caught on the plane back from our AWESOME trip from Paris. Poor Jefe was sick the entire trip and I was expecting to succumb sooner than I did.

    I felt like the past two months my life was consumed with preparing and researching for the trip. Now that it’s over I feel like I can get on with my regularly scheduled program: Preparing for my next trip to Paris!

    Just kidding. Sorta. I’ve got a ton of things I want to get done, now that I can focus. Things like Sewing! and Gardening! and Cooking! and Projects!

    I plan on sharing all the fun details of our trip with you but for now I’ll leave you with my covert attempt to capture some adorable pugs that were coming our way while we were walking down a Parisian street. I was trying to be all sly and not alarm the poor lady who was walking them. I don’t think it worked judging by the look she gave me. What can I say? I have a soft spot for pugs.

  • Macarons – The Nut Edition

    I decided that I am going to try to aim for at least one batch of Macarons a month this year. I was brainstorming flavors, trying to think of something that would fit for January and inspiration struck while I was at Trader Joes buying groceries. I saw that they started carrying cashew meal, which got me wondering what the flavor difference would be from regular old almond.

    I’ll go ahead and confess that I am harboring a secret desire to sell macarons. Perhaps a macaron truck or a stall at the Farmer’s Market. I don’t know. It seems like A LOT of work and food service is super foreign to me, so it stays bubbling around in my head. That stupid Eat St. show on The Cooking Channel makes it look so easy.

    I recently discovered that macaron shells freeze AMAZINGLY well, so over the past two weeks I’ve made four batches of shells: cashew, pistachio, pecan and almond.

    Top down: Pecan, pistachio, cashew and almond

    They’re filled with a basic vanilla swiss buttercream which I cut with some creme fraiche to add a little tartness.

    You can definitely taste the difference. I toasted the pecans, and that REALLY brought out the flavor, but the shells are super fragile. The pistachios are good as well, but holy cow. Aside from being expensive, they are a bugger to shell.I can see why the professionals stick to a paste in the filling.

    And I am STILL having the air pockets. I think that I am under folding during the “macarronage” stage, leaving too much air in the batter. I think.

  • Queen Bee Scarf

    There it is. I think it’s done. The skinny black border around the very edge will be rolled and stitched. Do you see the bee? Hint: Not the ones in the corners. Overall I am quite pleased if I do say so myself. And here’s where crazy artistic anxiety comes in to play: I’m afraid to get it printed! Isn’t that lame? I’m afraid it won’t look as good. AND THEN WHAT WILL I DO??

    Silly.

    I also have the next scarf almost done. Here’s a peek:

    I still don’t know what to do with the border. A wave motif maybe? What do you think? I also tried putting the little ships in the corner boxes, but I didn’t like it. I might try it again, or I might not even have corner boxes, although I like the idea of having continuity with these initial scarves.

    I’ll keep at it.

  • Clover Muslin Version 1

    I’m currently sewing the Clover Pants from Colette Patterns, which means I’m two years behind everyone else in the sewing world. This also means that I get to take advantage of everyone else’s fitting issues now that I have finally gotten around to tackling this pattern.

    Let’s jump right in and take a look at close-ups of my crotch and behind. I know you’re excited!

    First muslin:

    The first thing I noticed with these is that I had too much fabric in all the wrong places causing all kinds of mayhem. Also, crotch wrinkles. The back actually seemed okay-er than the front, but the center back dipped down a little bit, especially when I sat down, which is a sign that I needed to do a full butt adjustment.

    I essentially need to take about 3 inches off the torso, do the FBA, and perhaps look at the crotch depth and/or length. And maybe a full thigh adjustment. Clearly I’ve got too much in the width department and not enough in the height department.

    No matter! I WILL PREVAIL!

    P.S. I bought a serger. It’s been in its box for about two weeks now because I am too scared to fiddle with it All those threads! I have a three day weekend coming up so I’m going to try to tackle it then.

  • Let’s Tesselate

    Do you know what tessellation is? I got this definition from MathisFun.com:

    A pattern made of identical shapes:

    • the shapes must fit together without any gaps
    • the shapes should not overlap.

    That’s right. Math. I try to as little math as possible so I don’t really care about that part of it, truth be told. I learned about tesselation patterns and how to create them in art school. You’ll run into tessellations a lot if you ever delve into mosaics as the repeating pattern motifs are often comprised of tessellations. There is also a song from a band I like very much that is about tessellating, but this is a (mostly) family friendly blog, so we won’t be deciphering those lyrics today. And oh yeah! M.C. Escher.

    Now that I think about it, it might have been the song playing on the radio over and over again that got me thinking about tessellations. I had to go back and relearn what I forgot from schooling and now that I have relearned and/or remember, I am tessellating all over the place.

    Let me back up, just a little bit by saying that one of my goals for a long time has been trying to figure out what I wanted to do creatively. For a long, long, long (too long) time I thought that would be something like illustrating children’s books, but I realized, quite to my surprise, that I really didn’t have any interest in doing that at all. I just thought I wanted that goal for so long that I never stopped and questioned if I really did, or never considered anything else.

    What I DO know, is that I like making things. Things that I want to make. I’ll make them and then sell them on something like Etsy and/or Store Envy. I want to do it rightwhich is why it’s taking so long. One thing I want to make is silk scarves. Wearable art if you will. So…scarves, patterns…I am sure you can see where I am going with this.

    Here’s a swatch of the Queen Bee tessellation I want to get printed on silk for a scarf:

    Erica Mulherin Queen Bee Tesselation

    I’m trying to decide if I want a border or just the pattern. I’m leaning toward border, but I’ll keep you posted. I can’t wait to see what this looks like once it’s printed. I hope it turns out.

  • 2014 Reboot

    Why hello there! How have you been?

    Holy cow, I can’t believe how long I’ve neglected to blogand here we are at the start of a new year!

    I’ve got some big things I want to accomplish this year. Things like sewing more clothing, working on the house, getting my art career up and running, perfecting my macarons, and blogging more (of course)!

    I’m going to try to use the old blog here to document and share my journey and progress.

    I mentioned last summer that I was working with a life/career coach who was helping me get my act together in terms of making my personal career dreams turn into a reality. A lot of that was me actually DOING work, MAKING art, THINKING about what I want EXACTLY, which, is time consuming with a full-time job.

    I think the hardest part for me was/is that creating illustrations, or drawings, is a form of self expression, right? Well…what do I want to express?

    [INSERT BLANK SPACE]

    I’m still working on that part, but I’m getting there.

    P.S. I’m going to Paris for my birthday this year which is TOTALLY worth mentioning, but since the tickets and apartment are BOOKED it’s not an aspiration. It’s HAPPENING.

    !!!!!