Android 4.3 finally on my Galaxy S4

OK, so I really didn’t put Kitkat on my S4 but I did put Android 4.3 on there. Most people will be able to upgrade the S4 with an OTA or KIES update but if you’ve modified your phone by rooting it then that doesn’t work without intervention.

That intervention relies on flashing a “stock rom” on the phone which is just as risky as flashing the new rom so I decided to wait until it appeared here and then grabbed the file, backed up my photos, music, settings from various apps and with some trepidation fired up Odin.

odin

Odin is the tool used to flash Samsung Android phones and once begun, the process is painless.

So, Knox started complaining about the apps on my phone that needed root access to work. Get rid of that then! Thanks to CF Auto Root that was easy. Flash that on there with Odin and Greenify works once more and Facebook is hibernated. I sent Chainfire a donation too as I’m sure this is about the third time I’ve used his tools.

I haven’t noticed many differences, or really any except that Disk Usage works a lot faster now because of the TRIM being done on the flash memory.

Oh yeah, before I forget. I won a bar of chocolate with that KitKat. Got myself a nice Yorkie this morning. Didn’t win that time though. Ah well.

Edit: Noooooo! Knox stopped Disk Usage from scanning / which requires root. Greenify still worked which is more important but I guess Knox has some parts of the system still locked down.
Chainfire has more info on Knox and how to disable but also this bad news that disabling Knox may void any warranty on the phone. Grrr.

Kitkat on the Samsung Galaxy S4

KitKat on the Galaxy S4

While the rest of the world is waiting for or installing Android 4.3 on their Samsung Galaxy S4 phones I decided to skip ahead and put KitKat on my S4. In the end it wasn’t too hard either.

Meanwhile, if you’re not able to upgrade but you’ve rooted your phone you can use the photosphere function in the Google Camera from the Nexus 5 to shoot great 360 degree panoramas. Here’s one I shot near Blarney Castle this morning.
You’ll need the camera APK from here and since it will likely force close go here and download that zip file. Copy the required libraries to /system/lib/ on your phone and photosphere will work on your stock S4!

You can try the Android 4.4 Launcher too but I haven’t. Nova Launcher works well enough for me at the moment.

Oh, and sorry :)

Fix file (644) and directory (775) permissions in Linux easily

A few weeks back I was sorting out the drives on my Linux server and as some of the directories were created through various configurations of Samba by Windows clients the permissions were a bit odd. Some archive files were executable, some directories were rw only for the owner. You get the idea, it was a mess. How do I fix them quickly?

I’d like all the files to be 0644 and directories should be 0775 please. Oh, and I’d like all that done with the minimum of fuss through a Bash shell, with or without a cherry on top.

Luckily I’m not the first person to ask this as user stress_junkie in this thread had an answer:

For directories only do this.

find . -type d -exec chmod 775 {} \;

For files only do this.

find . -type f -exec chmod 664 {} \;

There’s also this useful chunk of code to avoid hitting . and .. but I didn’t care about that in my case so the above code worked perfectly:

find . -type d -name \* -exec chmod 775 {} \;

And finally, user Gethyn pointed out that this command will add execute permissions to directories.

chmod -R +X

I have a feeling I’ll be coming back to this post in the future, just like I’ve had to check my directory comparison post a couple of times recently.

WP Super Cache 1.4

WP Super Cache version 1.4 is out now. This release finally removes the mfunc, mclude and dynamic-cached-content tags as I warned about three months ago.

If your site uses that dynamic cached content functionality do not upgrade yet. There is a replacement dynamic cached content system but it’s not compatible so you’ll need to update your themes and helper plugins. It’s not difficult but there’s a lot to take in. I hope the example plugin and explanation in that post gets you most of the way there.

If you don’t use mfunc and it’s friends then you should upgrade immediately and it should be painless.

This release also has a few bug fixes and other features. It will now try to repair broken installs after a site migrates. It will update the wp-config.php and rebuild wp-content/advanced-cache.php. It will also delete tags and category cache files when a post publish status changes.

The shiny new dynamic content in WP Super Cache

With the next release of WP Super Cache in a day or two the long awaited move away from mfunc, mclude and friends will be complete.

This means that if you have been using mfunc, mclude or dynamic-cached-content the dynamic portions of your sites will go blank if you upgrade WP Super Cache without updating that dynamic code. This may seem complicated but there’s an example script included and detailed explanations below. A lot of effort was made to make this backwards compatible but unfortunately it wasn’t possible.

In their place is a new cacheaction filter called wpsc_cachedata and it’s sidekick wpsc_cachedata_safety. In the future when a site owner using WP Super Cache wants to make part of their website dynamic they will use those filters to modify pre-defined text strings and replace them with the data they want displayed to the end user. There’s an example script ready to be ripped apart to help you figure all this out.

There are two ways of using this:

  1. The dynamic content is the return value of a simple process, be it date() or any of the numerous get_*() functions in WordPress. That data can simply be slotted in place of the pre-defined text mentioned above.
  2. The more difficult bit comes when you need to use an output buffer to collect the data for display. Due to a limitation in PHP it’s impossible to run an output buffer in the callback function of another output buffer, which is when the wpsc_cachedata filter runs. We need to collect that data before the callback function executes.

The first way above is easy. Simply add a text string of random characters to your theme where you want the dynamic content to appear, then hook a function on to the wpsc_cachedata filter to str_replace() it with your dynamic content. These functions in this script do that:

  • dynamic_cache_test_filter()
  • dynamic_cache_test_template_tag()
  • dynamic_cache_test_init()

You’ll have to hook on to the wpsc_cachedata_safety action and return the numeral 1 to actually run the wpsc_cachedata filter. This is a fail safe used by the plugin to make sure things are ok when the filter runs.

Unfortunately if you want to use an output buffer it’s a lot harder. As stated above an output buffer can’t run in the callback function of another output buffer. This means you have to generate your dynamic content earlier in the PHP process.
This could be as easy as calling your dynamic content function (dynamic_output_buffer_test() in the example script) from the wp_footer action, or calling it from any action before shutdown, whichever is appropriate. You’ll also need to add a template tag of your own choosing to your theme.
Your dynamic content function will run just fine for cached pages, so after the new page has run it store the output in a constant or global variable that the same function can look for when the wpsc_cacheaction runs it. If it finds that information, it can do the search and replace of your template tag without running the output buffer again.
Some pages won’t run the dynamic content function however. This includes feeds and sitemaps. Those pages will generate a PHP error because the output buffer will try to run in the callback!

“PHP Fatal error: ob_start(): Cannot use output buffering in output buffering display handlers in…”

To stop that happening you must check that there’s text to shove in the cached page. That’s what happens in the function dynamic_output_buffer_test_safety() in the example script. It fires on the wpsc_cachedata_safety filter and returns the numeral 1 if successful.

Anatomy of an Output Buffer

I’m going to try and explain the output buffer functions in more detail here. They’re only example functions and if you spot a bug or can suggest improvements please do!

define( 'DYNAMIC_OUTPUT_BUFFER_TAG', '' ); // CHANGE THIS!

This is the string you add to your theme where your dynamic content will appear. The plugin will replace this string with the code generated by your dynamic content function.

function dynamic_output_buffer_test( &$cachedata = 0 ) {
	if ( defined( 'DYNAMIC_OB_TEXT' ) )
		return str_replace( DYNAMIC_OUTPUT_BUFFER_TAG, DYNAMIC_OB_TEXT, $cachedata );
	ob_start();
	// call the sidebar function, do something dynamic
	echo "<p>This is a test. The current time on the server is: " . date( 'H:i:s' ) . "</p>";
	$text = ob_get_contents();
	ob_end_clean();

	if ( $cachedata === 0 ) // called directly from the theme so store the output
		define( 'DYNAMIC_OB_TEXT', $text );
	else // called via the wpsc_cachedata filter. We only get here in cached pages in wp-cache-phase1.php
		return str_replace( DYNAMIC_OUTPUT_BUFFER_TAG, $text, $cachedata );

}
add_cacheaction( 'wpsc_cachedata', 'dynamic_output_buffer_test' );
  • 1. dynamic_output_buffer_test() is the function that will generate the dynamic content inserted into the cached page.
  • 2-3. DYNAMIC_OB_TEXT stores the previous output of this function. If it’s set that means we’re in the wpsc_cachedata filter and should insert it into the cached page and return it.
  • 4-8. This creates the output buffer, echoes a string with the current time and copies the buffer into a variable called $text before closing the output buffer.
  • 10-13. This is how we decide to return data. If $cachedata is 0 that means this function was called from the theme so we should define the constant DYNAMIC_OB_TEXT for later use. Otherwise, we must be dealing with an already cached page so insert the dynamic content into the page and return it.
  • 16. Add the dynamic_output_buffer_test() function to the wpsc_cachedata action. “add_cacheaction” is used as it loads before the regular WordPress action code loads.
function dynamic_output_buffer_test_safety( $safety ) {
	if ( defined( 'DYNAMIC_OB_TEXT' ) )
		return 1; // ready to replace tag with dynamic content.
	else
		return 0; // tag cannot be replaced.
}
add_cacheaction( 'wpsc_cachedata_safety', 'dynamic_output_buffer_test_safety' );
  • 1-6. dynamic_output_buffer_test_safety() is a function that checks if dynamic content was generated correctly. If that constant is not defined the output buffer will run within the callback function of the main WP Super Cache output buffer and generate a PHP error.
  • 7. Add the wpsc_cachedata_safety() function to the dynamic_output_buffer_test_safety action.

sidebar.php

As an example, if I wanted to display my dynamic content in the sidebar of my blog I would load sidebar.php in my theme’s directory and add the following code.

if ( function_exists( 'dynamic_output_buffer_test' ) )
    dynamic_output_buffer_test();
?>WORDPRESS ROCKS THE WORLD<?php

I had previously edited the example script, uncommented it and changed the appropriate tag:

define( 'DYNAMIC_OUTPUT_BUFFER_TAG', 'WORDPRESS ROCKS THE WORLD' ); // CHANGE THIS!

Final Note and Download Link

Please grab the development version of the plugin and try it on a staging server before you put it live. Feedback would be appreciated!

Warning! Keep the tags you use secret. You don’t want someone leaving a comment on your blog with that string! Do not use the same function names or constant names as in this post or example script. They’re in this very public post. Someone is bound to use them and cause you problems when you install their plugin.

Finally, barring any last minute major bugs this version of WP Super Cache will be released on Wednesday. Be careful upgrading. Pass the word around if you know someone is using mfunc as their site will stop working!

When Batman left Microsoft…

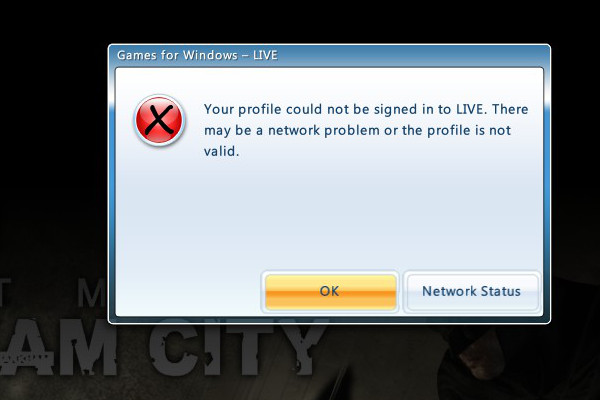
… there were cheers as gamers didn’t have to battle with “Games for Windows Live” or GFWL or “that pile of stinking sh*t that loses my save games” any more.

GFWL login

Except they do. As a final hurray, anyone who had either of the current Arkham games (Asylum or City) will get an upgrade to the GOTY version. Unfortunately the announcement says that save games cannot be transferred. Good old GFWL, evil until the end!

All is not lost however. If you’re willing to dig around with a hex editor here are instructions explaining how to make things work. I haven’t tried it yet but because I have Arkham City installed I can somehow play it with GFWL offline. It took me 5 hours to get through 16% of the game so hopefully I can salvage the save game! I can’t find any save file for the previous game which I had deleted but I had completed it and I don’t care for picking up all the Riddler’s trophies so no loss.

You must play Papa & Yo!

2013-10-14_00002

A few weeks ago I wrote about how much I enjoyed Papa & Yo. Well, I finally finished it this evening and I can honestly say it was a wonderful experience. I can count on one hand the number of games I’ve finished this year so that’s saying something!

The game isn’t hard, except when the game goes red and then it’s annoying until the puzzle is figured out. I don’t want to let slip any spoilers. All I’ll say is that if you enjoy platform games you owe it to yourself to buy this game and play it. Get it on Steam or on the PS3 store.

I forgot my Android unlock pattern!

Damn. I changed the unlock pattern on my Nexus 7 and stupidly locked it “to test” the code. Unfortunately I got it wrong each time and now my inbox has 20 emails from Cerberus with pictures of the top of my head and occasionally my eyes.

Panic! Luckily there is a way out. Fail enough times and the device asks you to login to your Google account. It’s supposed to appear after 5 or 6 attempts but I have the 20 Cerberus emails and the “Forgot pattern” message did not appear that quickly.

Nothing easier than logging into Google which I try but it says my email or password are incorrect. I try again. No, nothing. Then it hits me. Two step auth. I had to generate a new application specific password. That worked!

A few minutes later and there’s a notification warning me my Google login has failed. After using an application specific password on the lockscreen I had to login again using my real password. Weird.

Phew.

tl;dr If you have two step auth enabled use an application specific password to login to Google if you forget your Android unlock pattern. Breath again.

Here’s how to use Steam Family Sharing

A few minutes ago I got an email saying I had been accepted into the Steam family sharing beta. There are detailed instructions explaining how to set everything up but in a nutshell:

  1. Sit down at the computer where you want your Steam library to be shared. This is not your own PC and login.
  2. Enable beta participation in the settings.
  3. After restarting Steam go into “Settings->Manage Family Sharing & Devices” on that computer. Not your own PC. Authorize this PC.
  4. Logout and login as your family member’s account.

So, you don’t allow other Steam accounts access to your Steam library. You give access to other machines. Unless you want to give out your Steam login details (which would be against the T&C) you won’t be giving your online friends access to your games.

It was painless to set up. Once I logged in as the second account my games had “shared by donncha” after each title and could be played. It makes the idea of having a Steam machine in the living room all the more attractive.

Adapt Sound is like night and day

adapt-sound

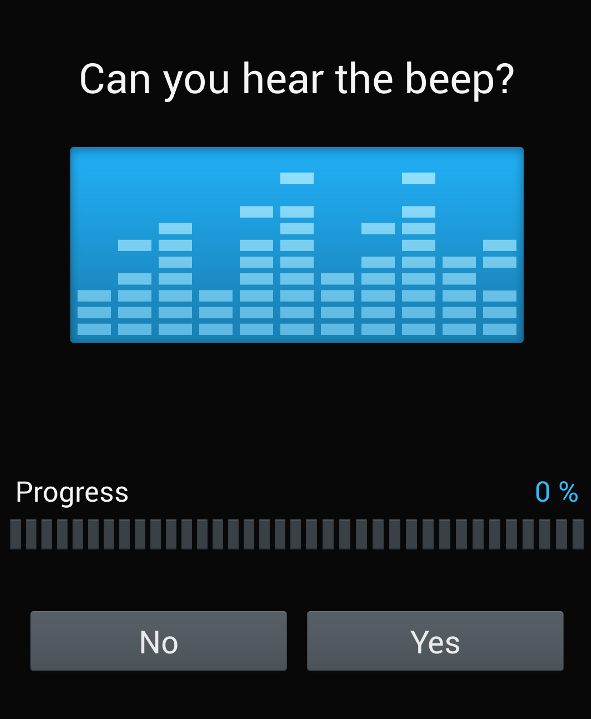
The Galaxy S4 has a very useful feature hidden in the settings. It’s called Adapt Sound and the difference in sound before and after is like night and day. I’m using the old ear phones that came with my Galaxy S2 and they’re fine for podcasts but after enabling this feature music is a lot clearer and richer. It’s quite amazing.

So, go into Settings, My device, Sound, Adapt Sound to run the sound test through your ear phones. Once that’s done and it only takes a minute or two and it will let you play a music clip with Adapt Sound on or off. The difference is quite startling.