10:00

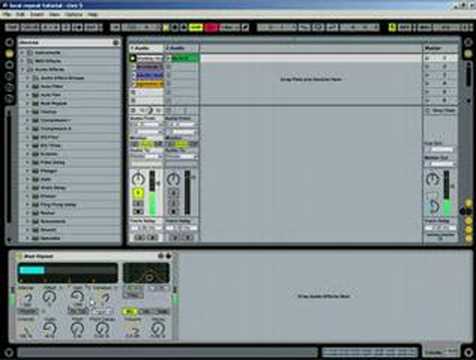
Making of "The Prodigy - Smack My Bitch Up" in Ableton by Jim Pavloff
Making of "The Prodigy - Smack My Bitch Up" in Ableton by Jim Pavloff
How to make Prodigy's legendary track "Smack My Bitch Up" in Ableton. Video describes, which samples were used by Liam in this wonderful track. Reworked by Jim Pavloff.
12:40

Make music with Ableton Live
Make music with Ableton Live
Ableton Live is about making music. When you're writing and composing, Live is quick and responsive. When you want to record and develop your ideas, Live has the depth and toolset for intricate production. It's got the features to take your DJ skills to the next level and it's stable and flexible on stage, whether you're playing in front of 10 or 10000 people. However and wherever you make music, whatever music you make, Live will inspire you.
7:59
20 Ableton Live Tips & Tricks in 8 Minutes
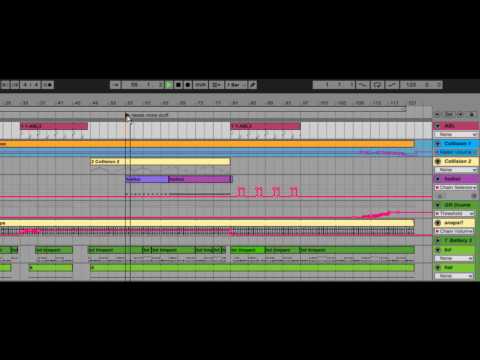
20 Ableton Live Tips & Tricks in 8 Minutes
with an emphasis on studio / DAW / sequencing use. BONUS 1: A better way to pan in Ableton Live-- www.youtube.com BONUS 2: Why you should get a mic pair-- soundcloud.com Uses music from my two projects, Renzu and MMvsUSAF if you're wondering. seanny.net | http Also recommended are Tom Cosm's "quick tips" series www.youtube.com www.youtube.com
9:32
Ski Beatz - Unique techniques with Ableton Live
Ski Beatz - Unique techniques with Ableton Live
Ski Beatz is a producer who's worked with some of the biggest names in Hip Hop, including Jay Z, Mos Def, AZ, Foxy Brown, Lil' Kim and Camp Lo. Watch the movie to see him in action and visit www.ableton.com to get the Ski Beatz slicing preset (requires Sampler).
6:47

Ableton Live Tutorial - Miami Pool Party Deep House Vibe
Ableton Live Tutorial - Miami Pool Party Deep House Vibe
With WMC 2012 coming up and the prospect of scantily clad revellers raving it up at various pool parties around Miami, this week Danny J Lewis decided to demonstrate how to create that summertime deep house pool party vibe. As part of the sound he shows you how to twist up a vocal sample using Ableton Live and Native Instruments Maschine as a control device. Check out our Ableton Live courses here: www.pointblankonline.net and Native Instruments courses here: www.pointblankonline.net Watch more free tutorials on our sample course page: www.pointblankonline.net Please subscribe to our channel to make sure you don't miss future exclusive tutorials from Point Blank Online school.
8:29

Ableton Live Tutorial - Creating an 808 Kick Deep Bass Sound with Analog
Ableton Live Tutorial - Creating an 808 Kick Deep Bass Sound with Analog
In this video tutorial Ski Oakenfull (Primaudial Records) emulates the bass sound from Julio Bashmore's huge anthem from 2011 'Battle for Middle You' in Ableton Live's Analog. Watch more free Ableton Live tutorials on our sample course page: www.pointblankonline.net Download this rack for free here: www.skioakenfull.com ... Nice one Ski! Buy 'Battle for Middle You' here: www.beatport.com
5:43
'Did you Know?' Pt 1 - Ableton Live Tips w/ Dubspot's Thavius Beck: Ping Pong as Tape Delay
'Did you Know?' Pt 1 - Ableton Live Tips w/ Dubspot's Thavius Beck: Ping Pong as Tape Delay
More info - bit.ly In the first installment of our new Ableton Live video tutorial series "Did You Know?", Ableton Certified Trainer, Dubspot Instructor, and electronic musician Thavius Beck checks out a less explored and slightly hidden feature in Live. Thavius shows you how to make Live's Ping Pong delay effect sound more like an authentic tape delay! As he puts it, this will "take less than 5 minutes of your life, and you will leave knowing a little bit more than you did before." Sounds like a win-win to me! "Ableton Live is one of the most flexible, capable, and robust pieces of software I've ever been lucky enough to use on a day to day basis. But even as an Ableton Certified trainer and daily user, there are still a few easter eggs that I stumble upon and think, "Wow, had I known that last year I would have already gone platinum by now!" Haha! Not quite, but I think you get the idea. Inspired by the tip that you all are about to learn in the following video, my fellow Dubspot colleague Steve Nalepa suggested that a video tutorial series be done about all of the hidden things in Live that can be revealed by a simple Right-click of the mouse. After giving that a bit of thought, I tweaked the initial idea and decided to focus on a handful of things that all users, no matter how novice or advanced, may have never known was possible in our beloved piece of software. Thus the brand new video tutorial series entitled, "Did You Know?" was born! I hope you enjoy and continue <b>...</b>
10:55
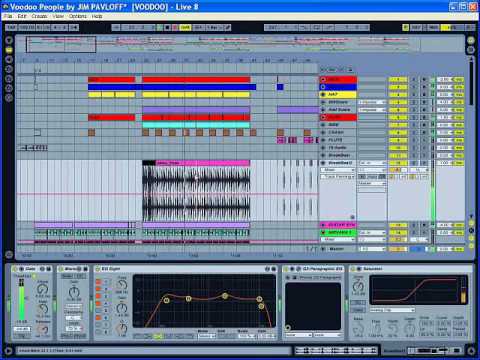
Making of "The Prodigy - Voodoo People" in Ableton by Jim Pavloff
Making of "The Prodigy - Voodoo People" in Ableton by Jim Pavloff
Making of "The Prodigy - Voodoo People" in Ableton by Jim Pavloff
7:35

'Did you Know?' Pt 4 - Ableton Live Tips w/ Thavius Beck: Better Sound w/ Hi-Quality EQ8
'Did you Know?' Pt 4 - Ableton Live Tips w/ Thavius Beck: Better Sound w/ Hi-Quality EQ8
More info - bit.ly In our new Ableton Live video tutorial series, "Did You Know?", Ableton Certified Trainer, Dubspot Instructor, and electronic musician Thavius Beck checks out less explored and slightly hidden features in Live. In this newest installment of Did You Know?, Thavius explains and demonstrates an often overlooked an even more often misunderstood feature; Hi-Quality mode on the EQ8. The EQ8 has a Hi-Quality setting that is not enabled by default. We are able to find the Hi-Quality setting by right-clicking on the EQ8's title bar and selecting "Hi-Quality" from the contextual menu that appears. Once that has been done, the EQ8 will be in Hi-Quality mode, but what exactly does that mean? This is a question that took me quite a bit of investigation to find the answer to, and one that requires more explanation than I intended for these particular videos, but this series is all about sharing esoteric knowledge (as it relates to Live of course) so that is what I will do right now. When Hi-Quality mode is enabled on the EQ8, the audio being fed into the EQ is oversampled by a factor of 2 (meaning the sample rate of the audio is doubled. If your session's sample rate is 44.1kHz, enabling Hi-Quality will make the audio being fed into the EQ8 88.2kHz). Then the EQ changes are calculated at the doubled sample rate, and finally the audio as it leaves the EQ is undersampled by a factor of 2, or basically brought back to it's original sample rate. Why does this happen? It <b>...</b>
6:05

Ableton Live Tutorial - Twisted Vocal Effects - Free Custom Rack DL
Ableton Live Tutorial - Twisted Vocal Effects - Free Custom Rack DL
www.pointblankonline.net In this tutorial Danny J Lewis shows you how to to twist up a vocal using a custom Ableton Live Effects Rack controlled by Native Instruments' Maschine. Download the custom FX rack from this tutorial for free here: www.yousendit.com Check out our Ableton Live courses here: www.pointblankonline.net Watch more free tutorials on our sample course page: www.pointblankonline.net Please subscribe to our channel to make sure you don't miss future exclusive tutorials from Point Blank Online school.
3:19

Serato & Ableton present DJ Revolution - King of The Bridge
Serato & Ableton present DJ Revolution - King of The Bridge
DJ Revolution, the King of the decks, puts Ableton and Serato's partnership, The Bridge, through its paces in this new performance video. Big thanks to Pull Bar on Karangahape Road, Auckland - www.pullbar.co.nz DJ Revolution Artist Profile: sera.to The Bridge: serato.com Ableton: www.ableton.com
9:36

Sidechain Compression for Smooth DJ Transitions Ableton Live
Sidechain Compression for Smooth DJ Transitions Ableton Live
www.pointblankonline.net Jonny Miller (Sonarpilot Audio) shows you how sidechaining, more commonly used as a production technique, can also be a great tool for adding some extra flavour to DJ transitions in Ableton Live. Learn more about putting together Ableton Live DJ sets on this course: www.pointblankonline.net Please subscribe to our channel to make sure you don't miss future exclusive tutorials from Point Blank Online School
11:38

Deep House Arpeggiated Chord Pattern Generator in Ableton Live
Deep House Arpeggiated Chord Pattern Generator in Ableton Live
www.pointblankonline.net In this video tutorial Ski Oakenfull (Primaudial Records) shows you how to create another great Ableton Live rack. Here's what he had to say about it. "Taking inspiration from Deep House don and Freerange Records label boss Jimpster, I wanted to have a go at recreating a musical pattern I heard recently on one of his tracks. I loved the way the rhythm of the pattern lay on the off beat, so I set about trying to figure a way to achieve this in Ableton." the Rack can be downloaded here: www.skioakenfull.com and the delay calculator he uses is here: www.thewhippinpost.co.uk Find out more about our Electronic Music Compostition course developed by Ski here: www.pointblankonline.net
2:35
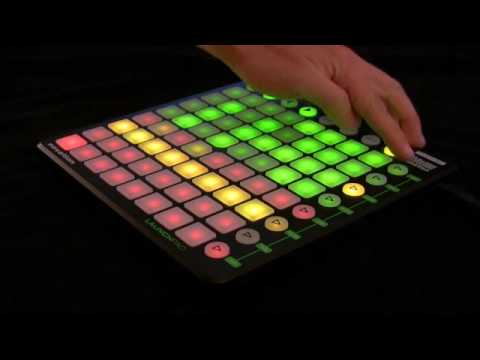
Novation Launchpad - Ableton Controller
Novation Launchpad - Ableton Controller
www.dv247.com Novation Launchpad - new controller for Ableton Live at DV247.COM. Literally play Ableton Live with Novation Launchpad, great for DJ's, live and studio performance. Launchpad includes FREE Ableton Live 'launchpad edition'.
5:28

'Did you Know?' Pt 5 - Ableton Live Tips w/ Thavius Beck: Remove Stop Buttons
'Did you Know?' Pt 5 - Ableton Live Tips w/ Thavius Beck: Remove Stop Buttons
More info - bit.ly In our new Ableton Live video tutorial series, "Did You Know?", Ableton Certified Trainer, Dubspot Instructor, and electronic musician Thavius Beck checks out less explored and slightly hidden features in Live. In the latest installment of 'Did You Know?' Thavius offers a very useful and invaluable tip for launching clips and moving through scenes in Live. He explains how by simply removing the stop buttons inside empty clip slots, you can launch clips and jump through scenes without having to interrupt your groove. This is something that is essential and practical putting a track in the Session View without committing it to the Arrange view.
10:45
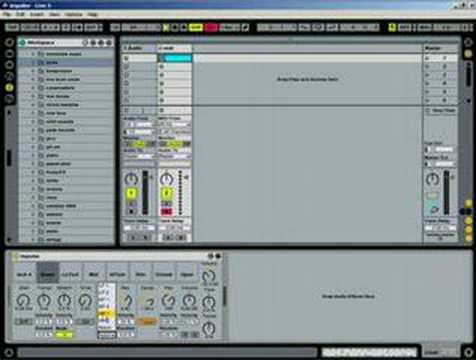
Ableton live Tutorial - Impulse drum programming
Ableton live Tutorial - Impulse drum programming
www.musicsoftwaretraining.com Ifyou are serious about taking your DJ'ing, Remixing, or Producing skills to the next level, you are in for a real treat! Below is a link to what myself and many of my customers agree is the ULTIMATE Ableton training DVD on the market! also Join the mailing list to get over 100 fantastic synth and effect plugins! You won't be disappointed! http
2:35

Ableton Live Tutorial - Arpeggiator Percussion Trick
Ableton Live Tutorial - Arpeggiator Percussion Trick
www.pointblankonline.net In this video Jonny Miller (Jus'Listen/Sonarpilot Audio) demonstrates a useful technique to create interesting percussion patterns by using the arpeggiator in Ableton Live. This tutorial is taken from the Ableton Live Production course www.pointblankonline.net **Due to popular demand we have scheduled a May 30th start date for the Ableton Live Production Course. Anyone who enrols before the end of May 2011 could win a free remix of your track from one of our team of Pro Producers!! Get in touch with a course advisor on +44 (0) 20 7729 4884 or luke@pointblanklondon.com for more info.** Please subscribe to our channel to make sure you don't miss future exclusive tutorials from Point Blank Online school.
7:11

'Did you Know?' Ableton Live Tips w/ Thavius Beck Pt 3: Routing Audio, MIDI + Effects
'Did you Know?' Ableton Live Tips w/ Thavius Beck Pt 3: Routing Audio, MIDI + Effects
More info: bit.ly In our new Ableton Live video tutorial series "Did You Know?", Ableton Certified Trainer, Dubspot Instructor, and electronic musician Thavius Beck checks out less explored and slightly hidden features in Live. In the third installment of Did You Know? Thavius explores Live's Audio and MIDI Routing options and shows you how you can route audio from one Return channel to another Return channel simply by enabling the Sends on your Returns (which are disabled by default). This opens up more options in terms of routing audio, applying effects, and manipulating sounds. When most people think of Ableton Live, they think of electronic musicians using it for live performance, and they think of glitchy sounding beats and warped audio. Live is great for all of those things, but one of the most powerful aspects of Live is how easy it is to route audio from one place to another within the software. Not only can you route audio from any MIDI or Audio track to any other Audio track, you can also send audio from one (or many) tracks to one of the Return channels, which gives you even more control over effects or options in terms of routing your signal. What I did not know before was that you can also route audio from one Return channel to another Return channel by simply enabling the Sends on your Returns. Doing this gives you even more options in terms of routing your audio and manipulating it to your liking. In this video, we will put a Reverb on the A Return and a <b>...</b>
16:19
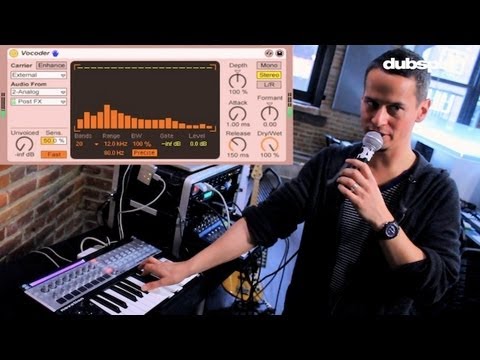
Ableton Live Tutorial: Vocal Processing Effects + Live Performance Tips
Ableton Live Tutorial: Vocal Processing Effects + Live Performance Tips
More info: bit.ly Dubspot Instructor Dan Freeman explains and demonstrates tips and tricks for processing live vocals with Ableton Live. This video is aimed at folks who want to take advantage of Ableton Live's powerful effects and use them for live vocal performance. This is also for producers who what to know how to route vocals into Live and work with the vocoder effect. Ableton Live Producer Program starts online the week of February 5th and in NYC the week of February 22nd. Course details and registration info here: bit.ly
67:20

Warping Tracks in Ableton Live, for DJ'ing
Warping Tracks in Ableton Live, for DJ'ing
This is a video designed to teach one specific skill for DJ'ing ... warping tracks for the purpose of DJ'ing in Ableton. It is a very detailed examination that predominantly focuses on warping dance tracks, along with a number of examples to make the viewer more familiar and comfortable with the whole process. Once you understand how to warp tracks properly, you can do things such as perform at live shows, or create entire complete DJ mixes in Ableton. Here's a link to a video showing you how to put together a DJ mix: www.youtube.com And finally, once your mix is exported to disk, I have a third video which covers the basics of mastering a DJ Mix to tidy it up for distribution to your fans, and ends with a few thoughts about marketing your mix: www.youtube.com I'm currently working on several other "DJ'ing in Ableton" videos, which when tied together, will teach you how to use this powerful software for some pretty impressive performances. Follow Jonathan Clark on SoundCloud or Facebook: www.soundcloud.com www.facebook.com If you find this video to be useful, please help us out by sharing it on Facebook or other forums or websites!! Or share the link to this post, which talks about all three videos in this mini-series: djbolivia.blogspot.com
6:25

Lemur for iPad Tutorial Pt 2 - Controlling Ableton Live Effects
Lemur for iPad Tutorial Pt 2 - Controlling Ableton Live Effects
More info - bit.ly In the second installment of this two-part series, Dubspot Electronic Music Production and Sound Design instructor Evan Sutton explains and demonstrates how to use the Lemur software to control some parameters in a custom-built effects rack in Ableton Live. If you missed part one, you can view it here - bit.ly First, we'll connect the iPad to the Lemur Daemon using an Ad-Hoc WiFi network. After both the iPad and computer are connected to the same network, the Lemur Daemon is relatively simple to use. The Daemon will translate incoming Lemur messages from your iPad to MIDI that can be used in your DAW. In Ableton's MIDI preferences, select the appropriate Daemon Input. Enable MIDI Learn by hitting cmd+M on your keyboard. Now click on a parameter in Live, and move the object on the Lemur you'd like to control it. For faders, this is a relatively straightforward process, but for Lemur's Multiball object, it can be helpful to move the ball to the bottom left corner so that you can be sure and learn only one axis at a time. The Effects Rack in this Ableton Live set features Redux, two Auto Filters, Corpus, Chorus, Frequency Shifter, Beat Repeat, and Auto Pan. Additionally, there is a Reverb on Send A, and a Granular Delay on Send B. Many of the effects are set so that when the relevant fader is moved, the effect is engaged. When the fader for any of the effects is set to zero, the effect is bypassed. Once all of your controls are set up, it's time to get <b>...</b>
6:31

'Did you Know?' Pt 6 - Ableton Live Tips w/ Thavius Beck: Set the Scene
'Did you Know?' Pt 6 - Ableton Live Tips w/ Thavius Beck: Set the Scene
More info - bit.ly In our new Ableton Live video tutorial series, "Did You Know?", Ableton Certified Trainer, Dubspot Instructor, and electronic musician Thavius Beck checks out less explored and slightly hidden features in Live. Last week, we looked at how removing Stop buttons in the Session view combined with launching Scenes can help you when testing out different ideas for arrangements. This week, we will look a bit more at what is possible with scenes by editing the Scene Launch Tempo as well as the Scene Launch Time Signature. These two options can be extremely helpful if you want to set up a live set using stems of completed songs. Each Scene can be comprised of stems from your songs, and then you can set the specific tempo and time signature for each scene/song. That way you can have control over individual tracks within a song (for effects, panning, volume, etc.) but still be able to launch all the stems associated with a song at once at their proper tempo and time signature. It's simple and effective. Yet another thing revealed by a simple Right-click of the mouse! - Thavius Beck


